Hi everyone!! I just wanted to let you all know that I will be migrating my website to a new host with a refreshing new look! During this period there will be a downtime. I apologize for the inconvenience and will have it back up as soon as possible. The website address will remain the same so come back and check it out when it is done!
Saturday, August 13, 2016
Tuesday, January 19, 2016
Florentines
So I made some Florentine biscuits because they look so fun and unique. Not your everyday bake.
The Florentine recipe normally is a mix of finely chopped nuts with cherries and other fruits but I'm not a fan of fruits in cookies so I decided to leave them out and decided to make my Florentines just a caramelized nut biscuit coated in chocolate. You can't go wrong with that and it didn't disappoint. Au Contraire! I had to fight the husband away with a chair so I could get a picture before he devoured them.
I actually put the chocolate on in a few different ways to decide which was the tastiest. The half chocolate covered Florentine won the taste test due to the balance of chocolate and biscuit so that's the way I will do them in the future.
These were actually not difficult to make either (bonus!). It was fast and fun so I would highly recommend this for any event or gift.
I've been watching the Great British Baking Show and the base of this recipe is from that show.
The Florentine recipe normally is a mix of finely chopped nuts with cherries and other fruits but I'm not a fan of fruits in cookies so I decided to leave them out and decided to make my Florentines just a caramelized nut biscuit coated in chocolate. You can't go wrong with that and it didn't disappoint. Au Contraire! I had to fight the husband away with a chair so I could get a picture before he devoured them.
I actually put the chocolate on in a few different ways to decide which was the tastiest. The half chocolate covered Florentine won the taste test due to the balance of chocolate and biscuit so that's the way I will do them in the future.
These were actually not difficult to make either (bonus!). It was fast and fun so I would highly recommend this for any event or gift.
I've been watching the Great British Baking Show and the base of this recipe is from that show.
Half Chocolate Florentine
(The color difference between the pictures is less than a 1 minute baking time difference so watch your Florentines carefully!)
Chocolate-backed Florentine.
The back picture is done by spreading the chocolate on parchment paper and then placing the caramelized biscuit in the chocolate until it dries. The front picture is just taking a spatula and spreading the chocolate onto the back and allowing it to dry chocolate side up.
They were ALL tasty so you really can't go wrong but we liked the half chocolate Florentine best.
Here's the recipe! Enjoy!
Florentines
Ingredients:
1.75 oz Unsalted Butter
1.75 oz Brown Sugar
0.88 (7/8) oz Honey
0.88 (7/8) oz Corn Syrup
1.75 oz All-Purpose Flour
1 oz Almonds, Finely Chopped
1 oz Walnuts, Finely Chopped
8 oz Plain Chocolate (I used 56% Semisweet Baking Chocolate)
Preheat oven to 350 degrees F. Line 3 (or 4) baking trays with parchment paper. Heat the butter, sugar, honey and corn syrup over low heat until butter is melted. Remove from heat and add the flour and nuts and stir until well mixed. Make 18 (or 24) Florentines by spooning a heaping teaspoon (or a flat teaspoon for a little smaller Florentine) onto the trays with 6 to a tray. Give them plenty of room to spread. They will spread surprisingly! Bake for 8-10 minutes or until golden brown. Watch them at the end. They can overcook quickly. Leave the Florentines to cool on the tray for a few minutes and then move to a cooling rack to harden being careful not to break the biscuit. They are quite delicate...well at least mine were. :) If the Florentines become to hard to remove then pop them back in the oven for a minute or two to soften and try again.
Use a double boiler or a heat proof bowl over a pan with simmering water to melt half the chocolate until it reached 127 degrees F stirring constantly. Remove from heat and add the remaining chocolate stirring gently until the chocolate has melted. Using a spatula, spread the chocolate onto half of the front of the Florentine. Simply wipe the back of the Florentine to remove the excess chocolate and swirl the chocolate on the front of the Florentine. Place the Florentine on the pan to harden (back side down). Voila! Store in an airtight container if they don't get devoured immediately.
Monday, January 18, 2016
I'm Baaaaaaaaaaaaaack!
Well, it sure has been a long time and it feels good to be back! Life just got so busy that I had to make some changes. I got married... that's one huge wonderful change. :) I quit my band.... that's another big change. I also accomplished some major milestones at work (phew!) and am feeling more settled in.
So now it is time to get back to doing what I love. Making yummy stuff for people I love and sharing it with YOU!
There are a few delectables that I have created in the last year that I haven't blogged about so I will recap those things for you. One of my ultimate favorites is a wedding cake for my friend Susan. Now I'm no professional when it comes to making desserts let alone wedding cakes but this one just turned out beautiful and I love it. I can do simple.
So now it is time to get back to doing what I love. Making yummy stuff for people I love and sharing it with YOU!
There are a few delectables that I have created in the last year that I haven't blogged about so I will recap those things for you. One of my ultimate favorites is a wedding cake for my friend Susan. Now I'm no professional when it comes to making desserts let alone wedding cakes but this one just turned out beautiful and I love it. I can do simple.
The bottom cake was chocolate with chocolate frosting, the middle was strawberry with strawberry frosting and the top was my yellow cake with vanilla buttercream frosting. When you can't decide, you don't have to. :)
The pink vintage flowers are from Tai Pan and the ribbon and lace were from JoAnn's. (Make sure you look at the price of the lace you are buying, lace can be REALLY expensive!)
The biggest trick was matching the yellow to the wedding colors which was inspired from family heirloom dishes that were being used for the desserts. It was NOT easy. But huzzah! It was accomplished.
If you are going to use non-edible decorations on your cake, make sure the recipient knows that they are not edible and make sure the products are non-toxic and you wash them before putting them into the cake (ie: flowers stems).
So there she be.
Stay tuned for more 2015 recaps.
Sunday, February 15, 2015
Valentine's Day Cake Pops
I whipped up some cake pops for my awesome neighbors today for Valentine's Day. I just thought I would share a picture. They turned out pretty cute.
I hope you are all surrounded by people you love and who love you!
Happy Sabbath.
"For God so loved the world, that he gave his only begotten son, that whosoever believeth in him should not perish, but have everlasting life."
John 3:16
Saturday, February 7, 2015
Toy Story Birthday Party
I am just throwing some phone pictures up of a toy story birthday party my friend just threw for her 1 year old son Emerson. I've helped her with her other two kids' 1st birthdays and it's always a fun theme. This time I had no time to help out (bummer!) so she did all the treats herself this time! I'm so proud! I just helped throw the cake decorations and fondant on quickly before the party (sorry... Not my best work). She made all the fondant and cakes.... I like this gig!
Sunday, July 20, 2014
Baking Cookies {Oatmeal Chocolate Chip}
Who likes oatmeal chocolate chip cookies?!
I do believe that this variety can be one of the tastiest.
These were pretty tasty.
Tip of the Day: The worst offense one can make towards the cookie is overbaking.
Resist! It should not look done when you take it out of the oven. The edges should generally just barely start to golden up.
Barely!
The recipe I used was this one.
I would decrease the white sugar and cook a single tray for 8 minutes. I prefer them to be a bit softer after they completely cool so I will be trying a different recipe but this one was good and wouldn't disappoint.
I use a mini cookie scoop roughly a tablespoon size. Cookies are also best, in my opinion, if they are NOT cooked on parchment or non-stick so they don't spread and become flat. Cook them on an ungreased cookie sheet for a thick, deliciously textured cookie.
Happy Cookieing!
Tuesday, May 7, 2013
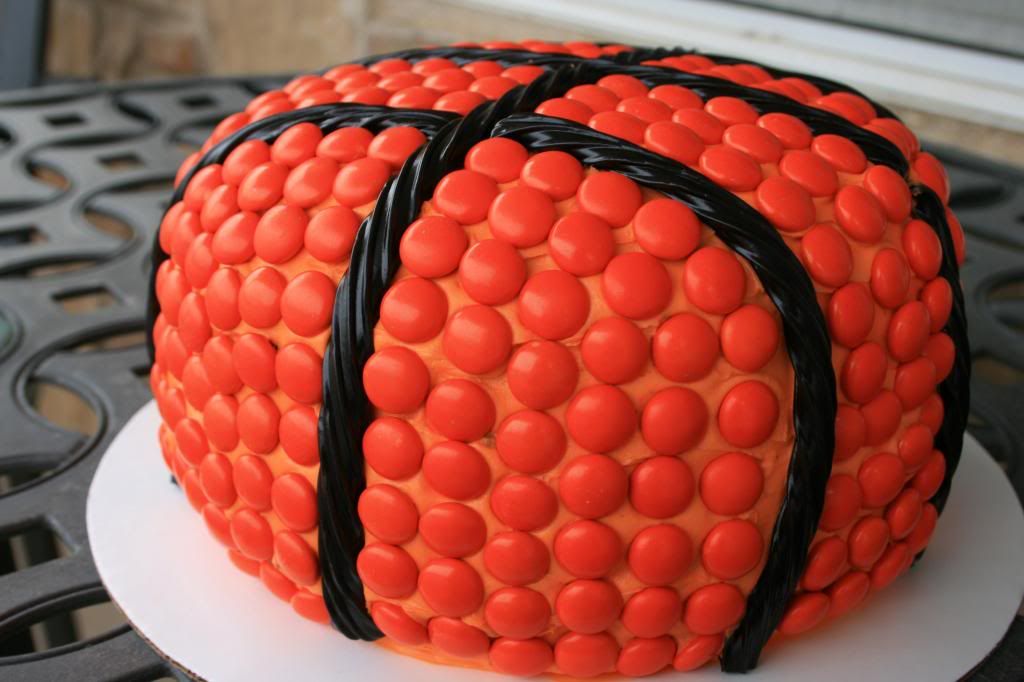
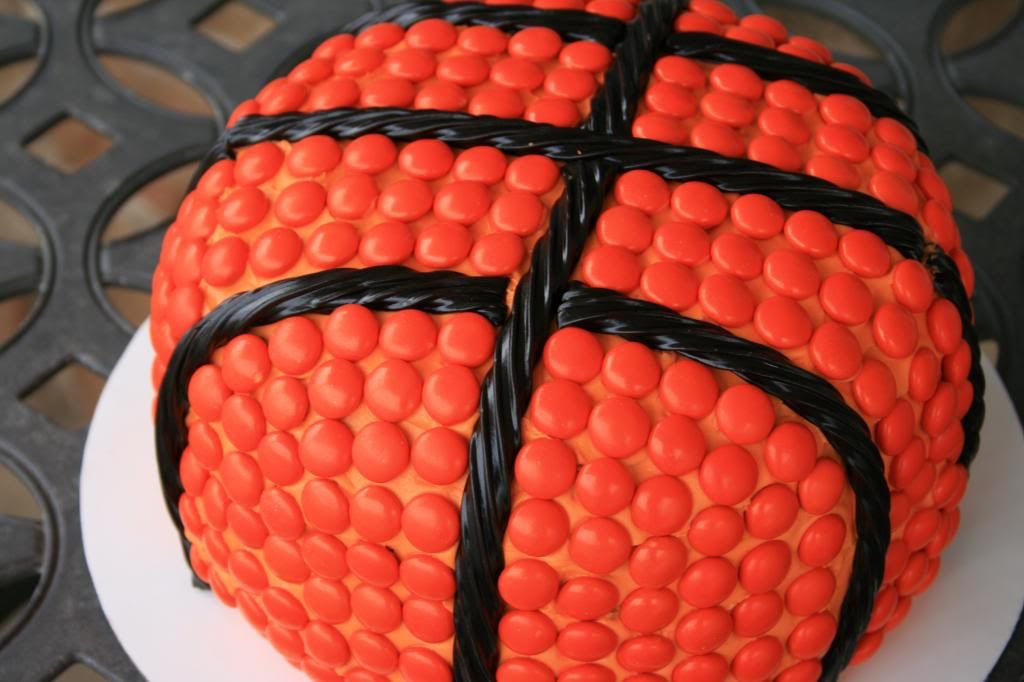
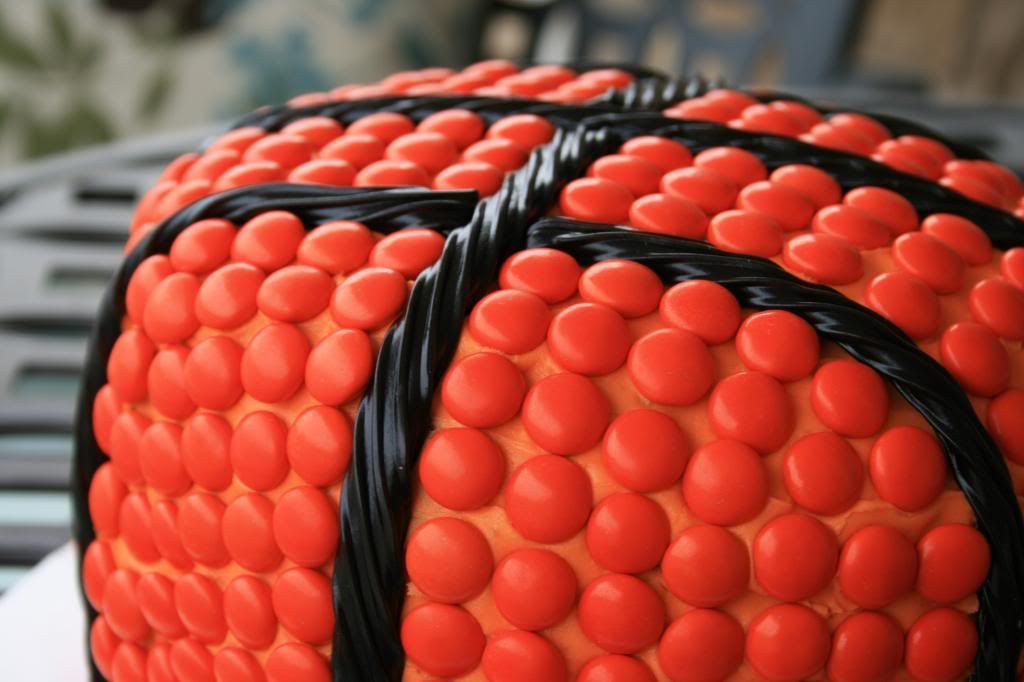
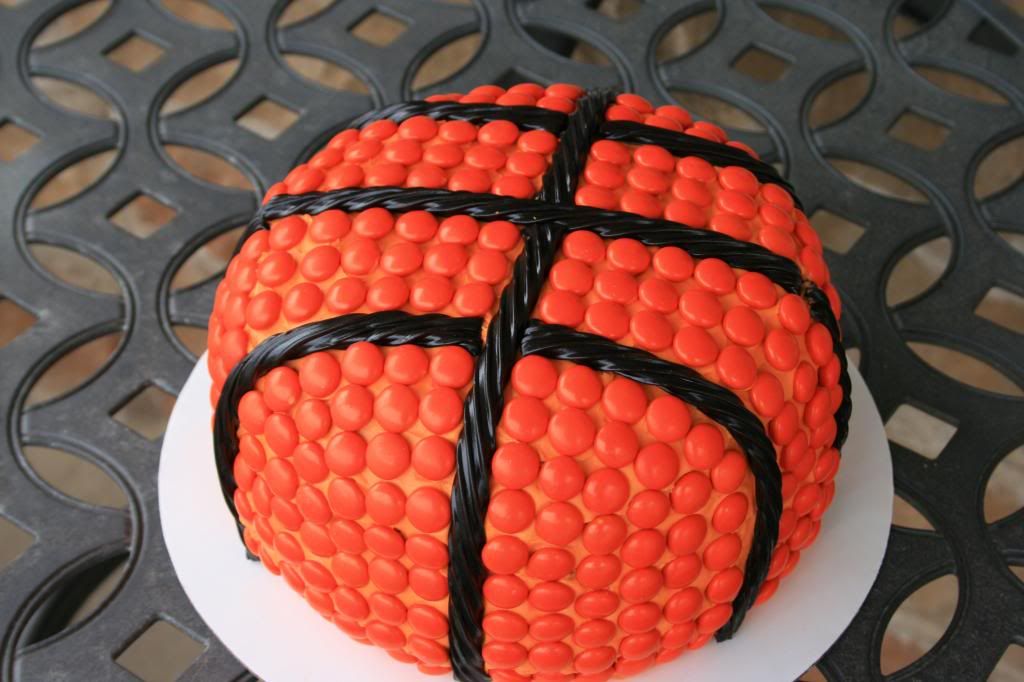
Basketball Cake Tutorial
Wow... 2 months. Has it really been that long since my last post?! Ay Caramba! Lots going on lately.
Check out my other blog for details --->
I actually have a ton of stuff to catch up on so I am going to just do really short posts.
Let me know if you have any questions and I'll answer those and add them back into the posts.
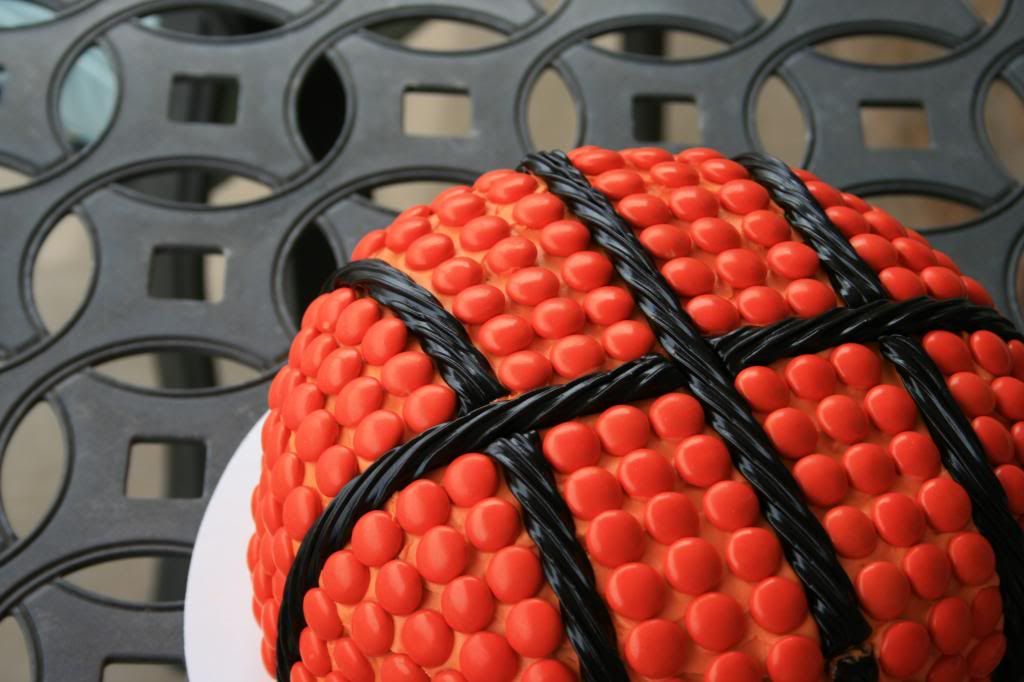
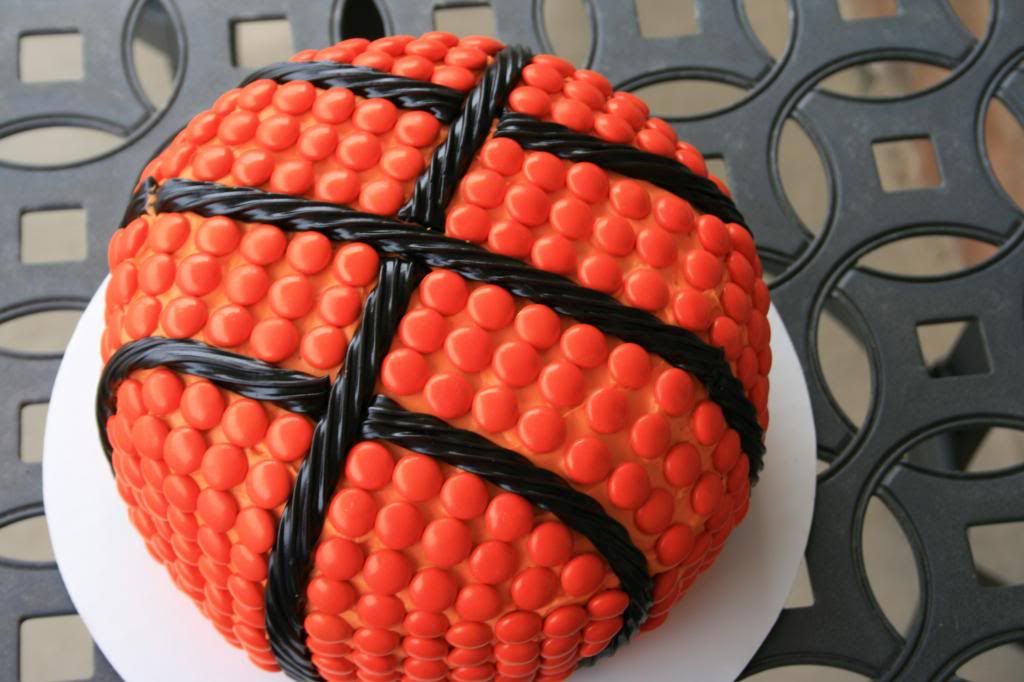
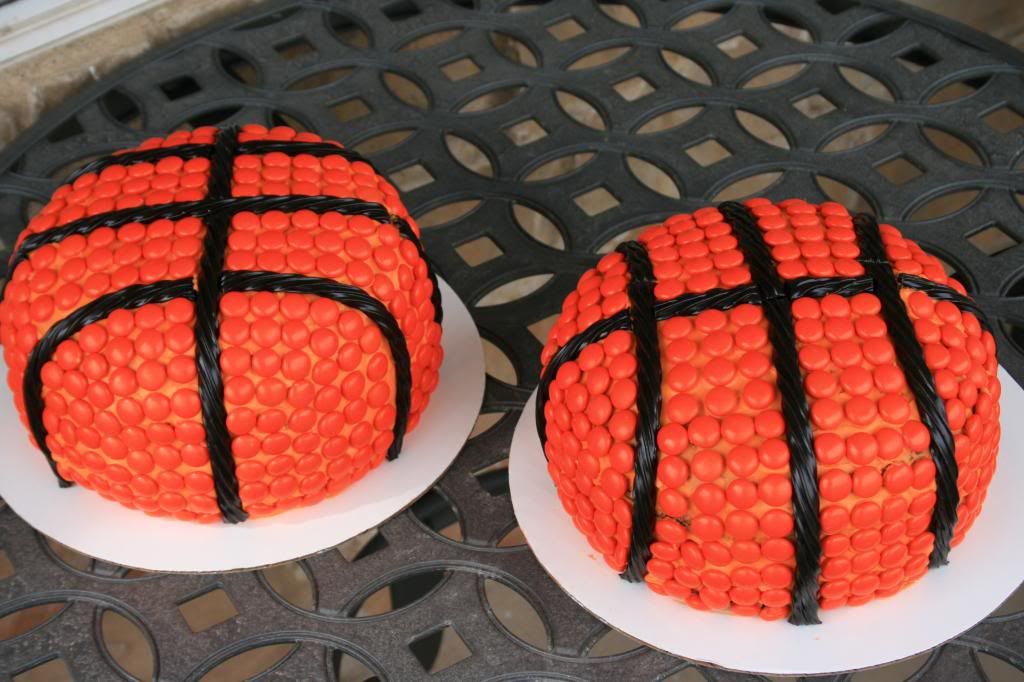
These cakes turned out so cute! They were for my little brother's basketball championship game for his team. It was super simple.
I made 8 inch round cakes and stacked them 2 high with frosting in between. I cut the cakes so they rounded off as much as I could on both the top and bottom (to try to make them look as round as possible without falling apart). This would also be really cute if you used a dome cake pan to truly make it round. I colored some buttercream orange (using water-based food gel) and covered the whole cake. Looking back I wish I had done the orange a little bit darker but I think I actually ran out of orange color and that's why. :)
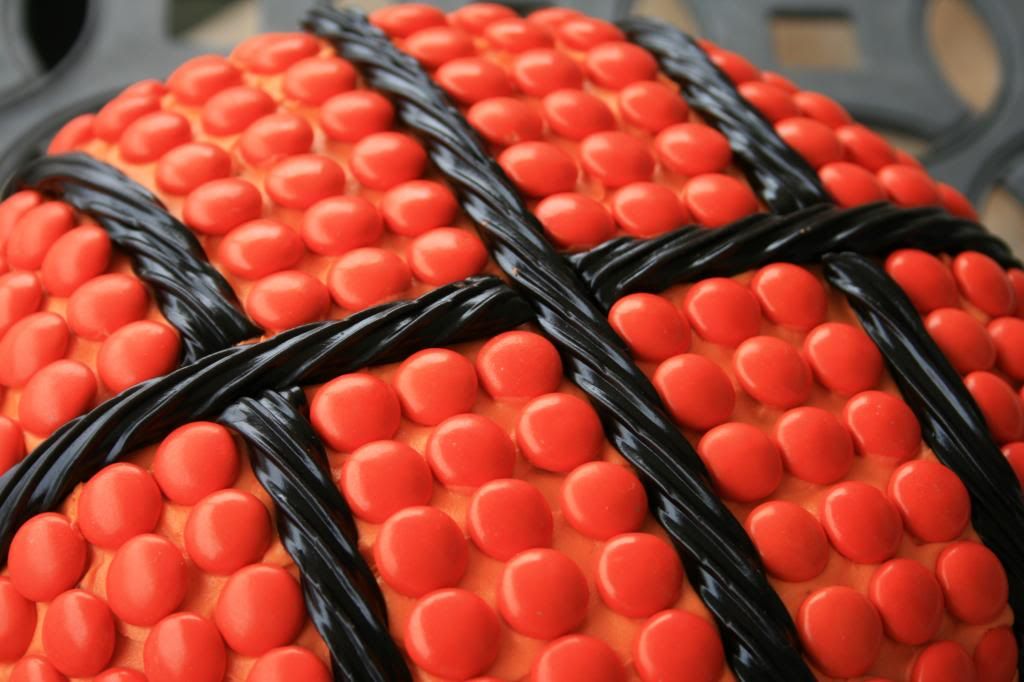
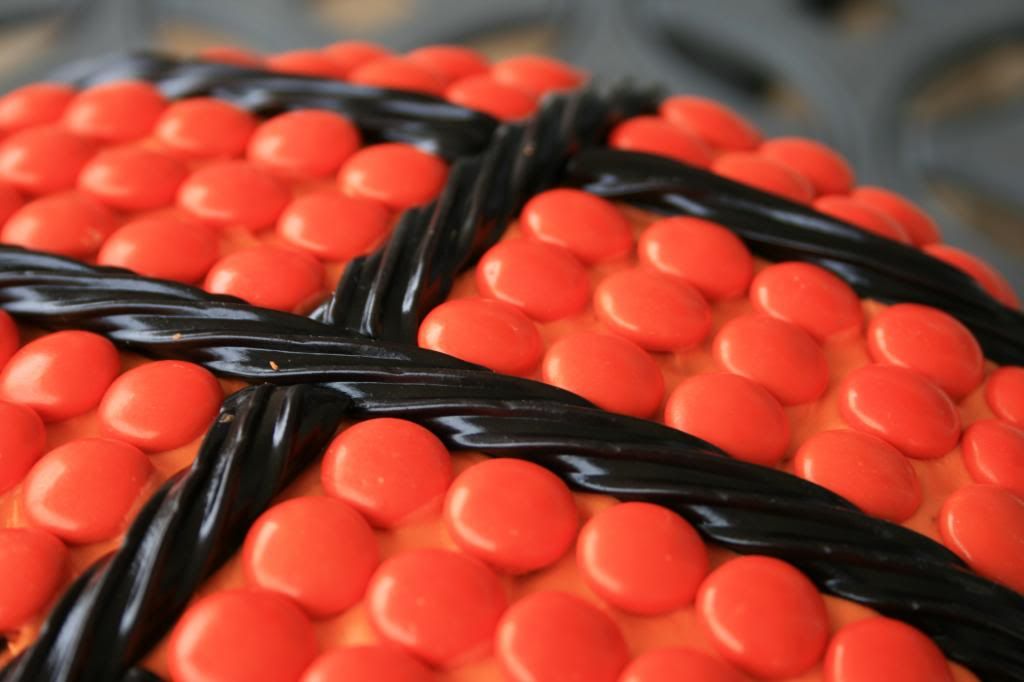
Once you do that, take plain twizzler black licorice for the stripes and lay one across the middle of the cake. You will have to use more than 1 rope for each line. Try to connect them away from the bends because they tried to stick up on me and wouldn't stay bent how I wanted them to.
Lay a rope perpendicular to the one you just laid (see pictures) and you can just start them right on each side of the first one (make sense?).
Then take about 3 orange m&ms- you can get plain orange m&ms at certain party stores. I went to Zurchers- and lay them down (with the m&m brand facing down) starting at the corner of the licorice on each side (again see picture). Do about 2 rows. You want them to be as close as possible. It looks better. Laying the 3 m&ms down helps you measure where your outer licorice lines should go. Now lay down your last outside licorice lines. To get a bit of a rounder effect, curve the licorice at the bottom back towards your main middle line just a little bit (see picture- right licorice is curved in a little).
Voila! And there you have it. These are not difficult to make but do take a little bit of time and dexterity since you have to place each m&m.
I want to say I used about 12-16 oz of m&ms by weight to cover these 2 cakes and 1 package of black licorice (I think! I forgot to write it down so if it just doesn't seem right when you are buying the m&ms, go with your gut. Extra m&ms never hurt anyone. That was my philosophy). I bought way too many m&ms so now extras are sitting in a dish on my desk waiting for on-lookers to come and eat them. They are sitting right next to the new Sherbert Oreos I had to get for my work people because they looked weird... yeah, they're pretty sweet (as in sugary... not awesome). Not my favorite. Other people liked them though..... tangent.
If you really want to know how many I used... you could count the m&ms on the cake. =D
Anyway, they were a big hit! So fun. Try them out for your next sports party!
Sunday, March 10, 2013
New Blog: Life with Sara Jane
Hello everyone!
I am in process of creating my new Blog called "Life with Sara Jane". It will contain all of my awesome ramblings and allow this blog to continue solely for desserts. Oh what joy!
They will both continue to be mine but will both have different content obviously. This is for all those who are interested in my desserts and don't want to sift through my other awesome non-sense (really?! Do these people exist?) So head on over real quick and please check it out! Subscribe to email over there if you want to continue getting all of my posts (not just desserts)!
I am in process of moving over most of my non-dessert related posts to this site so if you are looking for one here and can't find it... it probably moved over there!
{Here is the link}
I'll include the link in the nav bar above too!
Can't wait to start this new blog that will include so many awesome things to do, gifts to give, places to be and people to help! Come along with me on some new adventures!
Tuesday, February 26, 2013
Crossfit, Protein Shakes and German Chocolate Cake
Ok, so I'm not saying this is a good idea...
it's just what I do to make my protein shake enjoyable so I thought I'd share.
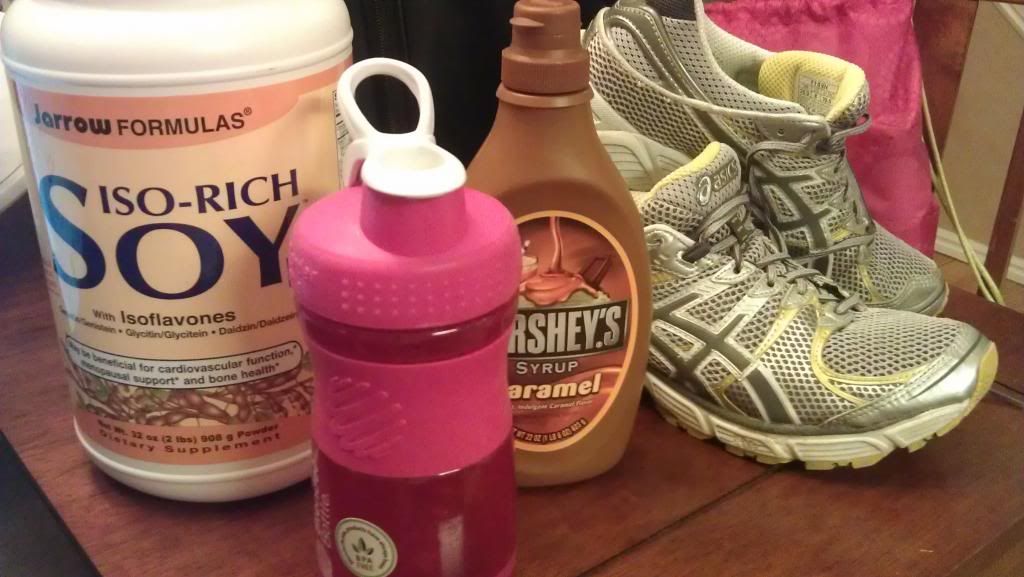
I use this protein supplement to make 8 oz shakes. It gives you 25 gm soy protein. boom. deal.
It's also nasty.
I am no quitter though so I found a way to make it really tasty!
I've tried to add it to my fruit smoothies and it just makes them taste funky. It doesn't work. no bueno.
It was just missing something.... what was it?
Oh yeah, sugar.
;)
So I found a great way to make it flavorful and tasty.
Caramel syrup.
Just a small squirt will do (about 1 tablespoon).
Yep. For the pittance price of 50 calories and 10 gm of refined death sugar... I get to enjoy my shake. I'm cool with that right now. You might even be able to get away with less (but why?!). For you health crazies out there, you can probably even find a decent sugar free caramel syrup (however it's debatable if that's really healthier). ;)
Try also chocolate syrup. Mmmm....mmmm....
So, yeah. It makes you want 2 servings of your nasty health drink. :)
*****
Crossfit Day 2:
Dear Diary,
Crossfit kicked my but today. I wanted to cry. Not like an emotional, more like a physical stress induced cry.... it was weird. I've never felt that before. No, I did not cry. :)
I was so sore from the workout yesterday that I could hardly walk up stairs. I found the solution to this though with the help of Michelle.... just don't walk up stairs. deal. But want to know what's worse than walking up stairs? Walking down them... my legs keep giving out on me. I get a little weak in the knees, shake a bit, get a little hyper-extension going and stumble down the stairs like I just got double prosthetics. It's probably pretty awesome to watch... not so much to experience.
Here was today's workout:
SWOD:
Deadlift- 10 lbs
warm up
5,3,2,1
Working Sets
5 x 3
WOD:
10 Hand Raise Push-ups
20 sit-ups
20 squats
40 mountain climbers (my shoes fell off with these)
Repeat.... 6 times!
Everyone else had to do 30 squats and 8 reps, suckers! Since I'm weak and sissy, Andrew modified it for me. Andrew is the owner and trainer. He's really great at explaining technique.
I did it in 27:12 but I finished!
I am 100% sure this is the hardest I have ever worked out in my life. To the point of physically being unable to do that last squat or last sit-up.
Oooouuuuch! I really thought I wasn't going to be able to finish the squats but I did. :) And I'm glad I did it!
I got a really good night's sleep last night after my first workout and woke up energized and ready for the day. I started to get sore around midday today.... I shudder when I think of what punishment tomorrow brings to my poor aching body. I'll be returning upon my recovery. I have to. I paid for March already. baaaahhh.
Well, that's about it for my crossfit adventure today.
Out!
*****
On an awesomer note.
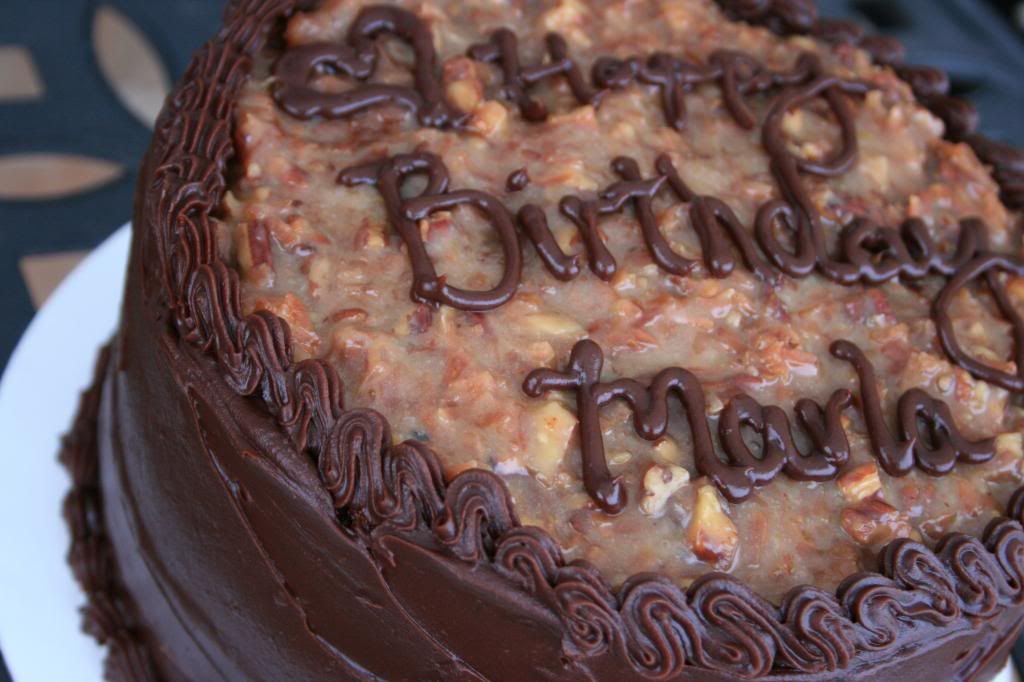
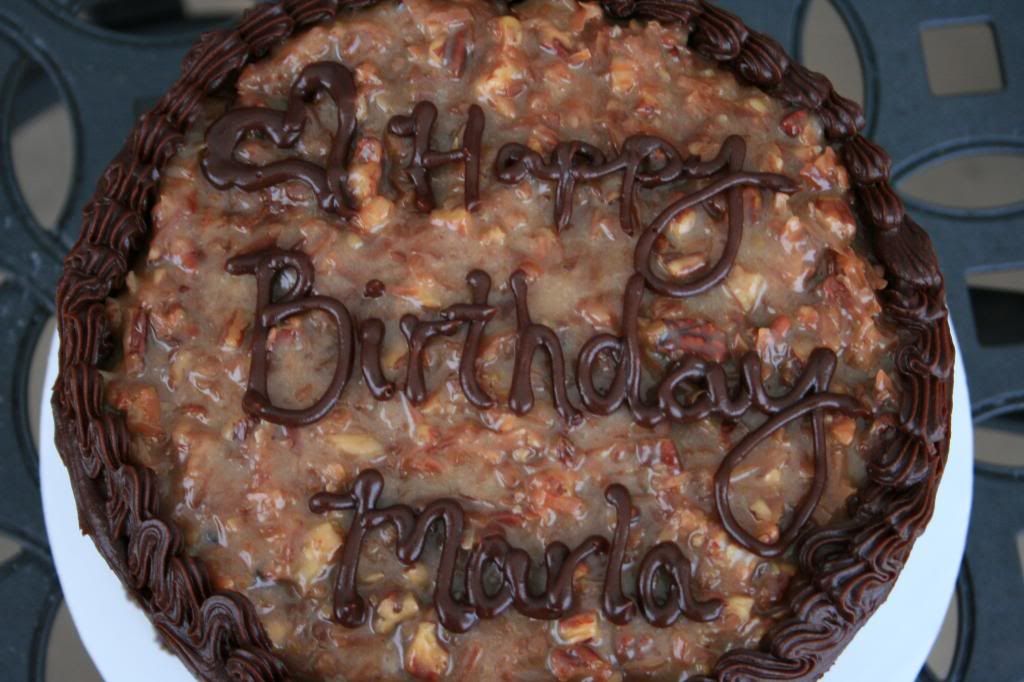
I made a cake!
First cake in months!
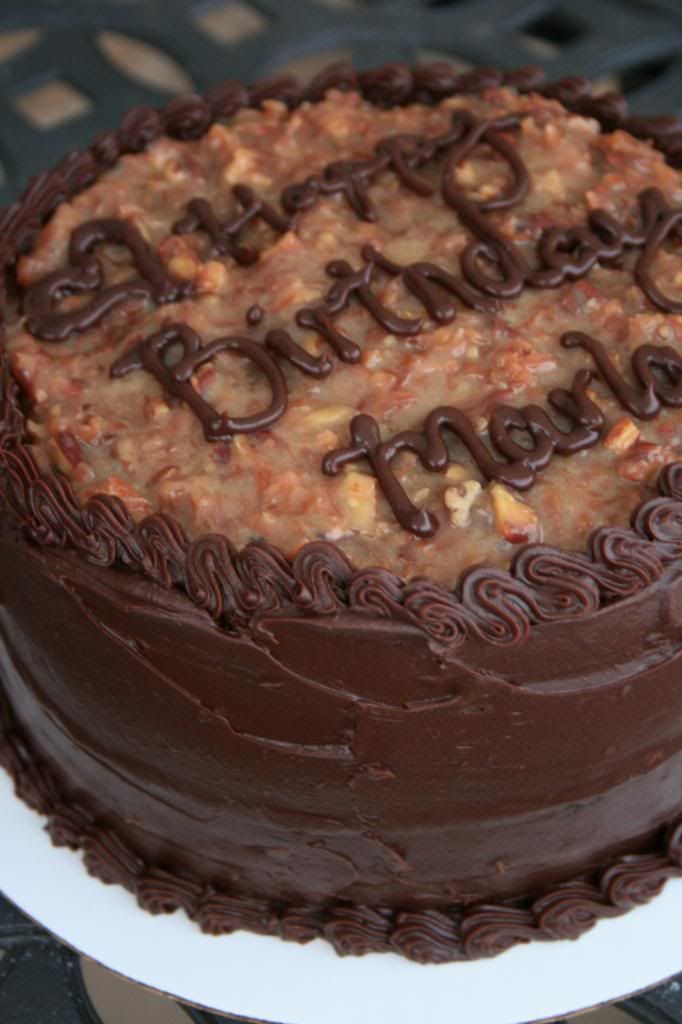
Here she be.
so pretty. It makes me happy looking at it.
It was really nice to be baking again. I even attempted writing on it!
{I don't write on cakes... when I worked at a bakery, I was banned from writing on cakes}
What I love about this cake is that when I am finished, I feel like I have made a substantial cake, a big impact on the world. It's heavy and takes 4 hours and is amazing.
You might even recognize her from last year.
Here is the recipe I posted before.
It's really pretty awesome.
Enjoy!
Tuesday, February 12, 2013
My Sweet Ben Passed Away
My Sweet Ben passed away on February 6th, 2013.
I wanted to share his beautiful obituary.
His sister Aspen wrote the body and I just added a few things.
He had the most beautiful funeral ever yesterday. It was such a peaceful day.
Ben was with me.
OBITUARY FOR BENJAMIN JOSEPH RIDGES
DECEMBER 12, 1980 - FEBRUARY 6, 2013
Our beloved husband, son, brother, uncle and grandson, Ben Ridges, age
32, passed away on February 6, 2013 after a long battle with cancer. It
may have taken his body, but Ben's spirit was never taken. He amazed
and inspired us all with his patience, kindness and grace. We will
forever remember his example.
Ben was born to J. Rand and Marla Campbell Ridges on December 12th, 1980 in Bountiful, Utah. Ben was the second of four children, the only son, and the king of the castle. He was sealed to his beautiful sweetheart, Sara Jane Falkner Ridges, on November 27, 2002 in the Salt Lake Temple. Together they moved several times before settling in Centerville, Utah.
Ben loved all things mechanical. He spent many hours with his dad working on engines and adding horsepower. He loved big tires, loud engines, and "showing us what this baby can do". Ben loved both the mountains of northern Utah and the red rock and sand of Southern Utah. He loved off-roading and horseback riding; whatever could take him off the beaten path and do so with speed.
Known as Uncle Teasy-Pants to his 8 nieces and 2 nephews, visits with him were always fun. During the last months of his life he often requested their visits to brighten his day and make him smile. His home was plastered with drawings, pictures and cards sent by his earthly angels who prayed for and loved him. He will be missed by them. Eliana, Cadence, Joel and Jasec Hadley; Brielle, Claire, Addison and Molly Davis; and Brooklyn and Kennedy Phillips.
Ben is survived by his loving wife, Sara; furry child (boxer), Izzy; parents, J. Rand and Marla Ridges; sisters, Aspen (Steven) Hadley, Camille (Marty) Davis and Emily (David) Phillips; grandparents, Roy and Maxine Campbell; parents-in-law, Trudi and Harold "Short-T" Goode, Dane R. Falkner and Mary Jo Ahlin; brothers-in-law Dane V. (Charlotte) Falkner and Nicholas Falkner along with aunts, uncles, cousins and friends who loved him greatly.
Special thanks to doctors and staff at the University of Utah Hospital and Huntsman Cancer Hospital for the professional and charitable care provided to Ben. Also to the many friends and neighbors who served and loved Ben during the past two years. We couldn't have done it without you!
While he will be missed terribly, we imagine Ben joyfully casting off his mortal body. We hope he will take big, deep breaths. That he will run and jump and enjoy freedom from pain and suffering. That he will increase the eternal joy and happiness of others on his eternal mission as he did in his earthly mission.
A funeral service to honor and celebrate his life will be held on Monday, February 11th at 11:00 a.m. at the Chase Lane LDS Building, 1125 N. 400 West in Centerville. A viewing will be held Sunday, February 10, from 6:00 to 8:00 p.m. at Russon Brothers Mortuary, 295 N. Main in Bountiful and on Monday morning prior to the funeral services from 9:30 to 10:30 a.m. at the church.
In lieu of flowers, those who wish to do so may donate to The Ben Ridges Charitable Fund at any America First Credit Union in order to assist with funeral costs.
The race is not to the swift, nor the battle to the strong. The prize belongs to him or her who endures to the end.
Ben was born to J. Rand and Marla Campbell Ridges on December 12th, 1980 in Bountiful, Utah. Ben was the second of four children, the only son, and the king of the castle. He was sealed to his beautiful sweetheart, Sara Jane Falkner Ridges, on November 27, 2002 in the Salt Lake Temple. Together they moved several times before settling in Centerville, Utah.
Ben loved all things mechanical. He spent many hours with his dad working on engines and adding horsepower. He loved big tires, loud engines, and "showing us what this baby can do". Ben loved both the mountains of northern Utah and the red rock and sand of Southern Utah. He loved off-roading and horseback riding; whatever could take him off the beaten path and do so with speed.
Known as Uncle Teasy-Pants to his 8 nieces and 2 nephews, visits with him were always fun. During the last months of his life he often requested their visits to brighten his day and make him smile. His home was plastered with drawings, pictures and cards sent by his earthly angels who prayed for and loved him. He will be missed by them. Eliana, Cadence, Joel and Jasec Hadley; Brielle, Claire, Addison and Molly Davis; and Brooklyn and Kennedy Phillips.
Ben is survived by his loving wife, Sara; furry child (boxer), Izzy; parents, J. Rand and Marla Ridges; sisters, Aspen (Steven) Hadley, Camille (Marty) Davis and Emily (David) Phillips; grandparents, Roy and Maxine Campbell; parents-in-law, Trudi and Harold "Short-T" Goode, Dane R. Falkner and Mary Jo Ahlin; brothers-in-law Dane V. (Charlotte) Falkner and Nicholas Falkner along with aunts, uncles, cousins and friends who loved him greatly.
Special thanks to doctors and staff at the University of Utah Hospital and Huntsman Cancer Hospital for the professional and charitable care provided to Ben. Also to the many friends and neighbors who served and loved Ben during the past two years. We couldn't have done it without you!
While he will be missed terribly, we imagine Ben joyfully casting off his mortal body. We hope he will take big, deep breaths. That he will run and jump and enjoy freedom from pain and suffering. That he will increase the eternal joy and happiness of others on his eternal mission as he did in his earthly mission.
A funeral service to honor and celebrate his life will be held on Monday, February 11th at 11:00 a.m. at the Chase Lane LDS Building, 1125 N. 400 West in Centerville. A viewing will be held Sunday, February 10, from 6:00 to 8:00 p.m. at Russon Brothers Mortuary, 295 N. Main in Bountiful and on Monday morning prior to the funeral services from 9:30 to 10:30 a.m. at the church.
In lieu of flowers, those who wish to do so may donate to The Ben Ridges Charitable Fund at any America First Credit Union in order to assist with funeral costs.
The race is not to the swift, nor the battle to the strong. The prize belongs to him or her who endures to the end.
Monday, February 11, 2013
Monday, January 21, 2013
Wednesday, January 16, 2013
New LDS Youth Curriculum~ LOVE IT!
I just have to give a proverbial shout out to the new LDS youth curriculum: Come, Follow Me.
Can I get a "Woot! Woot!"
I am so glad this has been initiated.
For those who aren't sure what I am talking about, The Church of Jesus Christ of Latter-Day Saints holds a 3 hour church block in which the classes are split up according to different categories such as age, gender, priesthood status, etc to help guide discussion to appropriate topics. For both male and female youth, they attend each of the following for approximately 1 hour each: Sacrament Meeting, Sunday School and Young Men or Young Women.
This new curriculum focuses more on guiding youth lessons by recognizing promptings from the Holy Ghost and teaching the same way Christ taught his disciples, through a discussion like mode rather than a lecture format. Christ often asked questions to his disciples that he might understand their spiritual maturity and then answered them appropriately according to what they personally needed to hear. He often explained gospel doctrines through specific examples, also known as parables, that related to their life at that moment in time.
"But the Comforter, which is the Holy Ghost, whom the Father will send in my name, he shall teach you all things, and bring all things to your remembrance, whatsoever I have said unto you." John 14:26
Using this type of teaching style in our modern setting grants each member the tools needed to learn for themselves the truths of this gospel and gain greater intelligence. It allows each individual to convert themselves through diligent study, prayer and guidance by the Holy Ghost resulting in stronger testimonies and knowledge of Christ's church. It also has many other benefits including increased fellowship and confidence in their knowledge of the gospel , which helps nurture full-time and lifelong missionaries. Christ himself said "Feed my sheep."
"But the Comforter, which is the Holy Ghost, whom the Father will send in my name, he shall teach you all things, and bring all things to your remembrance, whatsoever I have said unto you." John 14:26
Using this type of teaching style in our modern setting grants each member the tools needed to learn for themselves the truths of this gospel and gain greater intelligence. It allows each individual to convert themselves through diligent study, prayer and guidance by the Holy Ghost resulting in stronger testimonies and knowledge of Christ's church. It also has many other benefits including increased fellowship and confidence in their knowledge of the gospel , which helps nurture full-time and lifelong missionaries. Christ himself said "Feed my sheep."
I invite you to watch this quick 4 minute presentation that describes this new curriculum. I'm not going to lie, this curriculum is pretty cool and I am really excited to start using it with all the resources it provides. If you would like to watch other videos of how to do this click here.
"And he saith unto them, Follow me, and I will make you fishers of men." Matthew 4:19
Monday, January 14, 2013
New Share the Love Project: The Road Home
Who knows about The Road Home and what their mission is?
Sometimes it's hard to know how to help if you don't know who needs the help, right?
Well I am going to introduce you to different organizations that need your help and the first one is:
A few simple words sum up why I really love The Road Home.
They don't just provide a shelter for those in need but they help them re-establish permanent housing and a better life. This is critical to truly helping those without homes get back on their feet and keeping them off the streets. Housing is one of the first things you should have and they help you get it.
I first want you to watch this video.
If that doesn't bring a tear to your eye or make you want to help out then you should watch it again or go watch some of the other videos they have HERE. They are so good and eye-opening, I would encourage you to watch all of them. I'll be posting them all eventually, one at a time.
Did you know....
The Road Home is locate at 210 S. Rio Grande Street in Salt Lake City, UT
In 2011, The Road Home provided shelter to a total of 7,000 people, including:
They never turn anyone away.
Make a Donation. I have a "Donate" button on the right side of my blog to make it easy!
A few simple words sum up why I really love The Road Home.
"Give a man a fish, you
feed him for a day.
Teach a man to fish, you feed him for a lifetime."
I first want you to watch this video.
If that doesn't bring a tear to your eye or make you want to help out then you should watch it again or go watch some of the other videos they have HERE. They are so good and eye-opening, I would encourage you to watch all of them. I'll be posting them all eventually, one at a time.
Did you know....
The Road Home is the largest shelter in Utah.
The Road Home provides emergency shelter and housing services to men, women and families in our community.
The Road Home has helped over 1,000 families move out of shelter through Rapid Rehousing.
It only takes $9 to shelter one person for one night.
The Road Home is locate at 210 S. Rio Grande Street in Salt Lake City, UT
They also have a Community Winter Shelter at 529 West 7300 So in Midvale, UT
In 2011, The Road Home provided shelter to a total of 7,000 people, including:
•615 Families (including 1,063 children)
•4,387 Single men
•740 Single women
During the Winter Shelter months The Road Home expands from serving an average of 635 individuals per day, to serving 780 per day. This saves lives.
They never turn anyone away.
CLICK HERE for a more comprehensive showing of the services they provide to the community.
"So, how can I help?"
Make a Donation. I have a "Donate" button on the right side of my blog to make it easy!
CLICK HERE to see a list of items that they do and do not accept as well as delivery sites. You may also drop donations off to me at any time if you are in the Centerville, UT area.
In winter the most needed items are:
Warm clothing, blankets and shoes!So do a little New Year clean out and see what you could donate to them!
Consider sponsoring a Palmer Court Apartment Kit to help a chronically homeless family get re-established in permanent housing. These kits include essential home items. CLICK HERE for the different kit lists.
Attend One of Their Events such as the following one coming up!
Join TD Gift Solutions and 120 local boutiques & retailers for a Valentine's Gift Show to benefit The Road Home.
Clothing Drive Needs:
Hygiene Items
Towels & Pillows
Blankets (all sizes)
Baby Items (diapers, wipes, bottles, ect.)
Raffle Tickets for donations!
Pampered Chef Cooking Demonstration
Photos with Cupid
Key Note Speaker: Leta Greene
Sponsored by: Utah Olympic Oval
Volunteer! Being the largest shelter in Utah, they are a very large facility and can use your help! They have great opportunities to help ALL ages. Through giving your time you can make a huge impact on individuals or families. You can also really help if you are bilingual! CLICK HERE for more volunteer information.
Do you have a group that wants to donate time? This is a great way to provide service in a ton of fun ways such as sorting and putting together kits from donated items or making a dinner and taking it to the shelter to serve to guests. If you are a local food business owner, wouldn't this be a great way to use the food that wasn't sold?! You can even design your own project to help them. This would be great for Young Women or Young Men activities!
CLICK HERE for group information.
You can also volunteer for activities with the Palmer Court Residents. I think this one sounds like a ton of fun: Teen Night Out! You get to plan and take them on activities such as movies, bowling, sports games, you name it! Go have fun! CLICK HERE for Palmer Court Volunteering.
Here is also a very unique and awesome project that was launched Dec 4, 2012 and will be occurring on Jan 30-Feb 2, 2013.
100,000 Homes: Salt Lake City
100,000 Homes: Salt Lake City supports a national movement of change agents working together to house 100,000 vulnerable and chronically homeless individuals and families by July 2014. Homeless service providers and local volunteers will take to the streets for Registry Week. The objective is to create a by-name registry of people living on our streets, so that we can prioritize those who have been homeless the longest and are the most vulnerable, and move them into housing. What we learn together during this week will help us reduce and ultimately end chronic homelessness in our community. Volunteering for this requires a training day so you need to sign up for it. You can also sponsor or volunteer goods if you are a business.
Check out their Facebook page HERE to read more about it and sign up to volunteer.
This would be so incredibly rewarding and such a great experience. Take advantage of these awesome opportunities!
The Road Home collaborates with a variety of organizations to ensure families and individuals have the tools they need to get back on their feet and stay there. Check out all the resources in this link. Community Resources
I can personally say that I have learned a ton and have grown to love The Road Home as I investigated and created this next Share the Love Project. When I am able, I would like to coordinate volunteer activities to do, so when I do (or if I hear any of you are!) I will pass along the information!
Ya know, sometimes people just a need a little bit of help to get back up on their feet and be fine again. With your help, they can. Join me.
Share the Love
Friday, January 11, 2013
Homemade Hot Cocoa
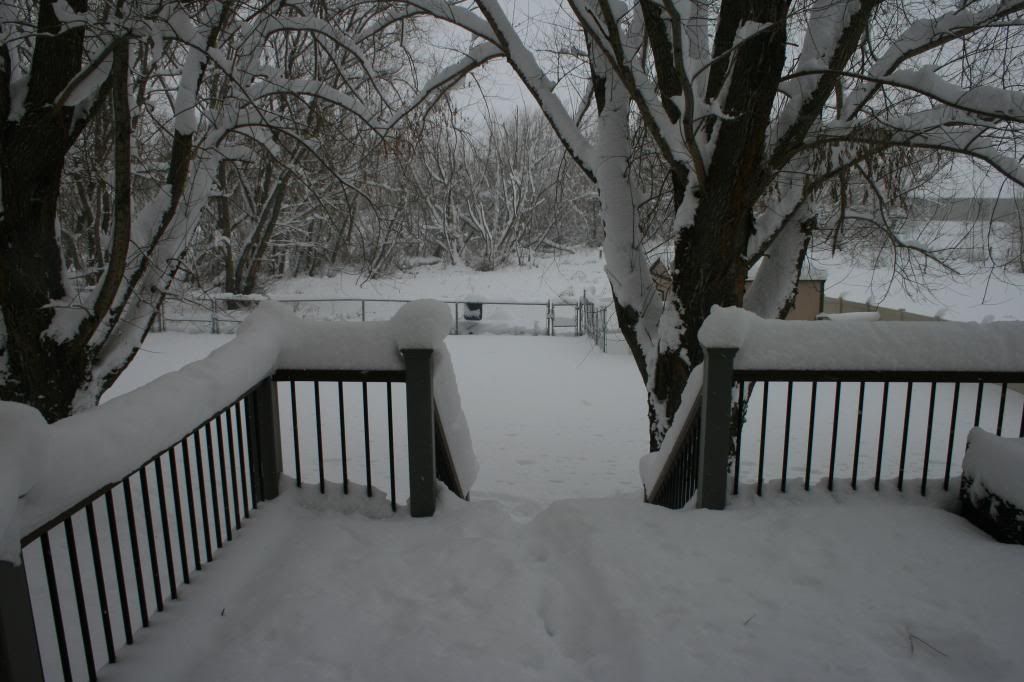
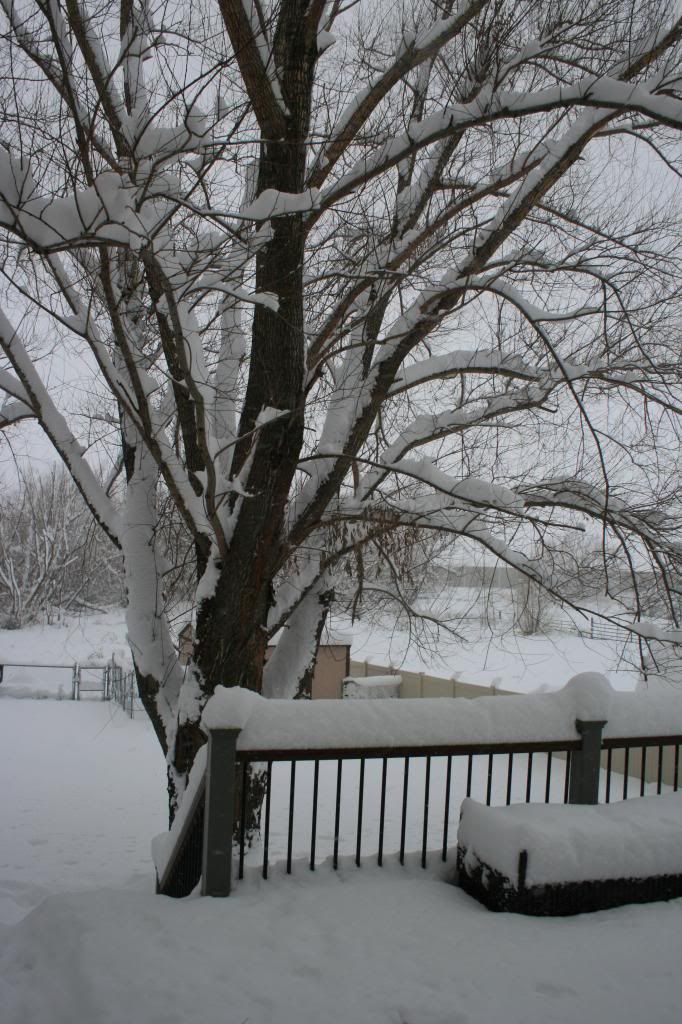
I wasn't going to post today but I felt compelled to do so because of the weather outside here in sunny Centerville, Utah.
It's beautiful! All 18 inches of it!
I love huge snow storms (as long as I don't have to drive or the roads are clear).
So anyway, I had a really bad headache this morning and decided that Hot Cocoa would definitely make it go away. Funny thing.... it did. :)
Here is a fabulous
and super quick hot cocoa recipe for those days when you find
yourself lacking pre-made hot cocoa powder or just like to make
things from scratch. There
are lots of good hot cocoa mixes out there (Stephen's Dulce de Leche Hot Cocoa...drool), just make sure you use
milk! That's what makes it creamy and rich, plus it gives you some nutrients too.
If you do make the hot cocoa from scratch it is a bunch cheaper.
Plus you can adjust it until it is your perfect flavor!
You like it sweet? No problem! Add a little more sugar.
You a chocoholic? Right on! Add more cocoa powder!
You can add hazelnut, caramel/ dulce de leche, peppermint sticks, you name it! You can have it your way!
If you do make the hot cocoa from scratch it is a bunch cheaper.
Plus you can adjust it until it is your perfect flavor!
You like it sweet? No problem! Add a little more sugar.
You a chocoholic? Right on! Add more cocoa powder!
You can add hazelnut, caramel/ dulce de leche, peppermint sticks, you name it! You can have it your way!
So snuggle up in front of your fire with a warm blanket and a good book and sip away at your rich creamy hot cocoa. Enjoy the moment. Mmmm..... :)
Dang it. My headache is back. Better go make some more hot cocoa...
Homemade Hot Cocoa
Ingredients:
1 1/2 Tbsp sugar (or adjusted to your preferred taste)
1 Tbsp cocoa powder (or more!- I used Ghirardelli sweet ground
chocolate and cocoa)
2 Tbsp water
1 cup milk
¼ tsp pure vanilla extract (or other flavoring)
Combine sugar, cocoa and water in a small saucepan and heat
over medium until sugar is dissolved.
Stir regularly to prevent scorching. Add the milk and flavoring and whisk well until it reaches your desired
temperature. Make sure not to get it too hot before serving so it doesn’t risk
burning someone, especially children. If you need to keep it on the stove, just turn the heat down to the lowest setting to keep warm. I love hazelnut or
caramel/dulce de leche flavored hot cocoas so adding a bit of that flavoring is
next on my list! I'll add an addendum if I find other awesome additives! Apparently, doubling the cocoa powder is a fabulous idea! ;)
Subscribe to:
Posts (Atom)