Monday, October 31, 2011

The Witches' Ball Halloween Party ~ Orange Cupcakes, Spiderweb Peanut Butter Cookies, Oreos and The Best Witch's Brew Slush

Happy Halloween!
Let me tell you that Halloween is probably the funnest time of year to make desserts! There is so much inspiration all around! You can make so many different types of fun treats...So I did. :)
I had two events to make goodies for and I had a blast!

This first post is of my own little family party.
The Witches' Ball


I picked up a few new Halloween decorations (since I really haven't done any REAL Halloween celebrating since I started college....9 years ago) and had so much fun getting inspired!
I found a fabulous spiderweb dessert stand and orange "Spooky" sign. Throw that together with a black tablecloth, a few candelabra's, some candles and orange food and...Voila!
A Witches' Ball fit for the finest!


Devil's Food cupcakes with bright orange frosting and black jimmies are the perfect treat to be featured on my new spiderweb cupcake stand!

The orange frosting was so vibrant against the dark cake, it was the perfect compliment to the black and orange theme colors. I went semi-homemade with these. I used Betty Crocker's Devil's Food Cake mix (delicious!) for the cupcakes and Pillsbury Buttercream frosting that I whipped up in my stand mixer and added food coloring. Easy Peasey. A few black jimmies purchased at Orson Gygis was the perfect contrast to the orange. They were absolutely tasty and super cute!


Next on the table was spiderweb cookies! I have to say that this was in my top 2 favorite treats for this Halloween. They were so fun and festive and amazingly easy to do considering I also went semi-homemade with these. I purchased some peanut butter fudge cookies from the store and then just melted some guittard vanilla a'peels (also from Orson Gygis) in a ziplock, snipped a small hole in the end and decorated like a spiderweb!

Spiderweb Cookies displayed on my ghost plate!

Who doesn't love peanut butter!
I have been wanting to do some 'tied' cookies for a while now and really just never found the right occasion where it would fit but, alas, the time has come! ...and it was amazingly adorable
 I picked up some orange oreos and some orange and white twine (Orson Gygis) and went to town. That's it!


So simple but oh so desirable.


I also served some appetizers and entrees including swamp sludge (guacamole) with black and orange chips found at my local grocery store, a cheesy chicken pasta dish that looked like brains and little smokies because they are always delicious!


The Table
What Witches' Ball would be complete without an authentic Witch's Brew?! None...you're right.
Especially the slushy kind! Mmmmm! I searched for the best slushy recipe out on the web and I think I found it. Recipe Below! It was the best punch I have tasted.
A word of caution though...Dry Ice makes it slush even more so I would recommend putting the dry ice in after it is all mixed and slushed up thoroughly. (or else it might turn the whole bowl into a big tasty ice ball :) Hehe. )

Dry Ice IS a necessity at any Halloween Party.
I also made some mummy juice boxes for the wee ones! They turned out cool! You can use white electrical tape or white duct tape and get some adhesive oogley eyes from a craft store. I found mine at Target for $1.99 for 100! Score! (...anyone need some oogley eyes?) ;P
Don't forget not to tape over the straw or the hole...both essentials to juice box pleasure.


Here is the formal invitation to The Witches' Ball. I think it turned out pretty cute.


This is a picture of me and the hubby! :) He dressed up for ME!
Me and my hubby, Bencula.
 
That's me.


Witch's Brew
Amazingly delicious and slushy!

2 1/2 cups white sugar
6 cups water
6 oz strawberry flavored gelatin mix
1 (46 fluid ounce) can pineapple juice (I used peach mango pineapple) 
2/3 cup lemon juice ( I didn't have enough so I used more of the others)
1 quart orange juice
2 (2 liter) bottles Sprite or such (I needed four 2-Liter bottles because I put the Dry Ice in before the slush melted and everything turned into a big slushy ice ball!) :)

Directions

  1. Bring the sugar, water, and strawberry flavored gelatin to a boil in a large saucepan; boil for 3 minutes. Stir in the pineapple juice, lemon juice, and orange juice. Divide mixture into 2 separate containers (I used 2 gallon ziplocks) and freeze.
  2. Combine the contents of 1 container with 1 bottle of the lemon-lime flavored carbonated beverage in a punch bowl; stir until slushy (THEN ADD THE DRY ICE). Repeat with remaining portions as needed.
  3. Keep in mind dry ice will slushy up your drink even more!
Original Recipe: http://allrecipes.com/Recipe/luscious-slush-punch/detail.aspx

Sunday, October 9, 2011

Baby Blessing Dessert Bar ~ Red Velvet Cream Cheese Cake Pops, Designer Flower Sugar Cookies and Vanilla Dipped Rice Krispies

A sweet little baby was blessed today and nothing goes better with sweet babies than sweet treats. Mama asked for a cute girly flare for the desserts with flowers and fun colors. We decided on Red Velvet Cream Cheese Cake Pops, Flower Sugar Cookies and Vanilla Dipped Rice Krispie Treats.

Red Velvet Cream Cheese Cake Pops
Everything went so well for the event. The luncheon was delicious and the desserts were delectible! They were a huge hit. The Red Velvet Cake Pops won the hearts (...er....stomachs) of this crowd.


Designer Sugar Cookies take some time to make (along with patience and a steady hand) but they are sooo cute that it is completely worth it! You'll find details on how to make them below!

Flower Sugar Cookies


The Red Velvet Cake Pops went fast! These are one of my most requested flavors...and for good reason! Recipe is below!


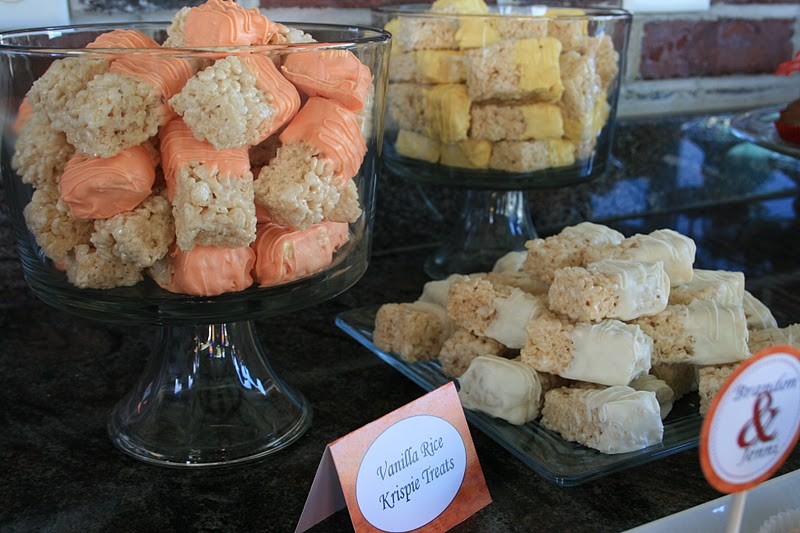
Vanilla Dipped Rice Krispie Treats... a dessert bar must! So simple and so good.


Jayden's Sugar Cookie Flower Garden

Red Velvet Cake Pops

This recipe is many people’s favorite red velvet cake recipe. It is so delicious and moist and the cream cheese frosting is just perfect. Try it out. You won’t be disappointed.


Red Velvet Cake:
10 oz cake flour
1 tsp baking powder
1 tsp salt
2 Tbsp unsweetened cocoa powder
2 oz. red no-taste food coloring
½ cup (1 stick) unsalted butter, softened
1 ½ cups sugar
2 eggs, room temperature
1 tsp pure vanilla extract
1 cup buttermilk, room temperature
1 tsp vinegar
1 tsp baking soda

Cream Cheese Frosting:
16 oz Cream Cheese (2 packages), softened
½ cup (one stick) unsalted butter, softened
1 tsp pure vanilla extract
8-10 oz (2 ½ cups) powdered sugar
pinch of fine salt


Cake Directions:
Preheat oven to 350° F. Line two 12-cup cupcake tins with liners (or grease any other baking vessel with Pam or the like).
Mix together cake flour, baking powder and salt into a medium bowl and set aside. In a small bowl (and with disposable gloves on) mash together the food coloring and cocoa until it forms a smooth paste. Be careful! It stains!
In a stand mixer using the paddle attachment, cream together the butter and sugar until just light and fluffy. Do not overbeat. Beat in eggs, one at a time, and then add the vanilla and food coloring/cocoa paste. Add one third of the flour mixture to the bowl and mix on low until well blended, then add half the buttermilk. Add another third of the flour and then the rest of the buttermilk finishing off with the last of the flour, mixing well after each addition until just incorporated. Scrape down the bowl as needed.


In a small cup, mix together the vinegar and baking soda and watch your science experiment fizz. Pour this into the bowl and give it one last mixing for good measure. Batter should be pretty thick.


Use a small ice cream scoop to portion the batter into the cups (about 1 tablespoon for minis). Fill cups about ½ full. These rise a lot here in the elevated mountains of Utah! Place the tins in the preheated oven and bake for approx 15-20 minutes for regular cupcakes, 8 minutes for minis and 30 minutes for a 9 x 13 glass pan. Once cupcakes pass the toothpick or spring test they are done!


Allow to cool completely. 

I listed my recipe for cream cheese frosting (above) if you want to make cupcakes or cake but I actually use storebought Pillsbury (or Duncan Hines) cream cheese frosting (NOT whipped) when I am making cake pops because it is wonderfully sticky!

Follow the directions I have previously described to make cake pops using any color of vanilla or chocolate wafer you please!


Frosting Directions:


In a stand mixer using the paddle attachment, blend the butter and cream cheese until smooth. Add about half of the powdered sugar and mix on low to medium (just so it doesn’t turn into a snow storm in your kitchen). Add the salt and vanilla and mix well. Gradually add more powdered sugar until you reach the desired sweetness/flavor of your frosting. Add less if you don’t like it too sweet or if you just like to taste that cream cheese tang! You may also add more sugar if you like your frostings on the sweet side but the more you add, the less you will taste the cream cheese. Beat on medium for another 2 or 3 minutes. This helps make the frosting a little bit lighter (not a ton though) as well as decrease the sweetness by a touch.
Use immediately or refrigerate. If refrigerating, allow frosting to come to room temperature and then rewhip in a mixer.


Designer Flower Sugar Cookies


Yields: 24-36 large cookies

Sugar Cookies:

1 1/3 cups shortening

1 1/2 cups sugar

2 1/2 Tbsp milk

2 1/2 tsp vanilla

2 eggs

18 oz flour

3 tsp baking powder

1/2 tsp salt

Preheat oven to 350 degrees. Cream together the shortening and sugar until well blended then add the milk, vanilla eggs and blend again. Add the rest of the dry ingredients until a soft dough forms. Refrigerate for a couple of hours if able (at least 1 hr) or preferably overnight. Spread flour over a clean surface and flour a rolling pin. I actually like to use part flour and part powdered sugar so the cookies taste sweet rather than floury. Roll out the dough to about 1/3 to 1/2 inch thick. Flour a cookie cutter. Press down firmly and wiggle to loosen from the counter. The key to getting pretty shapes that aren't deformed after you transfer them to the cookie sheet is to make sure your counter is heavily floured and nonstick. You can use parchment paper if you want but I find it difficult to roll on without everything moving everywhere. Place the dough shape onto a parchment lined cookie sheet and bake for 7-9 minutes depending on size and thickness of cookie. Do not wait for the cookie to brown. If your cookie is starting to brown take it out! These cookies can be frozen in airtight containers for a few months.
Royal Icing by Sweet Dani B
Yields 2.5 cups
 1/4 cup meringue powder
1/2 cup cold water (plus more if needed)
1 lb powdered sugar
squeeze bottles
food coloring gel (water-based)
Using the thick whisks on a handmixer, beat together the meringue powder and water until you see good trails where the whisk has been. Slowly beat in the sugar until well blended and you see trails again. If the mixture is too thick add water until it is smooth and the trails created with the whisk melt together after a little shake. (This takes some practice to get the right consistency) Split into different bowls and color as needed for design. Pour into squeeze bottles. I have found that the ones specifically for dessert decorating work the best (the hole is just the right size).
For writing, add more powdered sugar until the correct consistency is achieved (so it doesn't run) and use a small writing tip.
To decorate your cookies you might want to practice on a plate first to feel how much pressure you need to exert to get a nice consistent line of icing.
Start by creating the border to the design on your cookie. Go as far to the edge of the cookie you can without it going down the side. This makes for really pretty cookies. Once you start your line lift up the tip of the bottle about 1 to 1.5 inches off the cookie and guide your line with smooth movements. Raising the tip off of the cookie this much will give you smooth lines rather than jagged ones! Try both and you will see the difference! When you are coming back around to where you started let off the pressure and bring the tip down to the cookie again and connect the lines. Now start filling inside the border with the icing starting on one side and moving to the other end slowly. Squueze a little bit out and then use the tip to blend it with the border. Continue pressing a little icing out and then blending it with the icing that is already on the cookie. It is pretty easy. Once you have covered the whole cookie, pick it up and give it a little shake to even and settle the icing. This step really helps. Let this dry (at least 3-5 hours which really depends on your humidity and environmental factors. We are pretty arid here in Utah and I have to let it dry at least 3 hrs) and then you can continue decorating with other details such as pretty borders. I just outlined the cookies (or the pedals for the tulips) with the same color icing and then poured sanding sugar on it and dusted off the extra sugar with a soft small paintbrush. (NOTE: Your first layer of icing MUST be dry or else the sugar crystals will stick to the entire cookie wherever there is wet or even tacky icing).
To add the pearls I just used some tweezers and dipped a pearl in some icing and then placed it on the cookie.
Storage: If you are going to use these the next day then don't even worry about covering but if you want you can put them in an airtight container in a cool place to keep them longer. They will last about 3-5 days I would say.

Tuesday, September 27, 2011

Sealing Dessert Bar~ Pumpkin Spice w/ Honey Cinnamon Cream Cheese Frosting, Vanilla Dipped Rice Krispie Treats and Chocolate Fudge Cake Pops

I had the wonderful opportunity of making a dessert spread for my friends' sealing reception a few weeks ago. They were sealed together in the Bountiful Temple. What a great day!...especially when food and dessert is involved!

They had the reception at their private pavilion next to their cozy country home. The setup was beautiful with the rustic wood and brick complimented by the gorgeous granite! It made for a really great background for the dessert bar. The theme we were working off of was "Autumn Inspirations" so naturally the party planners chose Pumpkin Spice Cupcakes with Honey Cinnamon Cream Cheese Frosting. For a chocolate element we threw in some Chocolate Fudge Cake Pops tied with some festive fall colored ribbon and added some delicious Rice Krispie Treats Dipped in Vanilla because....Why Not?! It was beautiful.

I have been wanting to make some cupcake toppers so I figured this would be the perfect opportunity! I made 3 different toppers customized to the event and they turned out fabulous. I used Microsoft Publisher to design the toppers and printed them at Kinkos on white cardstock. I used a 2 inch round punch to cut them out. InkSpot WorkShop provides a nice beginner tutorial on how to make cupcake toppers that can help get you started. After that you can play around and get creative! I got my inspiration for the cupcake topper designs from The TomKat Studio
Thanks for assembling the cupcake toppers, Jill!
  
A sillhouette of the Bountiful Temple
These cupcakes were a hit!

 As I have said before, Vanilla Dipped Rice Krispie Treats make the PERFECT dessert bar selection because they are super fun, really easy to make and most important of all.... the TASTIEST! These are usually my favorite item at the dessert bars. Do you honestly know anyone who would turn down a delicious rice krispie treat?!


 Chocolate Fudge Cake Pops are always a favorite. I guess you really can't go wrong with chocolate in general ....right? Slap a stick in some chocolate fudgyness, tie a bow on it and you're good to go....well almost. ;D  I love how these turned out. Magnifique!


It was great to have help drizzling and
assembling the cake pops. Thanks Hope!
What a memorable day filled with family, friends, fun and desserts!

Pumpkin Spice Cupcakes with
Honey Cinnamon Cream Cheese Frosting

Pumpkin Spice Cupcakes
Yields ~24 cupcakes
Ingredients:
1 box spice cake mix
15 oz. can pumpkin (not pumpkin pie mix)
3 large eggs
1/3 cup unsweetened applesauce (or oil)
1/3 cup water
1/2 tsp cinnamon
1/4 tsp pumpkin pie spice

Honey Cinnamon Cream Cheese Frosting
1/2 cup butter, softened
4 oz. cream cheese (can use reduced fat or regular) 
1 tsp. cinnamon
1 Tbsp. honey
2-4 cups powdered sugar (grocery store brand)
1-2 Tbsp milk

Directions:
Preheat oven to 350 degrees. Line 24 muffin cups with cupcake papers.
Blend together the cake mix, pumpkin, eggs, applesauce, water, cinnamon, and pumpkin pie spice on low to medium speed until fully incorporated. Do not beat for too long or the batter will incorporate too much air creating a lighter, spongy texture (unless you like it that way). I prefer these cupcakes to have some solid structure. Pour the batter into the prepared muffin cups about 2/3 full. These do not rise a lot in the oven.
Bake for 12-15 minutes (6-7 minutes for minis) or until it passes the toothpick test.
Remove from oven and allow to cool in pans enough to touch them without burning yourself. Remove from pans and cool completely.

To make your frosting:
Cream the butter and cream cheese until soft and uniform. Add the honey and cinnamon. Gradually add about half the powdered sugar and beat until smooth. Add 2 Tablespoons of milk for a smooth texture. Continue adding powdered sugar until the cinnamon and honey flavors start to fade and the frosting starts to become sweet. I actually do not measure the powdered sugar but adjust to taste usually. It needs to be thick enough to hold up after being piped so if your frosting is still pretty soft and runny then you probably need to add more sugar.

To decorate your sweet cuppin' cakes:
Using a ½ inch plain round tip in a piping bag (or huge ziplock), swirl on the frosting starting from the outside and swirling in. Release the pressure and pull up to create the pointy top. Assemble your cupcake toppers using lollipop sticks and tape and then push into cupcake all the way to the bottom making sure they are straight up and down. Voila!

Vanilla Dipped Rice Krispie Treats

Ingredients:
10.5 oz bag of mini marshmallows
6 cups Rice Krispies (Use the original Kellogg's Brand so they stay Rice Krispies and don't become Rice Soggies)
3-4 Tbsp Butter
Vanilla Melting Wafers ( I use Guittard Vanilla Apeels because they are good quality, easily colored and melt to a thin consistency so the shells aren't too thick.)

Put your mallows and butter in a BIG ol' microwave safe bowl and nuke at 30 second intervals, stirring in between with a silicone spoon, until melted thoroughly. Dump in the rice krispies and quickly mix until uniform. Dump the mixture out onto a greased sheet pan (or another container). Remove jewelry, butter up your hands and press the mixture to compact it enough to hold together but not so much that it becomes too dense and hard. The top of the sheet pan edges seem to be the perfect height for these treats. It will take about 3 batches to fill an entire pan but you can just press it into a corner if you only want 1 batch. Let them cool.
Once cool, cut them into whatever size you want. These were about 1.5" x 3". They don't have to be perfect. I just eyeballed it. There might be scraps after you have cut your squares out...again, please test the product for quality assurance purposes.
Allow the marshmallow to set securely before dipping (an hour or two would be nice). Prepare another sheet pan with parchment paper. When ready to dip, melt the vanilla wafers (not to be confused with Nilla Wafers) however you prefer. If you are wanting to color the melt, use oil-based coloring ONLY. Add a little at a time until the desired shade is achieved. Dip the end of the Rice Krispie into the melt about half way and then shake off the excess. Drag the edge of the rice krispie against the bowl to take off the excess. Place onto the parchment and allow to dry. Repeat.
Once they are all done and fairly dry, take the left-over melt and place in a ziplock baggie. Zip the top, twist it to push the melt into a corner and snip a very small piece of the corner off. While pressing evenly, zig zag back and forth over the dipped part of the rice krispie treat. Let dry and Enjoy.

Sunday, September 25, 2011

Bridal Shower Desserts~ Pink Ruffle Cake and Rose Cupcakes

Pink Ruffle Cake ~ Yellow Cake with Strawberry Frosting
My best friend, Sonia, just got married! Well, it was almost a month ago but time sure has flown. I threw a bridal shower for her a week before her wedding and the theme was "Sunday, her Prince will come" (based on how her husband proposed to her) so naturally everything had to be Pretty Pretty Princess Pink, from the napkins to the cupcakes!
I just had to do a pink Ruffle Cake because they are so darn cute and perfect for any girly party. This was so much easier than I expected it to be! I will definitely be doing a lot more of these cakes and actually will be doing one for my 2 year old niece's birthday party this weekend!
For this mini cake, I used a 4 inch pan and it turned out absolutely adorable. Of course you can make this any size you want. The flavors were yellow cake and strawberry frosting. I should have shown a picture of the inside. There were 4 layers with strawberry frosting in between.


....and I love my cake stand!

Here is a Tutorial on how to decorate a Ruffle Cake
by My Sweet and Saucy owner.
Click HERE.

I also did Rose Cupcakes out of the same cake and frosting just to make things extra dainty. Again, super easy and it produced a delicious cupcake to frosting ratio.
Rose Cupcakes! Yellow Cake with Strawberry Frosting


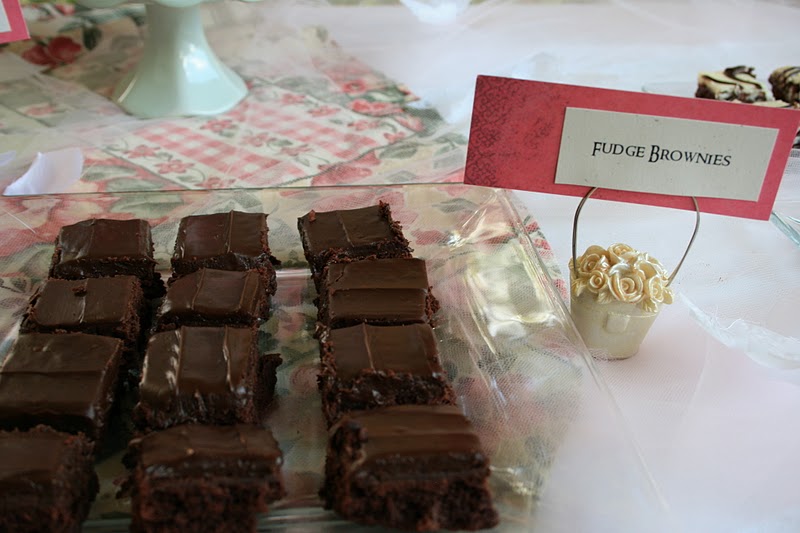
I must admit that I did not make the rest of the treats. I bought them. GASP! My brownies died (again....but now I know I can't double that recipe!) so I had to run out and purchase some finished tasty looking fudgy brownies. Luckily, people said they preferred mine... :D
Cream Cheese Brownies
Fudge Brownies
Back to our Fairytale....Sonia's husband proposed to her at Disneyland using this engraved glass slipper (see below). It says, "Myron & Sonia" "Happily Ever After" and the date of their engagement. Sonia loves Disneyland so this was perfect. Way to go Myron! I thought the glass slipper would be the perfect finishing decoration for the ruffle cake.... and Sonia did too when she saw it! Simply elegant and meaningful.


No, I did not make those pink fluffy confections on the left side of the picture below....they are pink snowballs I found at the store and had to put on the table because they were....well....pink. :)


Sonia

Happily Ever After Dessert Table

Sonia cutting the cake


We set up outside and the day was beautiful! We couldn't ask for much more than that.


Congratulations Sonia!
And finally, the long awaited....

Yellow Cake Recipe:
Yields: 2 x 4 inch cakes and 12 cupcakes 

1 cup unsalted butter
1 ½ cups sugar
8 egg yolks
¾ cup any milk
1 ½ tsp pure vanilla extract
8 oz (2 cups) cake flour
1 tsp baking powder
½ teaspoon fine sea salt

Preheat oven to 350 degrees F. Grease two 4 inch round cake pans and place cupcake liners in 1 cupcake tin. Mix together the flour, baking powder and salt. Set aside.
Cream together the butter and sugar until light and fluffy. Beat in the egg yolks one at a time. Stir in vanilla. Beat in the flour mixture (3 portions) alternating with the milk (2 portions). Start and end with the dry ingredients. Mix only until incorporated. The batter will be thick.
Pour batter into cake pans half full and divide into cupcake liners filling half full as well.
Bake all pans in the oven for 25-30 minutes (cupcakes will be done in ~12 minutes) or until the tops springs back when lightly touched or the cake passes the toothpick test. Cool completely in the pans.
Once cool, turn cakes out onto flat surface. Cut the round top off of the cakes using a long serrated knife and cutting horizontally. Eat the scraps for quality assurance. :) Cut the cakes in half horizontally to create a total of 4 layers. To make the frosting process easier you can refrigerate the cakes now but it is not absolutely necessary.

Strawberry Frosting
Yields: Enough for 2 dozen cupcakes or a 4 inch mini ruffle cake and 12 cupcakes

Ingredients
5 oz (1 cup) fresh or frozen strawberries (thawed)
2 sticks (1 cup) unsalted butter, firm and slightly cold
1 cup butter flavored shortening
Pinch of salt
875 g (7 cups) confectioners' sugar (Can use less if desiring less sweetness)
1 tsp pure vanilla extract

*NOTE: Your strawberry frosting will only be as good as your strawberries. If your strawberries don't have much flavor, that is how your frosting will taste also. Make sure your strawberries are in season.*
Puree strawberries in a food processor. In the bowl of an electric mixer fitted with the paddle attachment, beat together the butter and salt on medium speed until soft. Reduce speed and slowly add the powdered sugar; beat until well combined. Add vanilla. Add about 3-5 tablespoons strawberry puree or until desired flavor is reached making sure you don't put in too much puree that your consistency changes or your frosting breaks. Mix until well blended.
This frosting recipe can be very sweet as well as tart from the strawberries. It is extremely flavorful and tasty! A trick to make it less sweet if desired is to use the store's cheaper brand of powdered sugar because it has less sugar and more cornstarch than C&H sugar.
The frosting color in the photos is naturally pink from the strawberries but you may add food coloring to achieve your desired shade of pink.

Assemble the Cake:
Place the first cake layer on a 6 inch round cake board and pipe or spread a thin layer of frosting on top. smooth out with an offset spatula. Place the 2nd layer and repeat until all the layers are stacked and covered in frosting. Pipe or spread frosting along the sides of the cake by holding the spatula vertically attempting not to get crumbs mixed up in the frosting (this is just for good practice really. This cake wouldn't matter if you had crumbs in the "prime coat" of frosting). Smooth all the edges out as well as the top. This is easiest done with a turntable. Make sure the top looks nice if you are not going to cover it with another layer of frosting like in my pictures above. Place the cake in the freezer or fridge until it is firm to the touch (overnight is fine). Once you reach this point you are ready to decorate the cake with ruffles as shown in the video above.

Decorate the Cupcakes:
To frost the cupcake you will want a 1M (or 2D or similar) tip in a piping bag. Beginning in the middle of the cupcake, hold the bag vertically and pipe evenly around in circles until you reach the outside of the cupcake and then release the pressure and drag the tail around so it is sort of hidden. That's it! Viola! A Rose! Crazy Easy, huh!?
Enjoy.