Showing posts with label Tutorials. Show all posts

Tuesday, May 7, 2013

Basketball Cake Tutorial


Wow... 2 months. Has it really been that long since my last post?! Ay Caramba! Lots going on lately.
Check out my other blog for details --->
I actually have a ton of stuff to catch up on so I am going to just do really short posts. 
Let me know if you have any questions and I'll answer those and add them back into the posts.

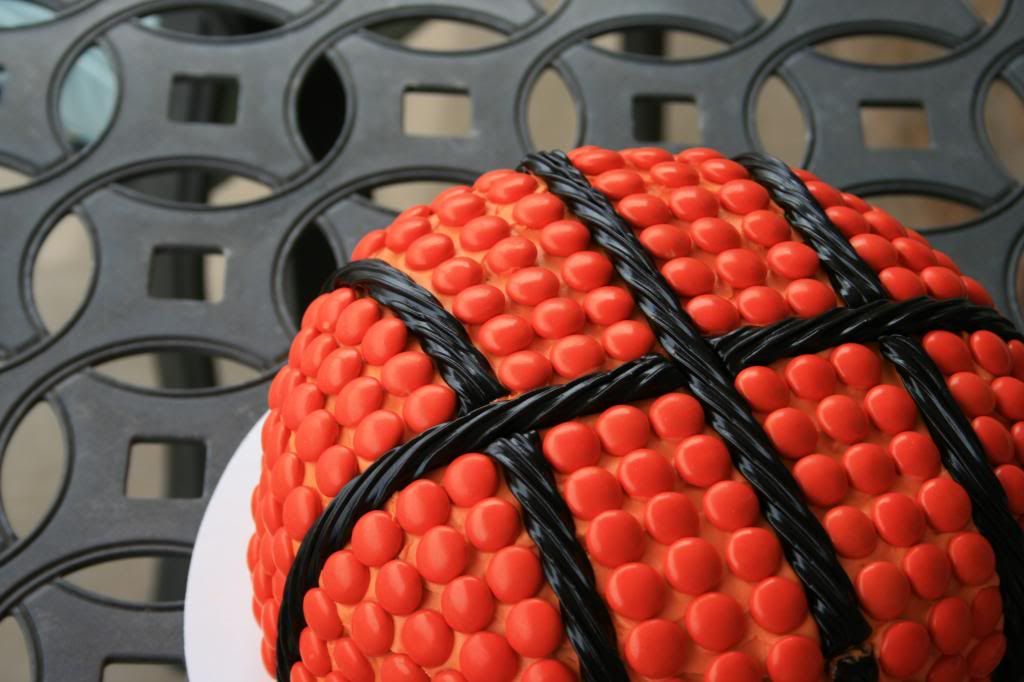
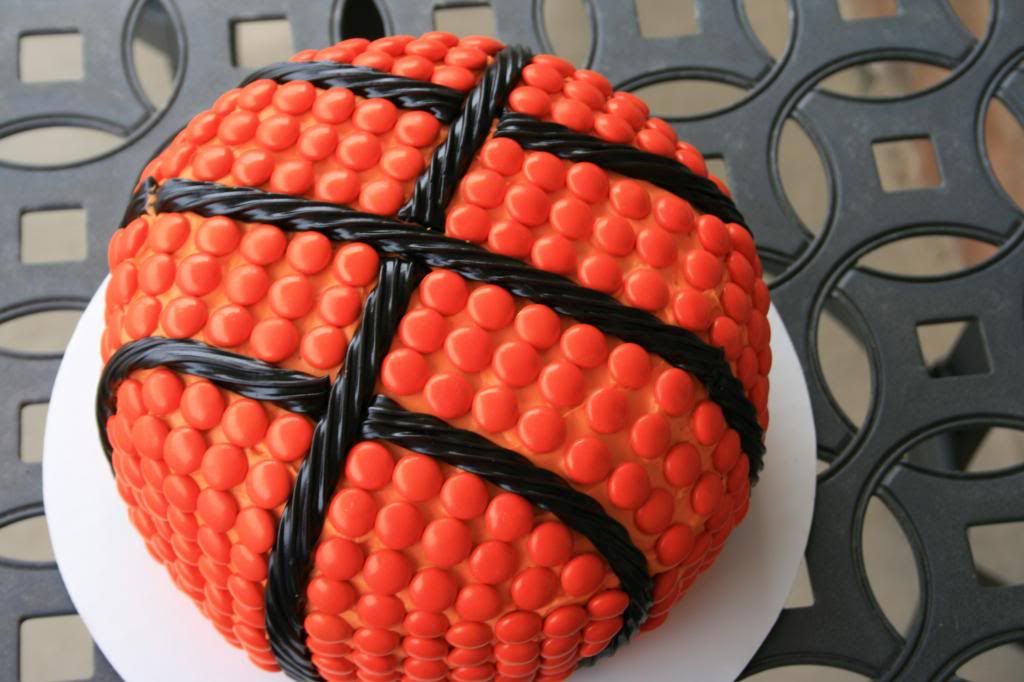
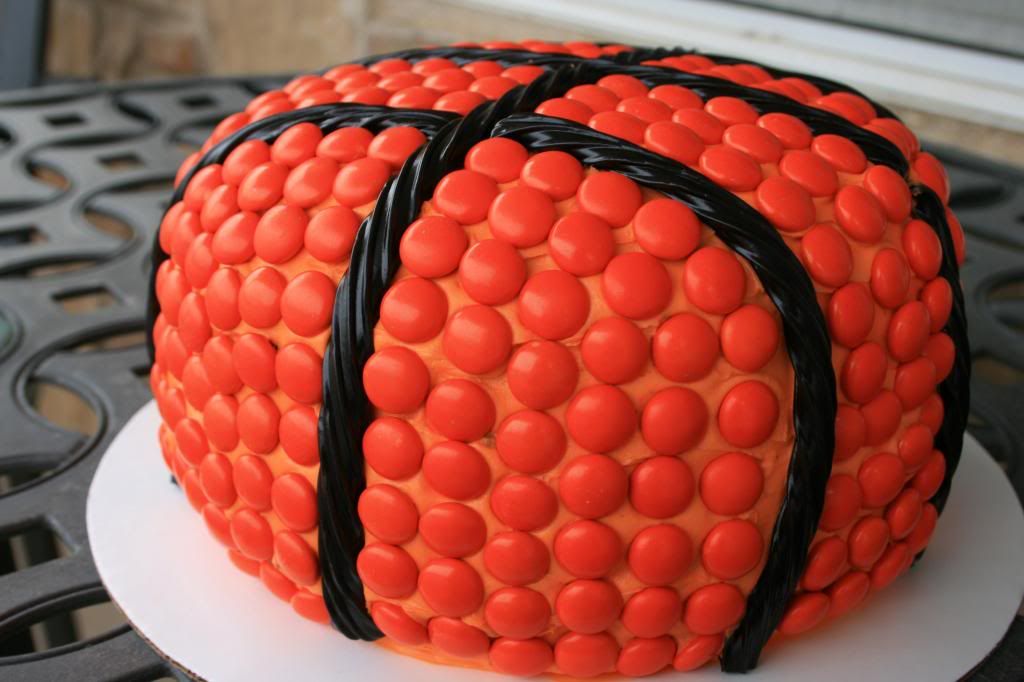
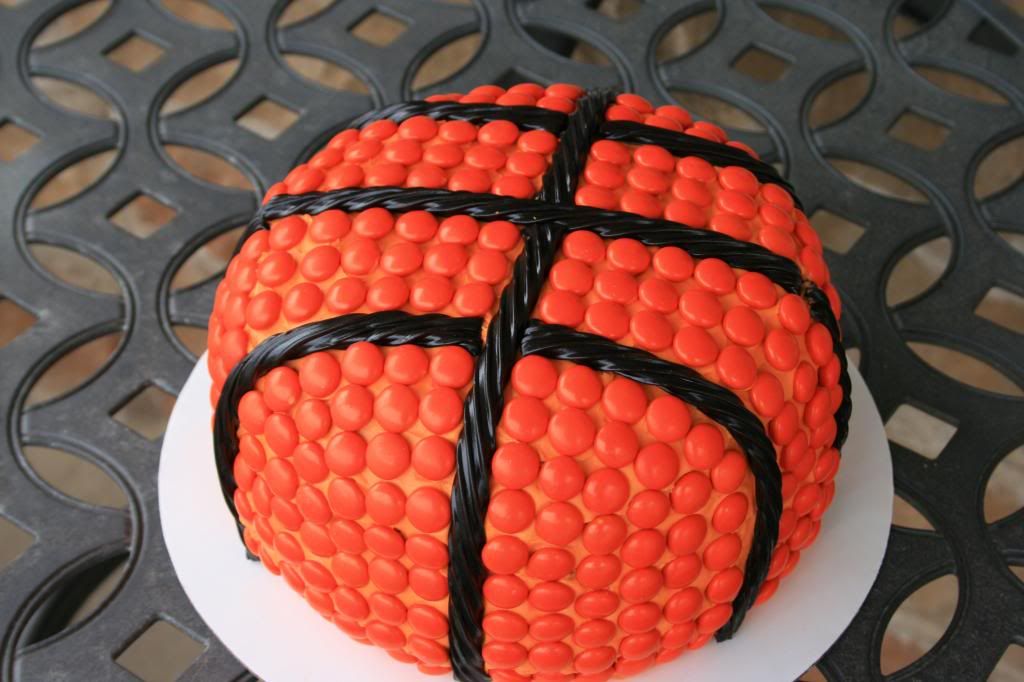
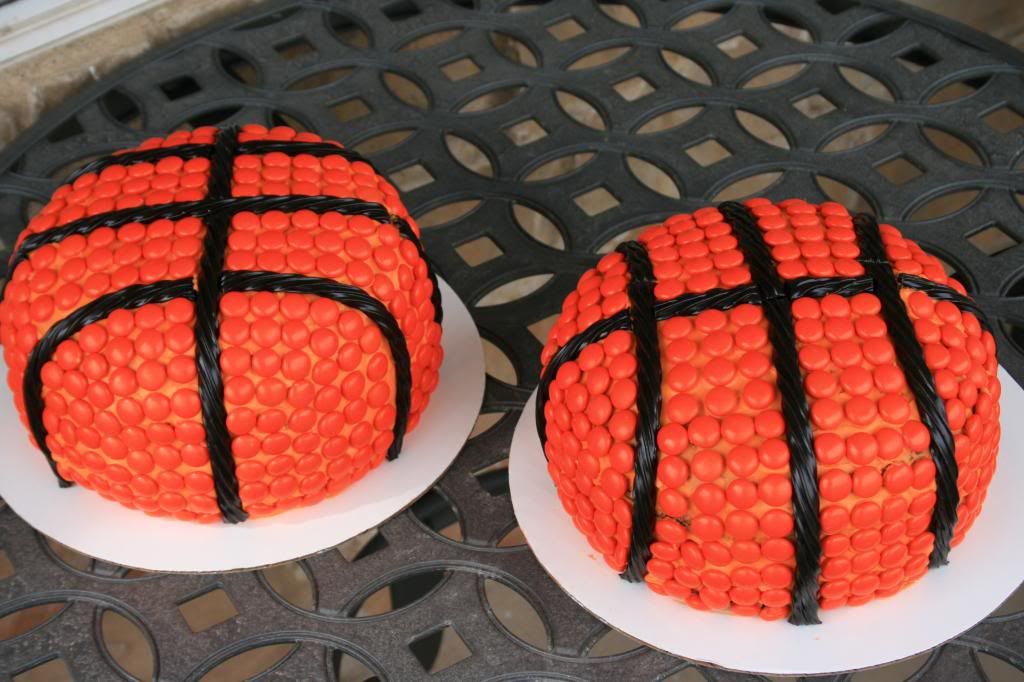
These cakes turned out so cute! They were for my little brother's basketball championship game for his team. It was super simple. 


I made 8 inch round cakes and stacked them 2 high with frosting in between. I cut the cakes so they rounded off as much as I could on both the top and bottom (to try to make them look as round as possible without falling apart). This would also be really cute if you used a dome cake pan to truly make it round. I colored some buttercream orange (using water-based food gel) and covered the whole cake. Looking back I wish I had done the orange a little bit darker but I think I actually ran out of orange color and that's why. :)


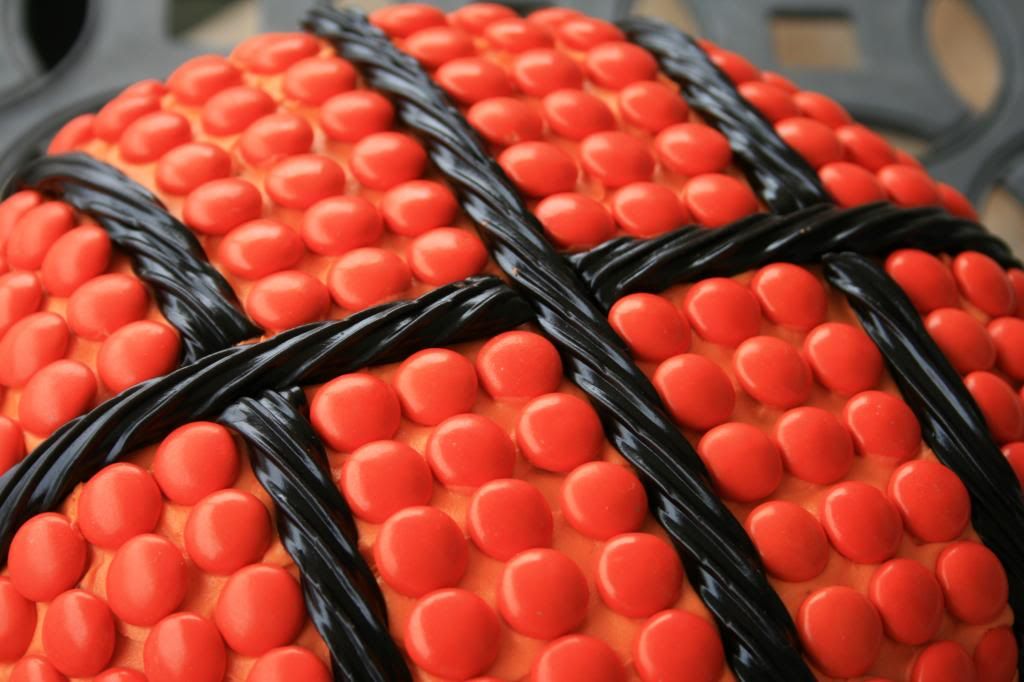
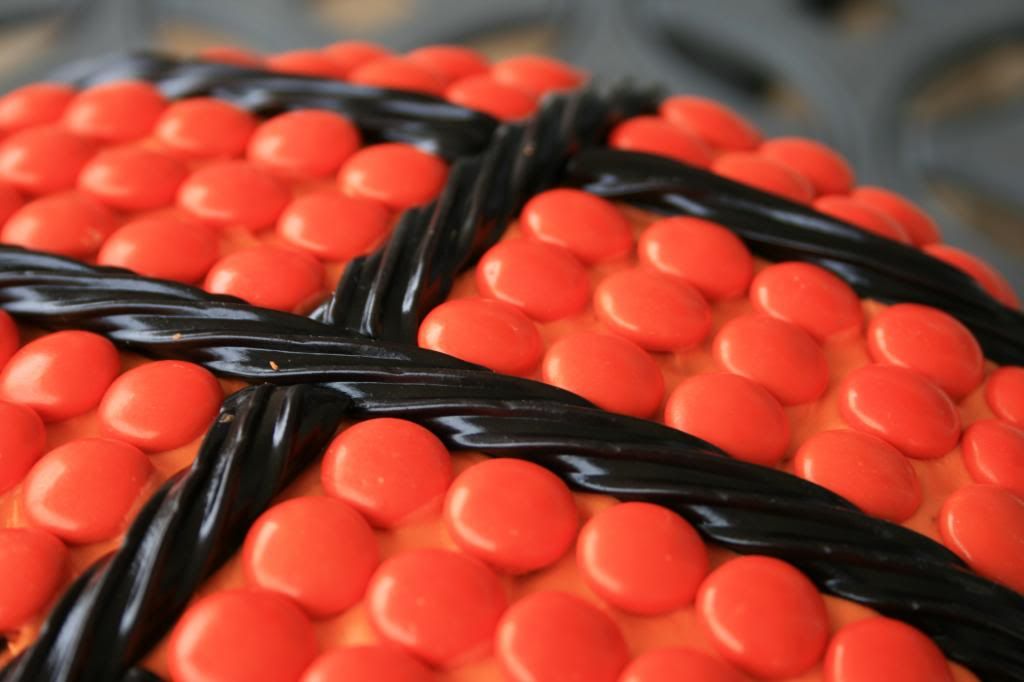
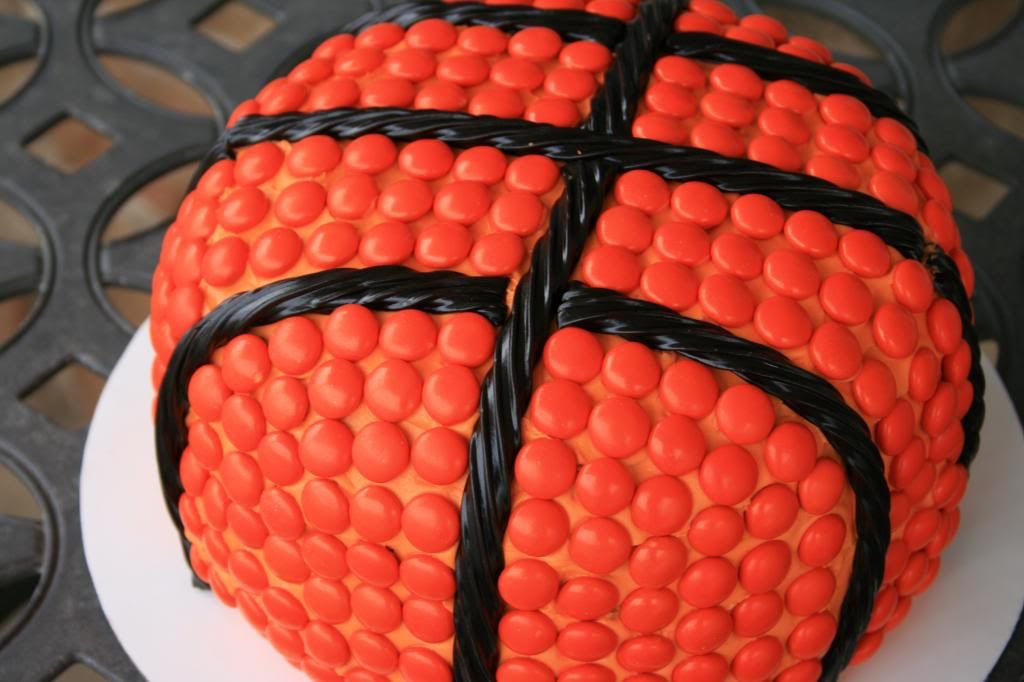
Once you do that, take plain twizzler black licorice for the stripes and lay one across the middle of the cake. You will have to use more than 1 rope for each line. Try to connect them away from the bends because they tried to stick up on me and wouldn't stay bent how I wanted them to. 
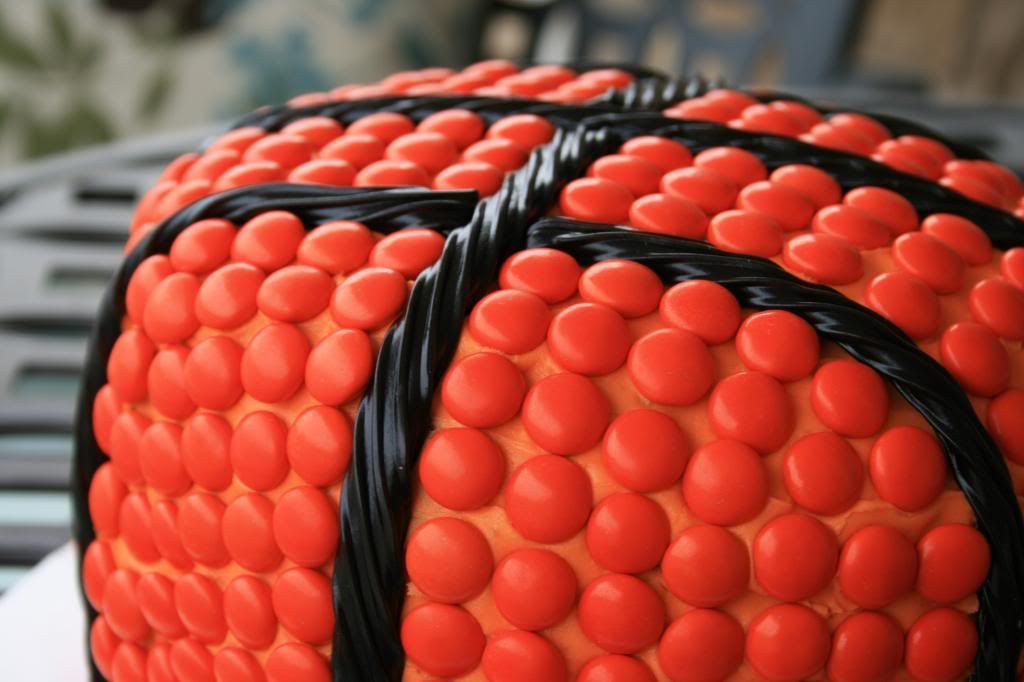
Lay a rope perpendicular to the one you just laid (see pictures) and you can just start them right on each side of the first one (make sense?). 


Then take about 3 orange m&ms- you can get plain orange m&ms at certain party stores. I went to Zurchers- and lay them down (with the m&m brand facing down) starting at the corner of the licorice on each side (again see picture). Do about 2 rows. You want them to be as close as possible. It looks better. Laying the 3 m&ms down helps you measure where your outer licorice lines should go. Now lay down your last outside licorice lines. To get a bit of a rounder effect, curve the licorice at the bottom back towards your main middle line just a little bit (see picture- right licorice is curved in a little).

Voila! And there you have it. These are not difficult to make but do take a little bit of time and dexterity since you have to place each m&m.


I want to say I used about 12-16 oz of m&ms by weight to cover these 2 cakes and 1 package of black licorice (I think! I forgot to write it down so if it just doesn't seem right when you are buying the m&ms, go with your gut. Extra m&ms never hurt anyone. That was my philosophy). I bought way too many m&ms so now  extras are sitting in a dish on my desk waiting for on-lookers to come and eat them. They are sitting right next to the new Sherbert Oreos I had to get for my work people because they looked weird... yeah, they're pretty sweet (as in sugary... not awesome). Not my favorite. Other people liked them though..... tangent.
If you really want to know how many I used... you could count the m&ms on the cake. =D


Anyway, they were a big hit! So fun. Try them out for your next sports party!


Tuesday, November 13, 2012

Buttercream Rose Cake

If you are looking for an elegant yet super easy cake, you really need to consider a rose cake.
This cake takes less than 5 minutes to decorate.... seriously.


I made this cake for my grandfather's 80th birthday party.
It is an 8 inch double layer spice cake with vanilla buttercream frosting.
Did I mention this is my favorite cake flavor combo EVER?
{It also happens to be my wedding cake flavors.... fancy that.}
You will have to forgive me for not posting a spice cake recipe. The balance of spices in a spice cake is so vital that, alas, I am still working on finding the perfect balance. 
You may find a delicious vanilla buttercream recipe HERE (keeping in mind the substitutions below).
When making your buttercream, if you want a very white icing then make sure you use clear vanilla extract as well as a pure white/clear shortening with or without some clear butter flavoring. Don't use butter because it will make the buttercream yellowish. I completely forgot to use clear vanilla so I got an off-white cake as you can see. It looked really cute but if I needed to have a white cake, that would have ruined my next 15 minutes (then I would have gotten over it), but still!


To get this look you just start with a cake that has a crumb coat and use a 1M star tip 
{The same kind you use for those swirly cupcakes}.
To make an individual rose you just start in the middle and circle around about 2 times and then release and drag the tail around to hide it. 
To make this cake you just do the rose over and over again all over the cake. There is really no science to it other than making sure your size of roses will fit the cake well. 
This also takes a lot of frosting so make more than you think you need and save the extras.
I actually ran out before I could do all my finishing touches but it turned out great still.


After you are done doing roses on the top and sides of the cake, sprinkle the cake with a few silver dragees to give it an extra special touch. Don't worry, they are edible! They really finish off the whole look quite nicely me thinks.


Again, this is really fast and easy after a few practice swirls. You can definitely do it!
Look how great it looks at the end!
One of these days I need to do a tiered cake with roses.
I think it is simply beautiful. 

Saturday, October 13, 2012

Chocolate Ganache Cake with Raspberry Filling... and Some Strawberries on Top.

This here is a rich chocolate cake with raspberry filling covered in a dark chocolate whipped ganache and topped with fresh strawberries.


My friend, Marci, wanted me to replicate her wedding cake for her anniversary. She and her husband never got to eat their wedding cake due to a fun family tradition.... actually it's probably closer to a bitter family rivalry. ;D
He continues to speak of it to this day so she decided it was finally time to give him a taste of his own wedding cake.
So I did my best.

Here she be.

It looked so tasty...
These pictures don't do it justice.
I impressed myself.
I was tempted to sneak a piece. I doubt they would have noticed.

This cake was simple to make. Make your chocolate cake in 8 or 9 inch round pans. Tort your 2 layers so that you now have 4 layers. Place a layer on your cake board (using a bit of ganache to glue it down) and pipe a chocolate ganache dam around the whole edge. I whipped my ganache after cooling it down in the refrigerator to make it more of a buttercream frosting consistency but you can leave the ganache smooth and silky too (it makes the dam a bit more difficult though). For the raspberry filling, you can make your own or you can use a store bought jam of your favorite kind. I was going to attempt a home made raspberry filling (never done it before) but just ran out of time so I used Smuckers Simply Fruit Red Raspberry. It's the only kind of jam my husband will eat so I figure it must be pretty good. Spread the amount of raspberry filling you would like inside the dam. This amount is a personal decision. Add what feels right and not a bit more. :)
Place another layer on top and repeat until you have placed your last layer on top. Cover the whole cake in the ganache. While the ganache is still wet, place your curls on the cake (see below how to make the curls). If your ganache is dried already, no problem, just dab a little fresh ganache on the curl before sticking it to the cake. Use a skewer to transfer the chocolate curls around instead of touching them directly. The heat from your fingers will melt the chocolate and make a gooey mess.


See those cute little chocolate curls? They were almost the death of me. Either I am just not at all skilled in this area or these are actually really hard to make. These aren't even the chocolate curls I was going for! I wanted some big curls and this is the best I could muster.
{At least they were pretty cute too}
Here is what I did to get these curls. {I will work on getting the bigger curls another day}.
You take 3 oz of semi-sweet chocolate chips and add a tablespoon of shortening. Microwave just enough to melt the chips. Stir until smooth. Spread the melt onto the back of a flat cookie sheet and, using an offset spatula, spread as thin as possible. {You can spread an entire side of a cookie sheet with the 3 oz.}
Allow the chocolate to harden a bit. Depending on the temperature of your kitchen, you may need to put it in the fridge (I did). Once the chocolate is kind of dry to the touch but not super hard, try scraping off a curl using a flat utensil. I used a brownie cutter/server and it seemed to be a good size.
Press down hard and push forward while providing continuous pressure. If it curls... awesome! Stop when you have the size of curl you want. If it breaks in small pieces then your chocolate is too hard and needs to warm up a tiny bit. You can do this on the counter if it is warm or in a low temp oven. If it scrapes off but isn't curling, it is too soft. Cool it down a bit somehow (fridge for me).
Be careful, these curls are fragile. As you make your curls you may want to keep them refrigerated so they don't melt. Use toothpicks/skewers to move them around.
I struggled a bit with just getting these so I will be looking into this and practicing different methods in the future. I definitely hope there is a better one out there.


Last step:
Pile some strawberries on top. Voila!
Magnifico!
It turned out pretty dang irresistible looking and the recipients gave their approval.
This would also make an absolutely fabulous Valentine's treat.... how romaaantic. Awww... <3

Chocolate Cake and Ganache Recipe HERE

Sunday, September 23, 2012

Felicia's Sweet Crepes

Crepes are one of those amazingly delicious comfort foods that you really could eat any day of the week. For me it all started as far back as I can remember.


Crepes were our family's Christmas comfort food. Add in some maple sausage, bacon and hot chocolate and you got yourself a feast for the finest on such a special day. Combined with the magical feeling of family and Christmas, nothing gets better. Really. :)


 As of late, my grandma (Felicia as my grandpa would call her) has passed on the responsibilities to me to make the Christmas crepes for the family. You have to have the right recipe, the right pan and the right utensils plus you have to store them in the right way so they stay warm.
She taught me well.
And now I will share this with you.


I have tested other crepe recipes and settled on the fact that my grandma's are still my favorite. Maybe it's because they are the ones I grew up with. Or maybe they really are the best. Either way....they are fabulous and surely worth your time.


So here it is:
1- You need a flat griddle. I just bought a new one to claim as 'my crepe griddle'.
I bought the Nordic Ware Reversible Round Griddle (at Target for about $30) and I absolutely love it. It flips over and you can use it as a grill on your stove top because it has deep grill grooves on the opposite side of the flat griddle. Multi-taskers are the best plus it's non-stick. L-L-Love.
{You should see my grandma's. It looks like it is over a hundred years old and crossed the plains with our ancestors. Maybe it did. I claimed it as a part of my inheritance.}
2- You also need a ladle. If you want to use one of those fancy crepe trowels then go for it but it is not necessary.


The process:
You blend your ingredients in a blender. Check.
Put batter into a bowl. Check.
Use ladle to pour batter onto a hot griddle (my griddle was nonstick so I didn't even have to spray it or anything!). Check.
Use bottom of ladle to swirl the batter into a thin round crepe. Check.
Pour yourself a glass of OJ. Tick. Tock. Tick. Tock. (about 30 seconds)
Release edge of entire crepe using a hard plastic spatula and flip.
Tick. Tock. (about 10 seconds)
Taste test for quality assurance purposes.
Repeat above steps.
Flip onto plate and roll crepe. Check.
Store in casserole dish to keep warm.
Share.
Decorate. 
Eat.
 Enjoy.
BAM!

Thaaaaat's about it.
Yeah, I thought there were more secrets too...
The secret must be love. Awwwwww.
Crepes are actually really easy to make (no secrets about that). So give 'er a try.

And seriously, these crepes are so tasty just by themselves that you won't be able to help but perform a little quality control frequently as you are making them.


Crepes are also so fun because they are French! And who doesn't like to enjoy a little Frenchiness in their life every once in a while. I personally love France. My high school report card says I should speak French but that was a long time ago so now I will hang onto my love of French things by diving into the culture, making French foods and saying "Mais oui" for the fun of it. 
Lately I have been trying my hand at some French foods and desserts {that I will be posting about shortly} and it has been a really fun change to the normal cake pops, cookies, brownies and cakes. I am loving it! So much that maybe, just maybe, I'll have to dust off that old French book of mine and brush up on it just because I can.


Crepes are sweet and tender but most of all, they are part of a wonderful tradition that brings back warm memories. I named these crepes "Felicia's Sweet Crepes" because my grandma's name 'Felicia' comes from the Latin word for 'happy things' and these crepes have definitely created many happy memories.
Start some traditions and share some memories with your family using this recipe.

Felicia’s Sweet Crepes

6 eggs
2 cups milk
1 ½ cups flour
¼ cup sugar
¼ tsp salt
½ tsp vanilla

Combine all ingredients in a bowl and beat until smooth.
Heat a round griddle until hot- stove tops will vary but mine is usually set right below medium.
Brush with butter if not using a non-stick griddle.
Dip ladle into batter and pour into the middle of the griddle. :) Adjust amount as necessary.
Quickly swirl mixture with bottom of ladle and spread batter into a very thin round crepe. If you accidentally created some bare spots while swirling just fill them with a small amount of batter.
Watch carefully lifting edge of crepe to see if it has browned to a light brown color.
Slide spatula under edge of entire crepe to release edge and then slide to the center. Flip crepe. Let this side brown for another 10 seconds or so until just starting to get brown spots. This side will not brown like the top.
When done, remove crepe to dinner plate and roll up (or wedge) and put in a covered casserole to keep warm. Place towel on top to keep heat in. Serve with anything. My personal favorite is powdered sugar.
Suggestions: powdered sugar, fruit, nutella, maple syrup, breakfast meats and/or eggs, sandwich fixings, brown sugar and butter, etc. The options are endless. May be eaten as a sweet dessert or as a savory snack.

If you are looking for a more savory taste to your crepes, I found this next recipe was good as well.

Savory Crepes
Yields: 8 crepes             

Ingredients:
2 eggs
1 cup milk
2/3 cup all-purpose flour
1 pinch salt
1 1/2 teaspoons vegetable oil

In a blender combine eggs, milk, flour, salt and oil. Process until smooth. Cover and refrigerate 1 hour. Heat a skillet over medium-high heat and brush with oil. Pour 1/4 cup of crepe batter into pan, tilting to completely coat the surface of the pan. Cook 2 to 5 minutes, turning once, until golden. Repeat with remaining batter.

Wednesday, May 23, 2012

Graduation Desserts {Cupcakes, Cake Pops, Candy}

 IT'S GRADUATION TIME!!
WAHOO!!!!
Congratulations to all you graduates out there! Way to go!
It seems like just yesterday that I was walking across the stage to collect my own diploma before getting sprayed with silly string. Oh the memories.
Those were good times and now those good times are all for you.
So, why don't you reward yourself for all that hard work with a little somethin' somethin' that was perfectly designed for YOU!
Graduation desserts of course!
These desserts are sure to start your new life of freedom off with a BANG!

First Up:
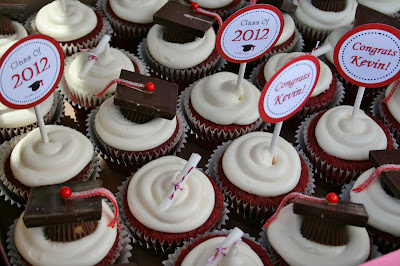
Graduation Cupcakes!

We grab our graduation cap, our diploma, throw in a few cupcake toppers and we are set for a Graduation Partay like no other!


Super Cute. Super Easy.


So to make the little graduation caps you are going to need some chocolate squares (Ghirardelli filled squares), mini Reese's peanut butter cups, small roundish candies (mini m&m or sixlets), some red Ripp Rolls or other stringy candy and some melting chocolate wafers.
First cut your Ripp Rolls into long thin tassles however long you want them to be. You can "fray" the end of the Ripp Rolls quite easily by pulling apart the little ribs for an extra cute touch. Unwrap all of your chocolate candies. You may want to refrigerate or freeze them for a short time so the wrappers don't rip the sides of the chocolate off of the candy. Melt some wafers in the microwave in a good ziplock baggie until just melted. Snip off a small tip of the corner. Place some of the melted chocolate on the bottom of the Reese's cup then place the chocolate square upside-down on top (so there is no writing on the top) and press firmly but gently. Repeat and allow all to dry. If the chocolate is clogging up the tip then just microwave it for a few seconds to remelt the chocolate. Use the chocolate melt to draw a thin line from the center of the chocolate square to the edge. Place the small candy in the center and lay the candy tassle along the line and allow to hang over the edge {Take a look at the pic}.
These are pretty heavy so I would wait until you are at the event to put them on the cupcake if you want to transport them. They may slide or shift on the frosting while transporting.


I make my cupcake toppers on Microsoft Publisher. I made the template a while back and now all I need to do is just change up the colors and details and voila! Instant deco.
I use a 2 inch round punch for the circles. All the other details are printed on the cardstock.
After I print out a sheet of these circles and punch them out, I attach them to lollipop sticks with a small round sticker on the back. You can just use tape (no one looks at the back!)
Then just insert into the middle of the cupcake!
If you have a lid that is going to go on top of your cupcake carrier box then you might want to wait to put the toppers in the cupcake until you set them up at the event so they don't get smashed.
{Would it be useful if I made a windows publisher cupcake topper tutorial?}


Look at these cute little diplomas! These are my favorite little topper for the cupcakes.
These were also super easy to make! Surprise!


Get a sheet of parchment paper (I use sheet pan sized pre-cut parchment paper sheets because it makes me feel rich when I use them and it makes things go faster and easier.) Cut the sheet into little rectangles with the width being however long you want your diplomas. Don't worry about them being perfectly straight. You won't even notice any problems when you roll them up. My rectangles were about 2" x 3".
 So here is a tip that made my life easier once I discovered this. If you cut your rectangels so that one side is slightly narrower than the other and you start rolling with the slightly longer side, you can grip the diploma much better to roll it into its tube. I really can't explain much better than that without actually showing you. Give it a try. Hopefully it makes sense. :)
Once you roll it small enough, use a long enough piece of tape to go all the way around the diploma. Tape does not stick to parchment paper so you have to put the tape all the way around to the other side where the tape is. Secure tape to tape.


Once you have all of your little diplomas rolled and taped, tie a small piece of twine or string around them. Then place them on your cupcake. So perfect!!


HERE is the recipe for my delicious red velvet cupcakes.
 As you can see, I placed my cooked cupcakes inside these red tinfoil liners.

I love them. Do it.


 So there really isn't anything quite like a delicious Pirouline.... hazelnut specifically.
They are so rich and delicious, I would not mind getting these every Christmas. =D
Don't they just look like little diplomas?!
 
 
Just tie some twine on each Pirouline and you got a diploma.
Easiest (and cheapest) diploma you will ever earn. Guaranteed.


Mmmm.......ghhhaaa.....are you drooling yet?


These were also one of my favorites of the spread. So tasty. So cute.

.
The graduee, Kevin, had some of my Rock Pops back from THIS post and had to have them for his graduation party and so a "Spark of Genius" cake pop was born just in time for graduation.
{Check out the link for a tutorial}


I used watermelon pop rocks....funny, they came in a green pouch.
It worked out because the theme color was red.
Yes, they pop in your mouth and not in the chocolate. :)
{I think there must be some chemical reaction going on because the pop rocks seem more ferocious and explosive when on a cake pop....dunno. Eat at your own risk. Ha.}


 Along with some delicious baked goods we had some red themed candy.

 Kevin loves cinnamon flavored candy so of course some Hot Tamales were in order along with some chocolate covered pomegranate seeds and red vines.


 And the table.


I didn't make these cute favors but wanted to include them in this post because they were so fun.
 These are mini Hershey bars wrapped in custom wrappers and topped with a custom tag.


Here is the other side. Cute huh!?

 
 I also did not do these beverage covers but they look so great!


Congratulations Kevin!
Thanks for letting me do your graduation desserts!
It was a blast!


 Again, Congrats everyone who graduated!
Now go somewhere and make a difference!