Sunday, January 22, 2012

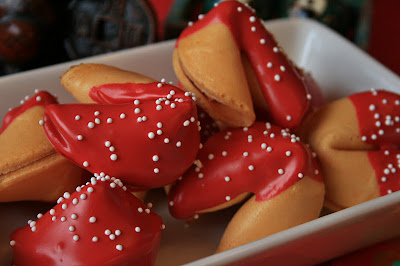
Dipped Fortune Cookies for Chinese New Year!

Happy Chinese New Year!!
Here's a little treat for you for your celebration.


It's the year of the Dragon, so crack open a cookie and see what good fortune the new year will bring you.


To make these fun fortunes, just snag yourself a handful of fortune cookies at your local grocery store (from the oriental food section) along with some red melting wafers and sprinkles (you might have to get these at a craft store). Melt your red wafers in a microwave safe cup and dip half your cookie and place on some parchment paper to dry. Sprinkle with some fun sprinkles before the vanilla melt sets up. Enjoy.
Go get your Dragon on!
 

Monday, January 16, 2012

The Best Gummy Bears

Ok. Yes, you read it right.
This post is on The Best Gummy Bears.

Are you a fan of gummy bears?
Because if you're not, you might be eating (or not eating I guess) the wrong ones.

The Best Gummy Bears


Haribo Gold-Bears

They taste so flavorfully fruity and delicious. They are addicting!
Seriously, go try them. Give 'em another shot.
Once you do, you will start looking for reasons to use them.
Put them in an apothecary jar on your next dessert table.
Put them out as part of your ice cream bar.
Put them in your movie goodie bag.
Make cute little gifts for your kid's friends.

Mmmmm....

Sunday, January 15, 2012

German Chocolate Cake

Dies ist ein dang guter Kuchen!
{Translation from German: This is one dang good cake!


We have a winner folks. This will definitely be getting posted to the "favorites" page.
I made a German Chocolate birthday cake for one of my family peeps and all who tasted it, raved about it.... all except the 5 year old, but that's ok. We'll let it slide this time.


I learned a bunch of new techniques while preparing this cake and honestly it was very easy to do, however, it does take a long time. This here is a 4 hour cake, my friends.
{I felt pretty good about making it in 4 hours since the recipe said it would take closer to 5 ;D }
Making this cake was full of a lot of firsts for me.
First time toasting coconut and pecans.
First time using a cake level.
First time using baker's chocolate.
First time using a simple syrup.
It was great! And, again, so easy!


German Chocolate Cake
Yields: four 8-inch round cake layers; about 16 servings
(or two 4-inch round cake layers, two 8-inch round cake layers and 12 cupcakes.)
For the cake:
 2 ounces semisweet chocolate, chopped (I used baker's chocolate)
 2 ounces unsweetened chocolate, chopped (I used baker's chocolate)
 6 tablespoons water
 8 ounces (2 sticks) unsalted butter, softened
 1 ¼ cup + ¼ cup sugar
 4 large eggs, separated
 2 cups all-purpose flour
 1 teaspoon baking powder
 1 teaspoon baking soda
 ½ teaspoon salt
 1 cup buttermilk, at room temperature
 1 teaspoon vanilla extract

For the filling:
 1 cup heavy cream
 1 cup sugar
 3 large egg yolks
 6 Tbsp (3 ounces) butter, cut into smallish pieces
 ½ teaspoon salt
 1 cup pecans, toasted and finely chopped (haha....don't forget to chop them)
 1 1/3 cups coconut (unsweetened or sweetened) toasted

For the syrup:
 1 cup water
 ¾ cup sugar
 3 teaspoons rum extract
{This makes quite a bit and you definitely won't use all of it so you could only make half or just save half in another container for later use. I would separate it before you use it on the cake so you don't get crumbs in it.}


For the chocolate ganache:
 8 ounces semisweet chocolate, chopped
 2 tablespoons light corn syrup (to make it shiny and pretty)
 1 ½ ounces unsalted butter
 1 cup heavy cream

{Adapted from David Lebovitz's Recipe}
Make your cake:
1. Prepare your cake pans with non-stick spray and/or line the bottoms with rounds of parchment paper. I just used non-stick spray and the cakes slid right out. Preheat the oven to 350°.
2. Melt both chocolates together with the 6 tablespoons of water. Use either a double-boiler or a microwave. {I use the microwave} Stir until smooth, then set aside until room temperature.

Wait a second... what is this "baking chocolate" you speak of?
Baking chocolate is simply cooled and hardened chocolate liquer (mixed with some fat, often lecithin, to produce a solid) that may or may not have added sugar, lecithin, and vanilla (giving the different "bittersweet", "semisweet" and other types of baking chocolate.) It contains 50-58% cocoa butter. Traditionally it is not sweetend with any sugar so it may also be known as "unsweetened chocolate", or "cooking chocolate". Hmmm.... interesting.

The coolest thing about baker's chocolate is that it comes individually wrapped in 1 ounce portions.
I thought this was awesome!

3. In the bowl of an electric mixer, beat the butter and 1 ¼ cups of the sugar until light and fluffy, about 3 minutes. Beat in the melted chocolate, then the egg yolks, one at a time.
4. Mix together the flour, baking powder, baking soda, and salt. (P.S....I never sift)
5. Mix half of the dry ingredients into the creamed butter mixture, then the buttermilk and the vanilla extract, then the rest of the dry ingredients.
6. In a separate metal or glass bowl, beat the egg whites until they hold soft, droopy peaks.  I use a hand mixer. Beat in the ¼ cup of sugar until stiff peaks form (peak of mixture stands straight up without bending/curling).
7. Fold about one-third of the egg whites into the cake batter to lighten it, then fold in the remaining egg whites just until there’s no trace of egg white visible.
8. Divide the batter into the prepared cake pans (or cupcake tins) filling about half full, smooth the tops with a little shake or tap on the counter, and bake for about 45 minutes for 8 or 9-inch pans, 20 minutes for 4-inch pans and about 15 minutes for regular cupcakes. As always, test using a toothpick inserted into the center. It should come out clean. You may have noticed I often like to very slightly "undercook" my cakes so they finish cooking on the counter to ensure moistness but this cake will have so much moisture added that you don't really need to worry about the slight undercooking. Cool cake layers completely.
While the cakes are baking and cooling, make the filling, syrup, and ganache icing.
To make the filling:
1. Toast the coconut flakes and pecans by placing on a cookie sheet (I put them on the same tray) and bake at 350 degrees. (By-the-by, I used sweetened coconut because I couldn't find unsweetened. I really don't think it made a difference) Bake the pecans until they become aromatic, about 5 minutes. Toast the coconut until all is light brown, about 8 minutes. Stir them to prevent burning and get even browing. I removed the pecans before the coconut was done. All ovens are different so go by the smell and color more than the time. The aroma of coconut may make it a little harder to smell the pecans so pay attention and don’t scorch them. Once done, allow them to cool on the baking sheet.

Sorry about the awesome gold hue, these pictures were taken quickly
and at night....I shoud look into that
2. Mix the cream, sugar, and egg yolks in a medium saucepan. Put the butter pieces, salt, toasted coconut and pecan pieces in a medium bowl.
3. Heat the cream mixture and cook, stirring constantly until the mixture begins to thicken and coats the spoon (a candy thermometer will read about 175°.)
4. Pour the hot custard immediately into the pecan-coconut mixture and stir until the butter is melted. Cool completely to room temperature. (It will thicken.) Yeah....so I forgot to chop my pecans before pouring the custard into them. I just spread it all out on an old baking sheet and chopped them in the goo. It worked out just fine. 

To make the syrup:
1. In a small saucepan, heat the sugar and water until the sugar has melted. Remove from heat and stir in the rum extract.

To make the ganache icing:
To be perfectly honest, I was so confused about the concept of "ganache". I did know it was basically hot cream poured over chocolate. However, I thought it was supposed to be really thin and runny so you could dip things in it or pour it over goods but then I saw it used on desserts where it wasn't runny....I was just befuddled by the whole situation. After doing this cake I had a sort of "ah ha" moment. It came when I stuck my ganache in the fridge and it changed consistency... I feel kind of stupid for not realizing it before but apparently ganache can really be any consistency depending on how you treat it.... the temperature you use it at and how much cream you put in it. If you want a runny ganache.... add more cream or use it warm. If you want a really thick yummy rich ganache (but still soft) like the one in this recipe, "fridge it" to a spreadable consistency. If you want it fluffy like a frosting then once it is cool, just whip it! If you want it fudge like.... add a little less cream. Ah ha! It all makes sense now! I am going to experiment with this in the future because I likes me some ganache. :)

{FYI: Ganache is the French word for a mixture of equal parts (by weight) of heavy cream and chocolate. This results in a pourable ganache that will stay very soft when set. Adjust your consistency according to this reference.}
1. Place the 8 ounces of chopped chocolate in a bowl with the corn syrup and 1 ½ ounces of butter.
2. Heat the cream until it just begins to boil using the microwave or stove. Remove from heat and pour over the chocolate. Let stand about a minute then stir until smooth. I recommend putting it in the fridge to help it thicken quicker, however, don’t leave it in so long that it turns almost solid (this one will). Keep an eye on it and take it out of the fridge once it is at spreadable consistency. It will take a very long time and may not even thicken enough at room temperature…. Don’t know. I didn’t wait long enough to see...
To assemble the cake:
Remove the cake layers from the pans and cut cake layers in half horizontally. This is called "torting". I used a cake level for the first time and LOVE it. It was so nice and easy to make even layers. Having even layers is great for making sure your stack of cake doesn’t start leaning or become lopsided.
This is the one I used. I am sure any kind would work and it was only a few bucks.


Set the first cake layer on a cake board. Brush well with syrup along the top and sides. Don’t worry too much about making the cake soggy. A good slathering will be fine. I recommend using a brush that is only used for desserts (or at least a silicone one that is easily washed) so your chocolate cake doesn’t taste like the garlic marinade you used for dinner yesterday.

Spread ¾ cup of the coconut filling over the cake layer, making sure to reach to the edges. Set another cake layer on top.


Repeat, using the syrup to brush each cake layer, then spreading ¾ cup of the coconut filling over each layer, including the top.


{I used two 4-inch round cake layers and torted them just in half to make the cake above}


{For the above cake, I used one 8-inch round cake torted in half}

To make the cupcakes, cut a cone shape out of the top of the cooled cupcake and eat the scrap for quality assurance purposes. Repeat for all cupcakes. Continue quality assurance monitoring as long as necessary. Save the rest of the samples in a baggie for later. Brush the entire top of the cupcake and inside the hole with the rum syrup. Spoon in the pecan/coconut mixture until it reaches the top. You can even make it look similar to the cakes by covering the whole top of the cupcake if you want.


Using a large spatula, ice the sides of the cake with the chocolate icing. When I was ready to ice the cake, my ganache was at the perfect consistency having put it in the fridge. Pipe a decorative border of chocolate icing around the top, encircling the coconut topping. Use whatever tip you want. I used a medium sized star tip.


I used the same piping tip to do the decorative borders shown above and below.


The chocolate ganache is absolutely delicious on this cake and I recommend using a bunch! Use all of it, however, if you do have more than you want, drizzling it over some yummy vanilla bean ice cream is always advised. Mmmm....

For the cupcakes, I used the same tip and just did a swirly S-shaped design along the border of the cupcake. Cute!

So as I said before, I made a tall 4-inch cake, an 8-inch cake and 12 cupcakes. I knew this recipe was a success when I came home from work the next day and all but 2 cupcakes were MIA .... due to 1 person.... over 1 day.... I just couldn't do it.


Enjoy.

Friday, January 13, 2012

Black and White Cake Balls

Love Black and White cookies?
Well, here is a great twist for you!
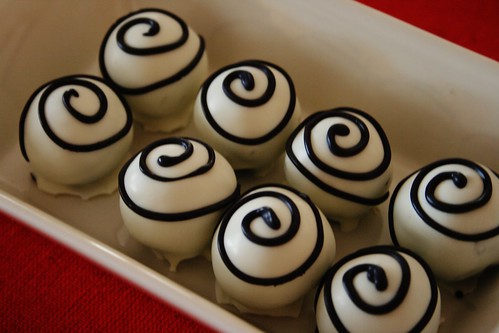
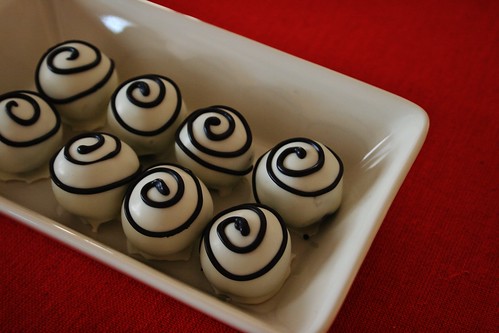
Black and White cake balls!

IMG_6798

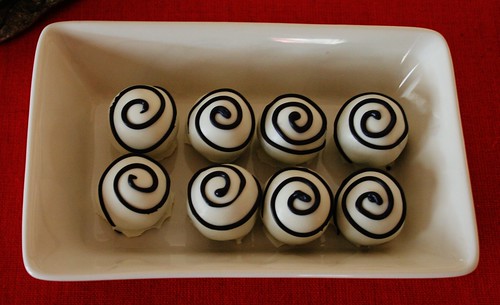
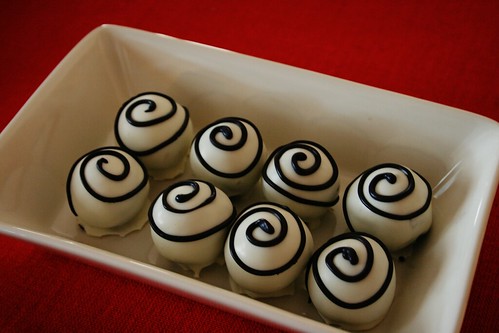
These are made of a simple chocolate cake mixed with chocolate frosting and
 dipped in vanilla candy coating, swirled with black vanilla.

IMG_6787

Yes, I will admit this is another Christmas post. The last one though!
I made these for a cookie exchange for someone. When she first approached me with the idea of taking cake balls to a cookie exchange last year, I thought it was such a fun way to jazz it up a bit.
These are cute little black and white ornaments.

IMG_6796

I actually really liked another design I did with these (but forgot to take a picture... doh!)
Use the black vanilla and do a tight back and forth drizzle only on one side.
It really makes it look like a "black and white cookie" theme.
Another option is to dip in all white and let dry, then dip the whole other side in black vanilla, then it would pretty much look identical to a black and white cookie!

IMG_6794

Maybe you should just have fun and do all the designs....

Check out this post to learn how to dip and decorate these babies.
These were amazingly tasty! Give them a try!
Enjoy.
{P.S. I will be posting my chocolate cake recipe online very shortly}

Thursday, January 12, 2012

How to Dip Cake Balls, Cake Pops and Truffles

Here is a straight forward guide on how to dip cake balls, cake pops and truffles as pictured below.


First, you need the stuff.
1} Chocolate or Vanilla Melts/Wafers
There are two different methods you can use to prepare your chocolate for dipping.
1- Use pure chocolate and temper it (that's another post) or
2- Use a chocolate coating or "melting wafer"
The pure chocolate, as you can imagine, is going to taste better but takes much more time and talent than using chocolate coating. Chocolate coating still tastes good and this is my preferred method at this time.
I use Guittard Vanilla A'Peels or Guittard dark or milk chocolate wafers for all my dippins. I buy these at my local commercial baking supply store that is open to the public. {Orson Gygis} You can also buy them online at a variety of vendors.
You can use any "melting" candy/wafer and it will work too but I have tried different kinds and the Guittard are my favorite because they are high quality, melt thinner and have a really good taste. The Wilton Candy Melts are still quite thick when they are melted and this results in a thicker shell, which I (and many taste testers) do not find desirable. The best part is that you can buy the Guittard melts in bulk (5-10 lb bags) and they can even be cheaper than the Wilton product. Good deal! Either way I would still use the Guittard. In a pinch, Wilton would do.
So, how are melting wafers different than chocolate?
Melting wafers are not actually chocolate.... yeah, disappointing huh? It is actually a vegetable fat-based coating with added flavorings and ingredients. This fat bas allows it to be melted easily without the temperament of real chocolate. The good part is that it can actually taste pretty good for not being real chocolate and it is much more fool-proof. They even come in a variety of colors.
So, now that you know about the chocolate (or vanilla)...
2} Melting the Chocolate
There are a few key fundamentals to understand to melt your chocolate successfully.
First, melt slowly over low heat. Chocolate can scorch easily if you heat it too fast and too hot. After being scorched, the chocolate may taste just fine but it will not look as beautiful as you would have liked. It will have streaks or patches of light color throughout the chocolate once it dries because the chocolate and butter fat separates when heated too much.... not the effect we are usually going for.
You can use a double boiler (keeping in mind the next tip) or you can use the microwave.
Heat just until most of the candy is melted, stirring constantly if you are using a double boiler or stirring every 20 seconds or so if using the microwave. When using the double boiler, heat your water to boiling, remove from heat and then place your top pan of chocolate on the water pan. If you keep your double boiler on the heat while you are melting your chocolate you have a much higher likelihood of getting moisture into your chocolate, which leads to our next tip.... 
Second, NEVER allow water/ moisture into the chocolate. It will seize and look unappealing if you can even continue using it.
What is seizing?
A little background first.... During the refining of cocoa beans into chocolate, all of the moisture is removed resulting in an essentially dry final product. It is actually considered a "dry" ingredient (kind of weird). When you take a dry ingredient and throw just a little bit of moisture into it, I bet you know what happens. It clumps up. When this happens to chocolate, the moisture is causing the sugar in the chocolate product to clump and we call it "seizing".
Therefore, seizing occurs when a small amount of moisture is introduced into the chocolate resulting in grainy, nasty, lumpy quasi-chocolate goo.
Try it with your kids! It's a science experiment bound for a blue ribbon!
However, if seizing does occur, DO NOT THROW IT AWAY! You can still use it but not for dipping anymore. It can make a great ganache if you just add some hot cream to it!
3} Coloring Your Vanilla or Chocolate {Optional}
You really don't want to try coloring brown chocolate....but white chocolate (and of course vanilla) is definitely doable. You can color your vanilla ANY color you want! This comes in handy when you have themed events or just want to have fun.
Referring back to tip #2, you should only use oil-based food coloring. You already know what will happen if you use the water-based food coloring. Oil-based coloring is often called "Candy Coloring" while the water-based coloring is often called "Icing Coloring". Keep in mind that this can be brand specific so always look for the "oil" or "water" labeling.
When using a custom colored coating, it's better to make more than you need and save the rest than try to match the exact same color again after you run short. So make a bit more and you can use the extra on another project or even just for drizzling.
Add a little at first to know how dark your color will be then add more as necessary, stirring the color in thoroughly every time.
4} Preparing Your Cake Ball for Dipping
If you dip a freezing cold cake ball into hot chocolate (...not real "hot chocolate"....you know what I mean!) it will only result in tears.... and maybe a few cake balls on your wall (or through it depending on how cold they were and how good your fast-pitch is).
Another physics lesson... As hot things cool, they contract and as cool things heat up, they expand. Therefore, if you have a cold cake ball dipped in warm chocolate, as these both come to room temperature the cake ball is going to expand (busting open your candy coating) and your coating is going to contract or shrink (again, busting your coating) resulting in big cracks.
Therefore, bring your cake balls and chocolate as close to room temperature as possible before dipping.
5} Dipping Your Cake Balls
There are a lot of ways to dip cake balls.
A} The simplest way is to dip and set on a baking sheet. Get a baking sheet ready by lining it with parchment paper. Have your melted chocolate ready to go and get a dipping tool. You can buy a dipping tool or make your own. I personally prefer the 2 prong store-bought kind because it has thinner prongs but they both work fine.

As such:

I just had a prong snap off so next time I will be investing in a metal one.
To make your own, just snap off the two middle prongs of a plastic fork. Voila.
Throw (gently) your cake ball into your melted chocolate. Make sure it is completely coated and then lift it out using the dipping tool. Don't stab it.... have the cake ball sit on top of the tool. Allow the excess chocolate to drip off and then lightly scrape the bottom of the cake ball against the rim of the bowl to take off a little more excess. Set it on your baking sheet and drag the tool out from underneath the cake ball. Yum. If you have crumbs on your dipping tool, wipe those off on a dampened towel before moving on. You don't want crumbs getting in your chocolate.
Disclaimer: This method introduces more moisture into your chocolate than the next method. You may find that after a while your chocolate is not as thin and ribbony as it used to be. This is from the moisture in your cake ball mixing with the chocolate. If you are fast putting your cake ball in the chocolate and getting it out then it becomes less of an issue. FYI.
B} Another method that I like involves a two part process. Take a cake ball in your fingers and dip just the bottom with a very small amount of chocolate and set it on the parchment. You should not have a lot extra squishing out from underneath the chocolate. Repeat for all. Allow them to dry (fridge makes it go faster). Place the cake balls on a rack like this one or similar.

Place the rack on top of the parchment paper on the baking sheet. Using a small ladle, pour chocolate over each cake ball covering completely. Once dry, remove from the rack. Do not throw away all that chocolate on the parchment paper. It will easily slide off into a baggy or tupperware. Save it and remelt it for dipping next time. No waste!
So there you have it. That's what it takes to dip some cake balls and truffles...
...oh, but what about cake pops?
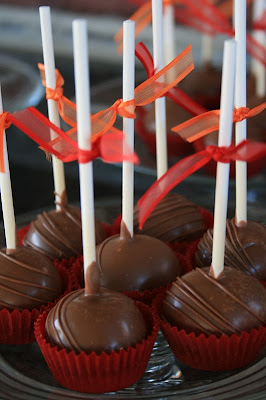
This is even simpler because you can use the stick as your dipping tool. You just dip it into the chocolate completely (make sure you cover a little bit of the stick to seal in the moisture), allow the excess to drip off, scrape the bottom lightly against the rim of the bowl and place it on parchment paper. Magnifique!


What if I want my cake pops to be completely round?
In that case, instead of placing them on parchment paper you would stick them into a foam block you can purchase at any craft store. (Just make sure it doesn't tip over because you put all the cake pops on one side) That's all. Then you have beautifully perfect little cake pops as such.


6} Decorating Your Cake Balls/Pops
There are a million and one ways to decorate your cake balls, cake pops and truffles and that's what makes these little guys so versatile! They can be gussied up for a wedding or made into cute little creatures for a birthday party.
If you want to have sprinkles (or the infamous pop rocks) on your cake pops like so

or


You just sprinkle them with your fingers after you have dipped, say, 5 of your cake balls. The chocolate needs to be wet still so they will stick.
If you want your treats to have drizzles on them...

or

Wait until the dipped chocolate is dry. In the meantime, put whatever color of melt you want (yes, you can use the same color as pictured in the chocolate cake pops above) in a good quality plastic baggie. You usually don't need a lot. Leave the top open and place inside a microwave safe bowl or cup. Microwave at 30 second intervals, squishing it up each time, until most of the candy is melted. Allow the rest to melt and zip the top closed. Create a little piping bag with the baggie by pushing all of the melt into a corner of the bag and twisting the bag just above it. With some scissors, snip off a very tiny hole in the corner. Try it out to see if it is the thickness you want. If you want it thicker, snip off a tiny bit more. Be conservative.
Once that is done, you are ready to pipe. Press on the bag with consistent pressure as you sweep the melt across the cake ball. Go back and forth across the whole cake ball. If you want to criss-cross it like above, just switch sides and do it again. As you can see, if I am doing a cake pop, I hold the pop at a bit of an angle. When I do cake balls I just go straight across the top while it is still sitting on parchment paper. Like so...


or


You can also drizzle your chocolate into a shape!


Another fun method I really like takes a steady hand or just some practice
but is so cute when it is done.


For the above, you allow your dipped chocolate to dry completely and prepare a baggie full of the same color of melt so you can pipe it. You want the size of hole to make a big enough line that the sprinkles can stick to it. Go ahead and draw your design (whatever you want!) and then sprinkle on the non-pareils. You can clean up the lines with a toothpick if there are stray non-pareils. If they look loose, go ahead and give them a gentle tap to keep them in place. These are not good for rough travel because the little non-pareils will start to pop off, so be gentle. Allow to dry.


This uses the same technique except you will use a sanding sugar instead of non-pareils giving you a completely different look! This is my favorite medium to sprinkle these designs with. Try it!
Or you can just go crazy....


But plain also looks real nice too...


If you want to add a sheen to your cake balls you can use luster dusts!


Oh, the decisions!!
Don't forget, this works for anything you want to dip..... like oreos or other cookies.


Any questions?

Wednesday, January 11, 2012

Cupcake Liners

It doesn't seem like there is much to know about cupcake liners, huh?
Well, actually there is...sort of.


Have you ever had your cupcake liners separate from your cupcake?
Ever bought some cute cupcake liners just to bake your cupcakes
and find that they look gross after actually cooking in them?!
It can be pretty frustrating.

A key quality you might want to look for, especially for patterned liners,
is to make sure it is "grease proof". It usually says right on the package front. 
This keeps the grease in the cupcake from saturating the liner and discoloring it.
This simple thing will make your liners come out looking like they did when they went in.

Now, when your cupcake liner starts separating from your cupcake, this is a result of too much moisture. Either your cake is too moist (Is this really a problem?!) or your liners are a thin lower quality that absorbs a lot of moisture.
You can try to help this by making sure your cake is not undercooked as well as purchasing decent quality paper liners. {Stay away from the super cheap kind}
Grease proof liners will also help with this.
Another thing I personally like to consider regarding cupcake liners is the size of the liners.
Not all "mini" cupcake liners are the same size. You will want to figure out which size you like best and just stick with those. You can look on the package and it will always say the size.
I prefer regular cupcakes with a 2 inch diameter bottom and mini's that are 1 1/4" diameter bottom.

Now if you really, really love a certain patterned or colored cupcake liner and it is not grease proof, it's ok. you can still use them. You can bake the cupcakes in a plain white liner and then set them inside the nice pretty liner. This works well too. Just make sure that the liners you bake the cupcakes in are the same size or smaller than your decorative liner....
 I learned to think about that one the hard way. ;)
Now, go have fun trying out the different types of cupcake liners out there.
There are a ton!

Tuesday, January 10, 2012

As Featured On....

One of the exciting things I love about blogging my treats is getting featured on other people's blogs! It's nice to know that other people think your stuff is just as cool as you do! ;D
Just recently my cake pops were featured on 2 blogs.

It's a Bride's Life follows a group of brides in their experiences and preparations until they say "I do"


Rock Star Party Place posts ideas for a wide variety of different kinds of rock star parties.
Pretty cool! Go check them out!

To all of you who love to bake and have great creative ideas.... you should start blogging too! Share your ideas with the world. Help others make their parties awesome!
Baking isn't as much fun if you keep it all to yourself.
The joy comes when you share it with others and see their reaction.
So go Share and Enjoy.

Monday, January 9, 2012

This for That {Buttermilk}

Ever go to make your favorite cake recipe and make it half way through
just to realize that you have no buttermilk!?

Well, there is a really easy remedy for that.
All you need is some milk or heavy cream and either vinegar or lemon juice.

You will add about 1 Tablespoon of vinegar or lemon juice to every cup of milk or cream. Let it sit for a few minutes and now you have a buttermilk equivalent!

Some tips:
1} Heavy cream will give you a final product that is more like buttermilk due to the thickness.
2} Use a white or even apple cider vinegar for your buttermilk. Refrain from using red wine vinegar or other distinct tasting vinegars.

Other options:
You can also use yogurt as a buttermilk equivalent replacing it 1 to 1 or some people use 3/4 cup yogurt mixed with 1/4 cup milk for a thickness closer to buttermilk.
Or instead of using vinegar in your milk you could use 1 3/4 tsps cream of tartar.

Speaking of buttermilk... "What is Buttermilk?"
Well, if you take some heavy cream in a jar and shake it like a poloroid picture you will end up with a solid (butter!) and a liquid (buttermilk!).
Ohhhhhhhh!

"So, why does buttermilk have a tangy taste?"
Buttermilk is tangy due to the acid in it. Lactic acid to be specific.
Nowadays, most buttermilk is "cultured" in a factory meaning we take milk and add lactic acid to it. These acids cause the milk proteins to curdle, which makes buttermilk thicker
(and a bit more sour) than regular milk.
In the old days they used to just let it sit out for a few days and ferment....that works too. :)

"Can't we just use milk?"
Good question. We could. But when it comes to baking it makes some real nice fluffy cakes.
It is the same idea of adding vinegar to baking soda in chemistry class...when we add the acid (vinegar or buttermilk) to baking soda in our cake, a chemical reaction occurs and carbon dioxide (a gas) is released. The gas is inside the cake so it gets trapped as little tiny bubbles and expands with the heat. This expansion makes your cake rise and create fluffiness!
For cakes (or other desserts) made with baking soda there needs to be an acid to cause this reaction.

....and now you know! 

Friday, January 6, 2012

Christmas Tree Mint Truffles

IMG_6880

You will have to forgive me.
Not because it is another Christmas post (tee hee)...

IMG_6844

...but because I put a thousand pictures in this post.
I couldn't decide. They were all so cute!

IMG_6867
But who doesn't love pictures, right?!
IMG_6857

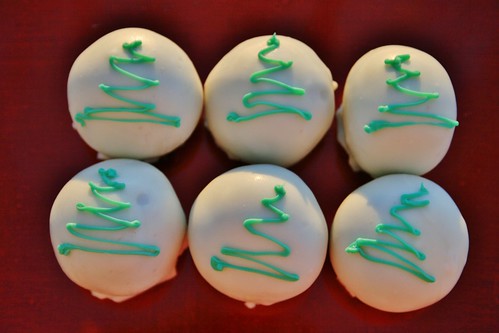
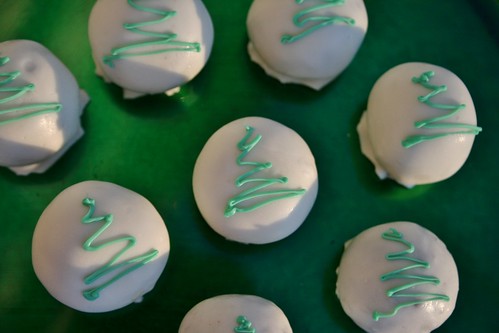
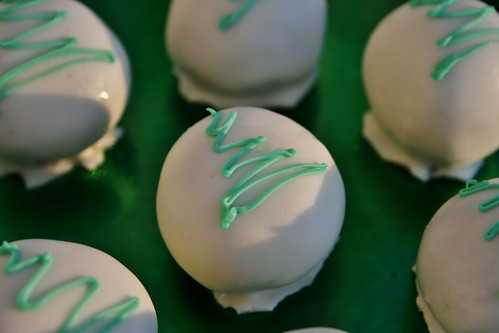
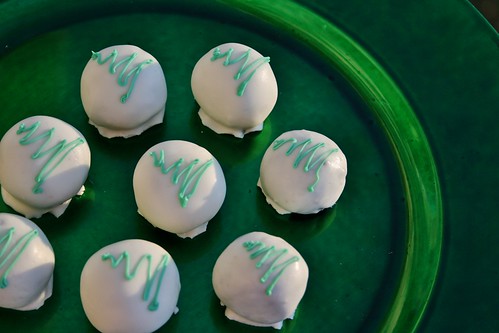
So, these are the famous (or infamous...) mint truffles.
These are an absolute favorite of everyone who tries them. 
IMG_6853
The best part is that they are super duper easy. With only 3 ingredients. I'm still not quite sure why I don't tell everyone I slaved over them all day long or it took 3 days to make...
I actually brought the supplies to work and we made some there!
(Not those pictured)
I did a little mint truffle tutorial for all my coworkers and it was a ton of fun. We all had to work Christmas day so I thought I would at least make it fun!

IMG_6843

I have actually posted this recipe before.
You may remember this post for St. Patty's day....
.....which happens to be coming up. ahem.

IMG_6882

You just take a pack of mint oreos. Yep. Oreos.
Throw them in your food processor until crumby.
Mix in about 4-6 oz cream cheese with your hands
until smooth and creamy.
Use a 1 Tbsp cookie scoop to portion out. Roll into smooth balls.
Throw into the fridge for 15 minutes or so.
Melt your guittard vanilla wafers and dip. done.

IMG_6841

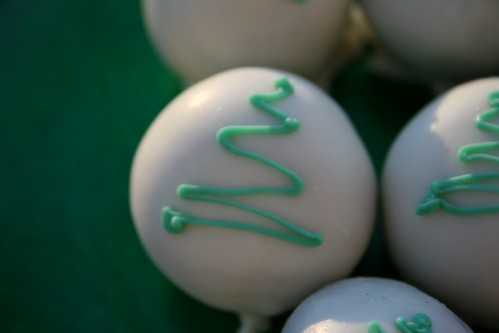
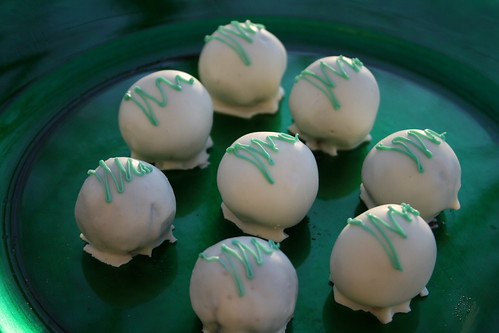
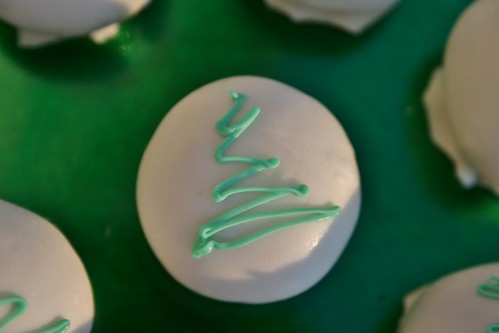
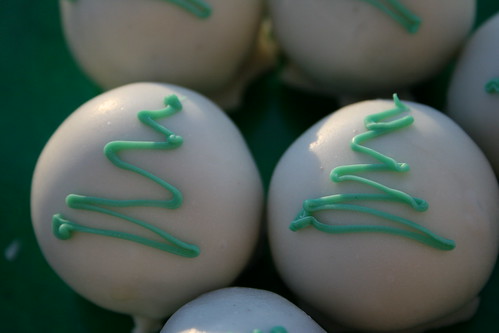
If you want to get all fancy, you can drizzle a little bit of melted mint chips in the shape of a christmas tree!
These were made for a Christmas night dessert.

IMG_6833

So go ahead and make some... right now.

IMG_6866

Share and Enjoy.