Showing posts with label Cakes. Show all posts

Monday, January 18, 2016

I'm Baaaaaaaaaaaaaack!

Well, it sure has been a long time and it feels good to be back! Life just got so busy that I had to make some changes. I got married... that's one huge wonderful change. :) I quit my band.... that's another big change. I also accomplished some major milestones at work (phew!) and am feeling more settled in.
So now it is time to get back to doing what I love. Making yummy stuff for people I love and sharing it with YOU!

There are a few delectables that I have created in the last year that I haven't blogged about so I will recap those things for you. One of my ultimate favorites is a wedding cake for my friend Susan. Now I'm no professional when it comes to making desserts let alone wedding cakes but this one just turned out beautiful and I love it. I can do simple.


The bottom cake was chocolate with chocolate frosting, the middle was strawberry with strawberry frosting and the top was my yellow cake with vanilla buttercream frosting. When you can't decide, you don't have to. :)
The pink vintage flowers are from Tai Pan and the ribbon and lace were from JoAnn's. (Make sure you look at the price of the lace you are buying, lace can be REALLY expensive!)
The biggest trick was matching the yellow to the wedding colors which was inspired from family heirloom dishes that were being used for the desserts. It was NOT easy. But huzzah! It was accomplished.
If you are going to use non-edible decorations on your cake, make sure the recipient knows that they are not edible and make sure the products are non-toxic and you wash them before putting them into the cake (ie: flowers stems).
So there she be.
Stay tuned for more 2015 recaps.

Tuesday, May 7, 2013

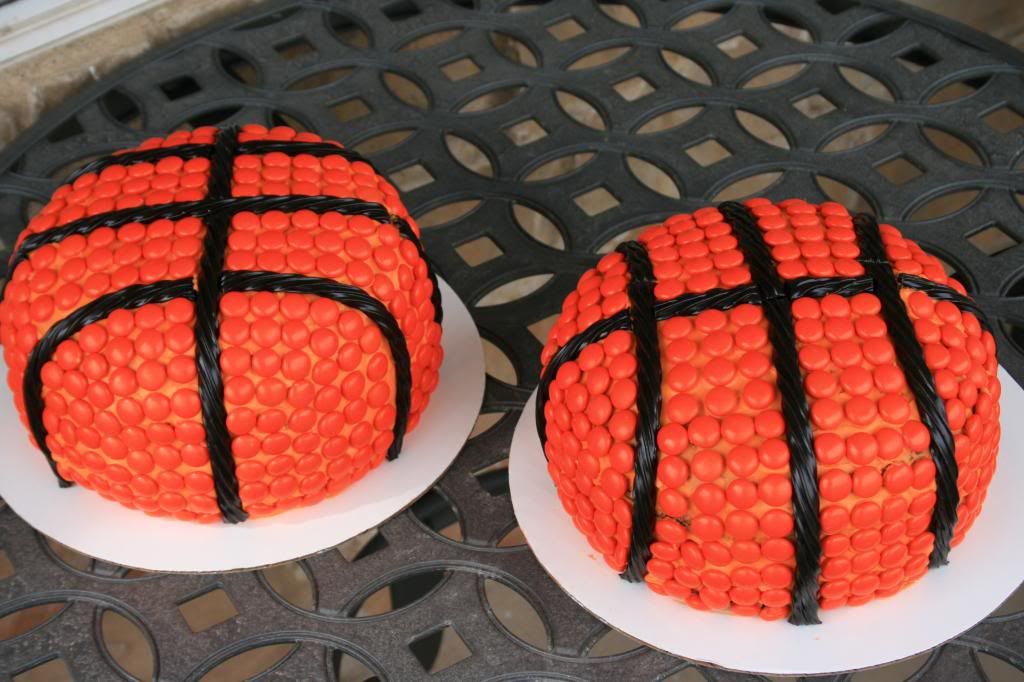
Basketball Cake Tutorial


Wow... 2 months. Has it really been that long since my last post?! Ay Caramba! Lots going on lately.
Check out my other blog for details --->
I actually have a ton of stuff to catch up on so I am going to just do really short posts. 
Let me know if you have any questions and I'll answer those and add them back into the posts.

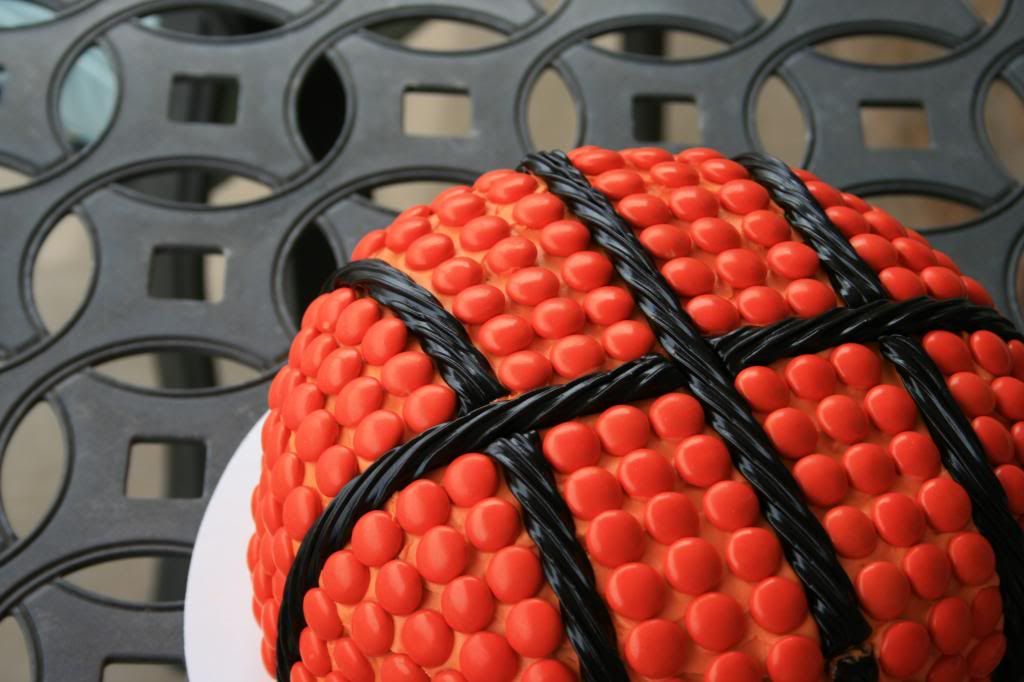
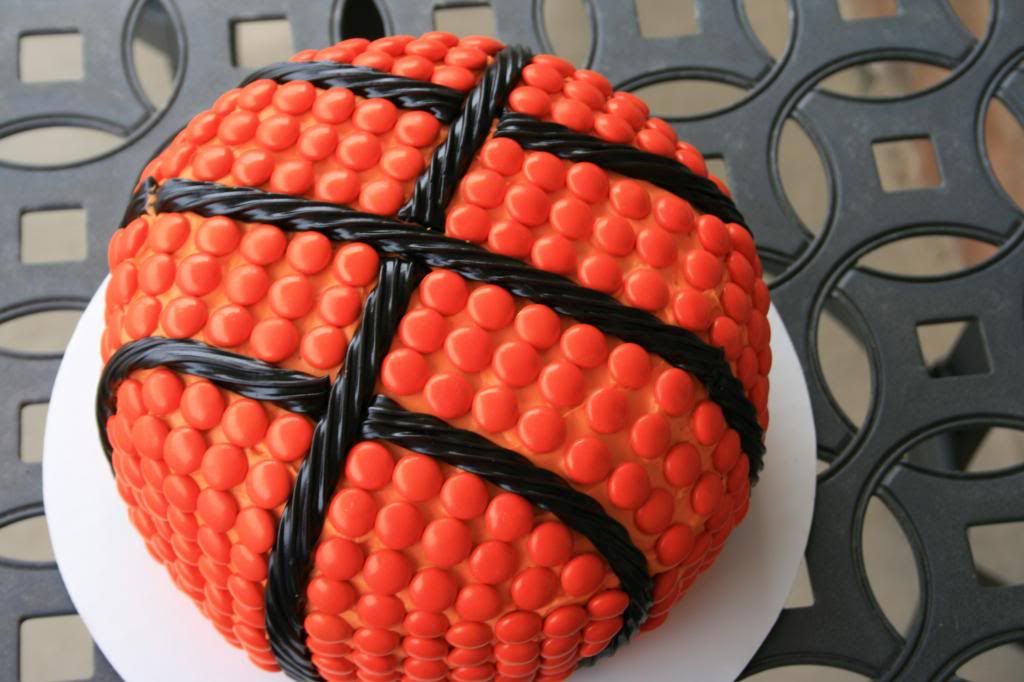
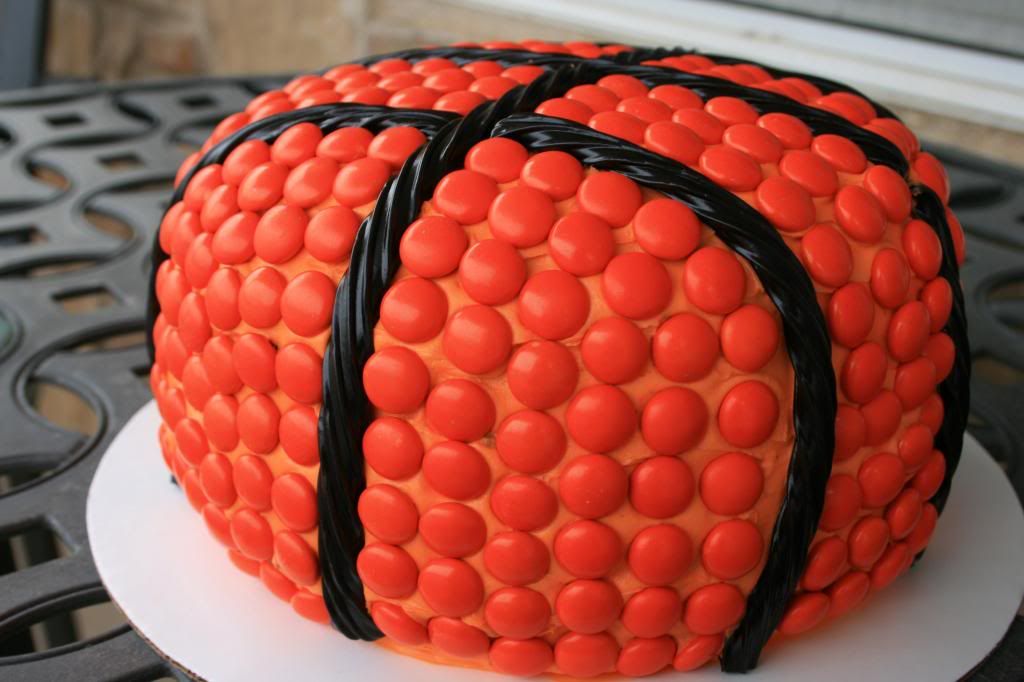
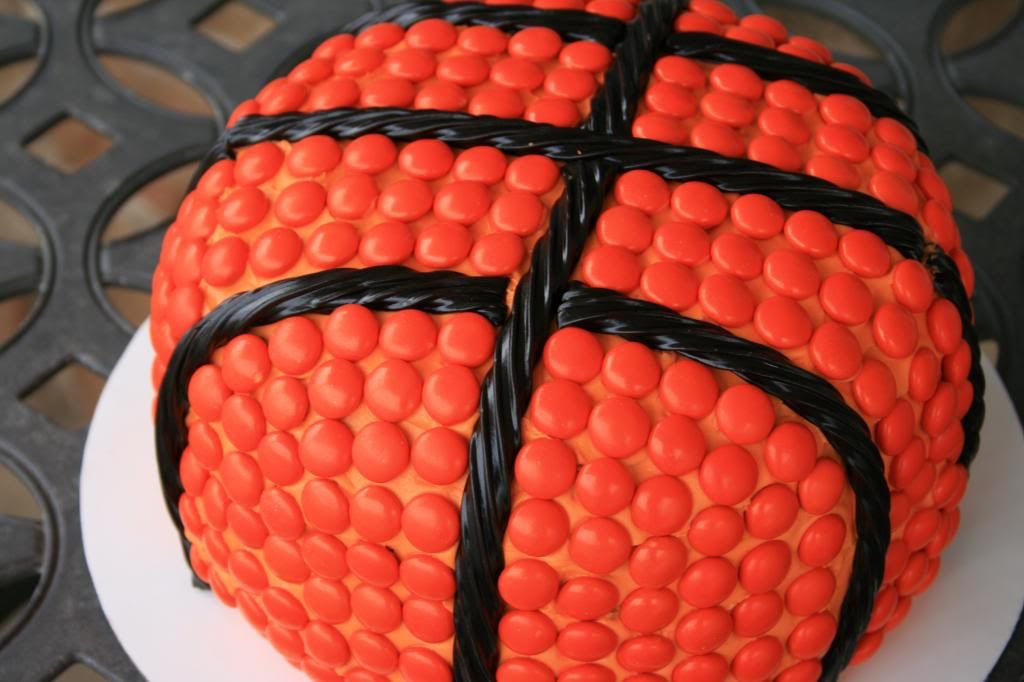
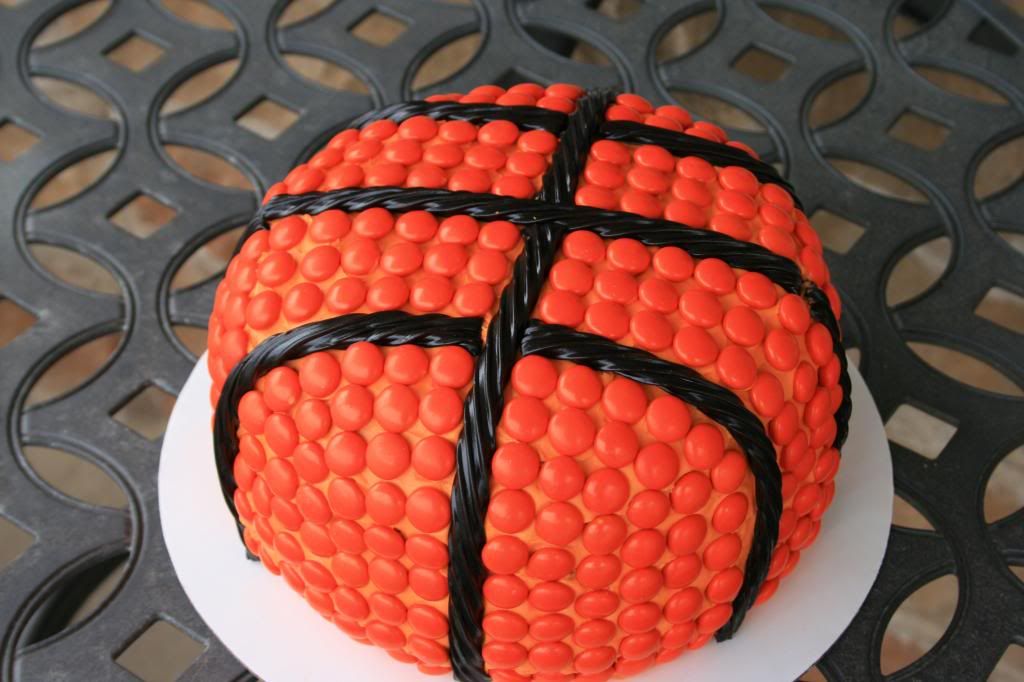
These cakes turned out so cute! They were for my little brother's basketball championship game for his team. It was super simple. 


I made 8 inch round cakes and stacked them 2 high with frosting in between. I cut the cakes so they rounded off as much as I could on both the top and bottom (to try to make them look as round as possible without falling apart). This would also be really cute if you used a dome cake pan to truly make it round. I colored some buttercream orange (using water-based food gel) and covered the whole cake. Looking back I wish I had done the orange a little bit darker but I think I actually ran out of orange color and that's why. :)


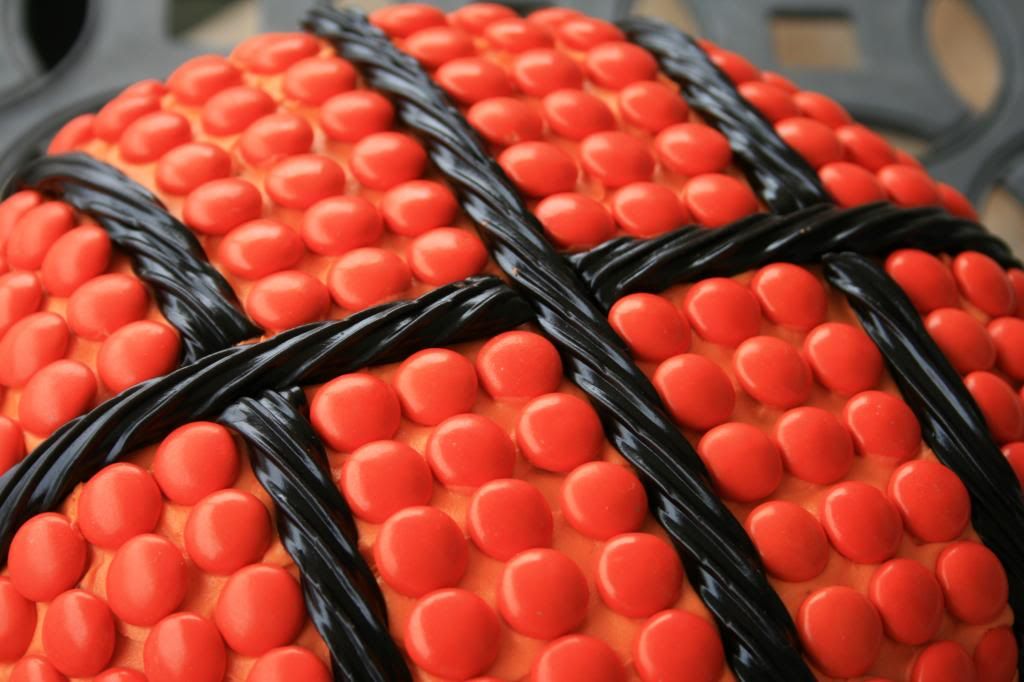
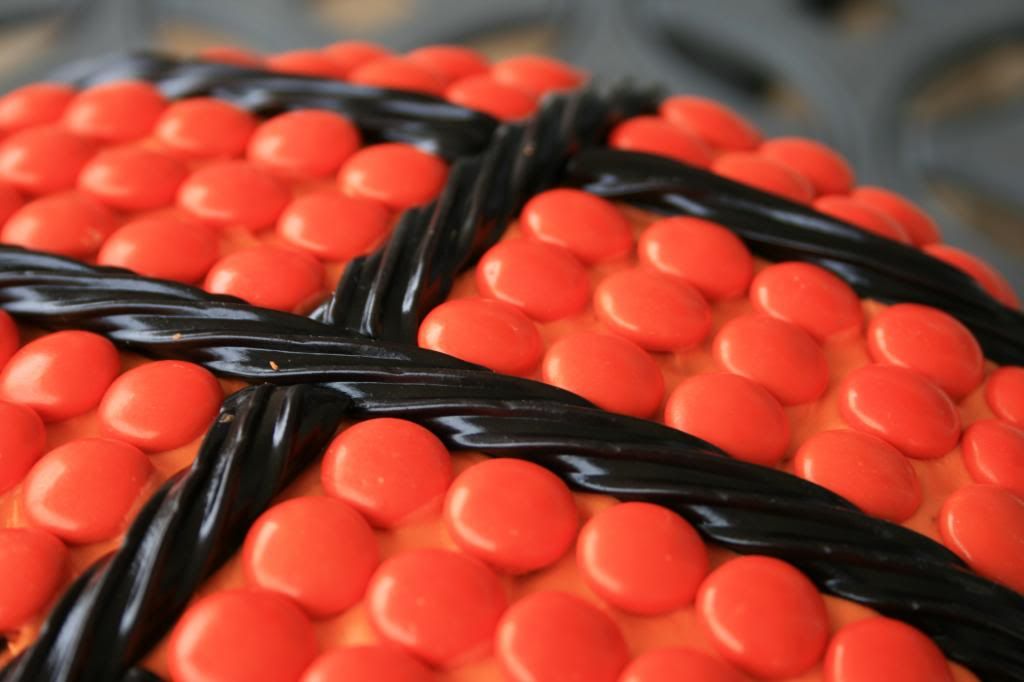
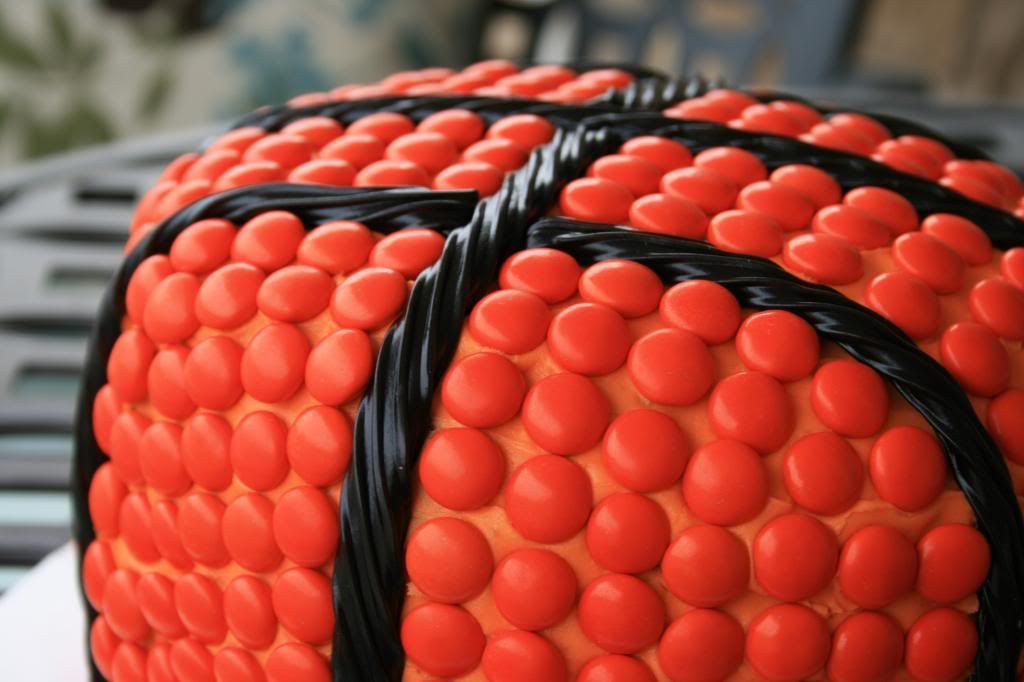
Once you do that, take plain twizzler black licorice for the stripes and lay one across the middle of the cake. You will have to use more than 1 rope for each line. Try to connect them away from the bends because they tried to stick up on me and wouldn't stay bent how I wanted them to. 
Lay a rope perpendicular to the one you just laid (see pictures) and you can just start them right on each side of the first one (make sense?). 


Then take about 3 orange m&ms- you can get plain orange m&ms at certain party stores. I went to Zurchers- and lay them down (with the m&m brand facing down) starting at the corner of the licorice on each side (again see picture). Do about 2 rows. You want them to be as close as possible. It looks better. Laying the 3 m&ms down helps you measure where your outer licorice lines should go. Now lay down your last outside licorice lines. To get a bit of a rounder effect, curve the licorice at the bottom back towards your main middle line just a little bit (see picture- right licorice is curved in a little).

Voila! And there you have it. These are not difficult to make but do take a little bit of time and dexterity since you have to place each m&m.


I want to say I used about 12-16 oz of m&ms by weight to cover these 2 cakes and 1 package of black licorice (I think! I forgot to write it down so if it just doesn't seem right when you are buying the m&ms, go with your gut. Extra m&ms never hurt anyone. That was my philosophy). I bought way too many m&ms so now  extras are sitting in a dish on my desk waiting for on-lookers to come and eat them. They are sitting right next to the new Sherbert Oreos I had to get for my work people because they looked weird... yeah, they're pretty sweet (as in sugary... not awesome). Not my favorite. Other people liked them though..... tangent.
If you really want to know how many I used... you could count the m&ms on the cake. =D


Anyway, they were a big hit! So fun. Try them out for your next sports party!


Tuesday, February 26, 2013

Crossfit, Protein Shakes and German Chocolate Cake


Ok, so I'm not saying this is a good idea... 
it's just what I do to make my protein shake enjoyable so I thought I'd share.

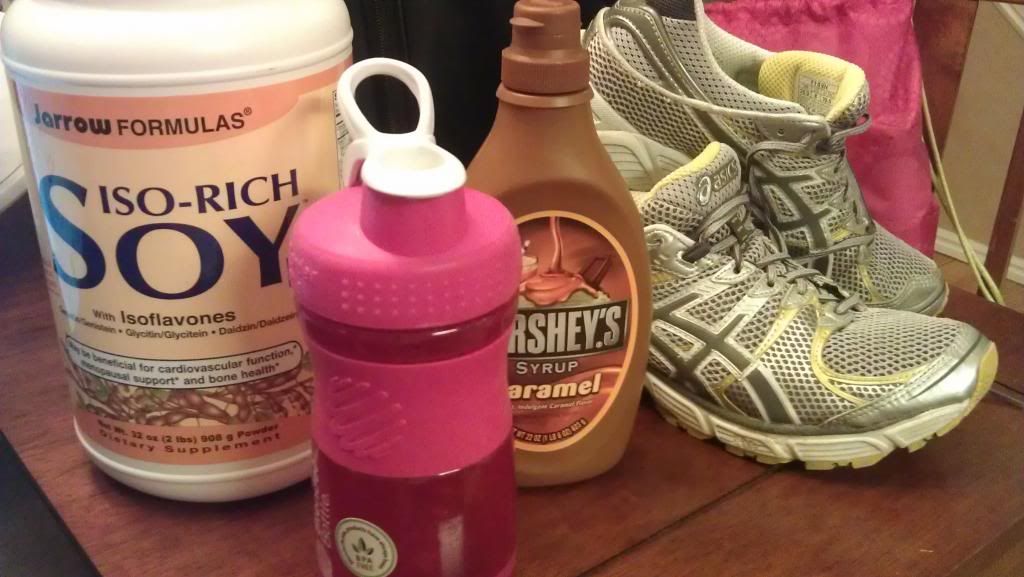
I use this protein supplement to make 8 oz shakes. It gives you 25 gm soy protein. boom. deal.


It's also nasty.
I am no quitter though so I found a way to make it really tasty!
I've tried to add it to my fruit smoothies and it just makes them taste funky. It doesn't work. no bueno.
It was just missing something.... what was it?
Oh yeah, sugar.
;)
So I found a great way to make it flavorful and tasty.


Caramel syrup. 
Just a small squirt will do (about 1 tablespoon).
Yep. For the pittance price of 50 calories and 10 gm of refined death sugar... I get to enjoy my shake. I'm cool with that right now. You might even be able to get away with less (but why?!). For you health crazies out there, you can probably even find a decent sugar free caramel syrup (however it's debatable if that's really healthier). ;)
Try also chocolate syrup. Mmmm....mmmm....
You get the picture. Try it! You will be surprised!


So, yeah. It makes you want 2 servings of your nasty health drink. :)

*****

Crossfit Day 2:
Dear Diary, 
Crossfit kicked my but today. I wanted to cry. Not like an emotional, more like a physical stress induced cry.... it was weird. I've never felt that before. No, I did not cry. :)
I was so sore from the workout yesterday that I could hardly walk up stairs. I found the solution to this though with the help of Michelle.... just don't walk up stairs. deal. But want to know what's worse than walking up stairs? Walking down them... my legs keep giving out on me. I get a little weak in the knees, shake a bit, get a little hyper-extension going and stumble down the stairs like I just got double prosthetics. It's probably pretty awesome to watch... not so much to experience.
Here was today's workout:
SWOD:
Deadlift- 10 lbs
warm up
5,3,2,1
Working Sets
5 x 3

WOD:
10 Hand Raise Push-ups
20 sit-ups
20 squats
40 mountain climbers (my shoes fell off with these)
Repeat.... 6 times!
Everyone else had to do 30 squats and 8 reps, suckers! Since I'm weak and sissy, Andrew modified it for me. Andrew is the owner and trainer. He's really great at explaining technique.
I did it in 27:12 but I finished!
I am 100% sure this is the hardest I have ever worked out in my life. To the point of physically being unable to do that last squat or last sit-up.
Oooouuuuch! I really thought I wasn't going to be able to finish the squats but I did. :) And I'm glad I did it!
I got a really good night's sleep last night after my first workout and woke up energized and ready for the day. I started to get sore around midday today.... I shudder when I think of what punishment tomorrow brings to my poor aching body. I'll be returning upon my recovery. I have to. I paid for March already. baaaahhh.
Well, that's about it for my crossfit adventure today.
Out!

*****

On an awesomer note.
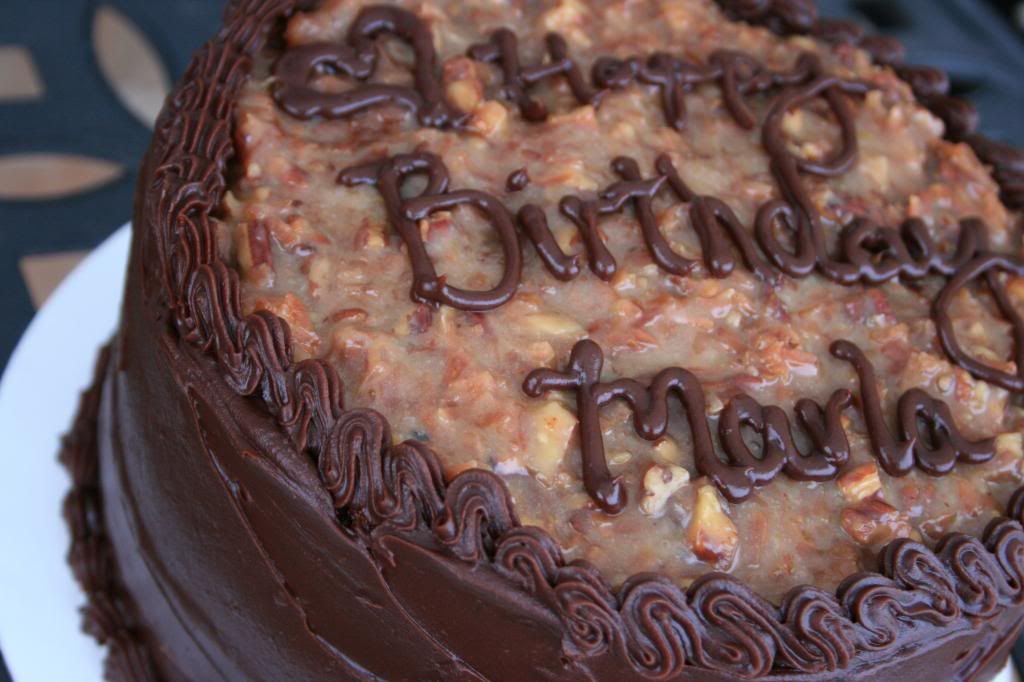
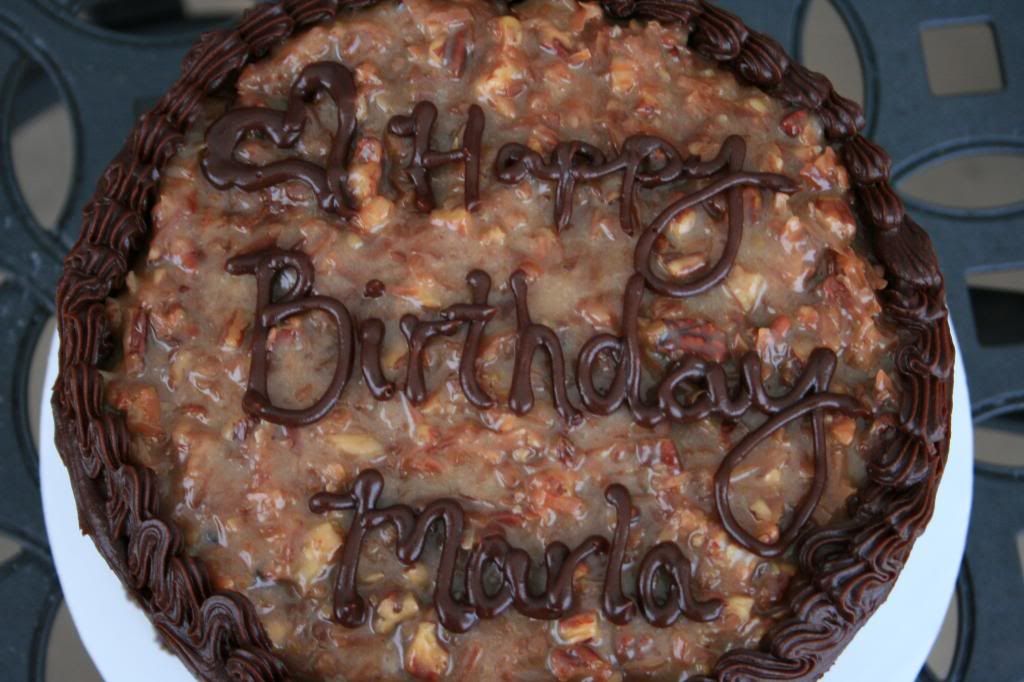
I made a cake!
First cake in months!
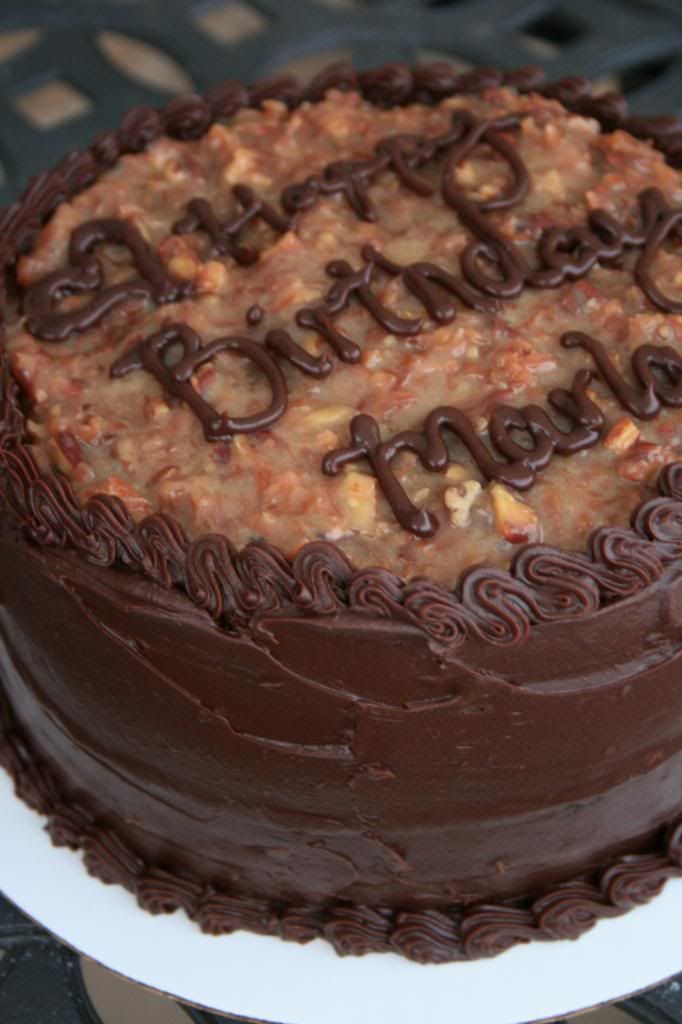
Here she be.


so pretty. It makes me happy looking at it.


It was really nice to be baking again. I even attempted writing on it! 
{I don't write on cakes... when I worked at a bakery, I was banned from writing on cakes}


What I love about this cake is that when I am finished, I feel like I have made a substantial cake, a big impact on the world. It's heavy and takes 4 hours and is amazing.
You might even recognize her from last year.
Here is the recipe I posted before.
It's really pretty awesome.
Enjoy!

Sunday, November 18, 2012

Cute as a Button First Birthday Party! {Fondant Cake}

This party idea was cute as a button! 
No. Really... it was a cute as a button party.
This theme was really fun and the buttons were way fun to make!


It was for a first birthday party. Very fitting.
I did a big fondant cake, button cookies, and cupcakes.


To make the button cookies, simply make round rolled sugar cookies (recipe found HERE). The button is made of a fondant circle so just use the same cookie cutter to cut out the fondant and then poke button holes using the end of a decorating tip. Wet the back of the fondant slightly so it becomes slippery and then put it on the cookie and tap down lightly. Allow to dry and it will stick very well.


The cupcakes and cake were made of yellow cake (the BEST ever yellow cake recipe found HERE) and yellow vanilla buttercream frosting with little decorative fondant buttons. Awwww,,,,, fer cute.


To get the ruffles, use a petal tip with the small end facing out. Spin the cupcake while applying even pressure to your pastry bag and move the tip up and down. When coming back around to where you have already piped the icing just continue on top of that layer and continue the ruffles until you come to the middle. Take a few tries doing a ruffle before going to your cupcake. 
To get the plain swirl use a large round tip (I think this one was a half inch) and starting in the middle of the cupcake cover the whole bottom in a swirl and then continue on top of that swirl and then again once more. Top it with a few cute buttons and done. Magnifique!


 Now for the big boy. The cake.
So I am no master of fondant but I got 'er done and you definitely can to if you choose to go this route. Here are a few tidbits for you to make sure it goes as smoothly as possible. I have seen many different methods of applying fondant so here is how I did it.
First off, bake your cake. This one was a 4 layer 8 inch cake. I actually did 2 purple layers and 2 white layers alternated so you got a pretty surprise when you cut into it. Then layer it up with frosting in between the layers. Cover the whole cake in a crumb coat and stick it in the freezer if possible or else just the fridge will do. Get it really cold so the buttercream doesn't smear easily. You are now ready to put fondant on your cake.


 I used Satin Ice white fondant that comes in tubs of different sizes. It's kind of pricey so you can also make your own but it's messy. I'll have to try it again sometime to see if it's worth it. I only did it once and it was back before I really got into baking seriously. Anyway...
When tinting your fondant use water-based concentrated food gel (also called icing food coloring). You can always add more but you can't make it lighter unless you have enough to add more white fondant, so keep that in mind. You can get gel coloring at craft or baking supply stores. Walmart actually has some too in their specialty baking section by the wedding stuff. These (see below) are the colors I used (Violet, Soft Pink, Electric Yellow). Poke a small hole or indent into the fondant ball and then fold it over on itself so the color doesn't get all over. You might want to use gloves if you don't want your hands to get dyed. Knead the fondant until the color is evenly dispersed. Try to do it fairly quickly and don't let the fondant sit out because it dries out VERY quickly. This is the bane of my existence with regards to fondant. I think it is the toughest part of using fondant. So just try to work quickly. When you aren't using it, put it in an airtight bag or container.


 I bought this fondant mat to help me measure how big I needed to roll my fondant and it was definitely a good purchase. When using these it is recommended to rub the top with a very small amount of shortening to "season" it and make it more non-stick.


This was a big cake (I know...this is no wedding cake but for someone with next to zero fondant experience, this definitely made things trickier than it would have been had it been a smaller cake.) You want to measure the top and sides of the cake to see how large the diameter of your fondant circle needs to be. Add about an inch on each side to give yourself some wiggle room and find that number on the mat. You don't need to roll the fondant in a perfect circle but you need to cover that line around the whole mat. Make sure you have plenty of fondant to work with. That will also make your life easier. You can use the extra that you cut off for something else... like the buttons. Fancy that.
So, when you are rolling it out, do so very quickly or else you will get what is called elephant skin on your fondant. This is where the top of the fondant dries out and as you try to handle it it streches and looks like elephant skin like so.

Picture located HERE
 Roll it pretty thin but not so thin that it will tear when handling (decide based on your own comfort level). I rolled it too thin the first time and it tore so I kept it a little thicker the second time. I would recommend watching a few youtube videos before you try so you don't destroy your fondant. Some people use shortening on the fondant to keep it from sticking. I did not do that but maybe it would have made it easier. I'll try it next time.
Fondant is actually really fun to work with aside from the frustration that can occur so it would be really fun to be really good at fondant because it so pretty and I really like the look of it.


So form your fondant ball into a smooth ball and flatten it slightly and start rolling it out. You don't want any creases on top so make sure there aren't any before starting to roll. Roll it out quickly until it is as thin as you want. Now you can roll it up on your rolling pin or just stick your arms underneath it (I did this) and transfer it to your cake. Make sure you set it down right where you want it to stay. Get the middle of your fondant onto the middle of the cake. You can't slide it around on the cake.... it will likely destroy your cake (Having it frozen helps). You have to lift it off completely and then reset it if necessary. If you get buttercream all over your fondant and then have to completely start over... that's not good. You need to scrape off as much of the buttercream as possible, especially if the color of the buttercream will change the color of your fondant. What I am trying to say is do it right the first time.... and do it quickly. :) Easier said than done. It takes practice to do a good job.


So now quickly smooth the top of the fondant on the cake so it is level. Sometimes the buttercream will get distorted and smooshed so just make it level now that the fondant is in place. You can use your hand/fingers or a fondant trowel but just make sure to keep it light so you don't get dents and divots. Those will be there forever. :) now quickly smooth over the sides. You can make the corner sharp or smooth. It's up to you. I kept this one smooth and I like it a lot. Now on the sides lift the bottom of the fondant very slightly away from the cake and take your other hand and smooth the fondant onto the side of the cake. Go around the cake continually smoothing the fondant lower on the cake until you reach the bottom. This is the hard part. I always get wrinkles. You can smooth them out after they are there. Again, they are there forever. I need to practice more and then I can give you tips but until then I will have to refer you to youtube. Luckily....many fondant cakes have thick ribbons on the bottom because they just look beautiful so that hides most of the wrinkles. 
Lucky me. :)
So now place your ribbon on your cake. I like to use long pins. Just take them out before you cut into the cake and eat. :) You should be taking off the ribbon too... unless you made an edible one.
Now you are ready for the fun part! The buttons!


The buttons on the cake were the funnest and easiest part of the whole process. I separated my fondant into 3 balls and dyed them different colors. I used a mini fondant roller with a spacer (the little rubber band like thing that keeps the thickness even when rolling) to roll out a sheet of fondant. I then actually just used my icing decorating tips to get the different sizes of holes and designs (using both the small and large ends). I even used the "hair/grass" tip for a fun decorative button. That's it! I left them on a cookie sheet covered in parchment paper for them to firm up a bit before I man-handled them onto the cake.


They will not harden. That's where gum paste comes in...


If you want to make a decoration that hardens and can "stand up" on a cake like this number 1, then you need to involve gum paste. Gum paste hardens when left out. Fondant just gets chewy and becomes less elastic but will not harden enough to stand up on its own. You can use all gum paste or do a 50:50 mix of fondant and gum paste. Ether should work fine (depending on the humidity in your local area so make it ahead of time just in case. This is usually not eaten so it will last until you destroy it or the elements do.) I mixed the fondant and gum paste together and then tinted it to the color I wanted, rolled it out to a thickness where I wasn't worried it would accidentally break and then cut it. I drew a number 1 on a piece of paper the way I wanted it and then cut it out, placed it on top of the rolled out fondant and used a knife to cut it out. Be careful cutting on the fondant mat. It is not meant to be cut on. Once it was cut out I just let it harden overnight. Voila!
One thing you actually don't see in the picture above is that when I was cutting out the number 1, I left a piece on the bottom that would let me stick it into the fondant so it would stand straight up. Kind of like so.... :)

I love paint. :)
 Use a knife to cut a small slit into the cake and then insert the number 1. When you are ready to place your buttons, slightly wet the back side and apply it to the fondant. Smooth it out.You can place them however you want to. Cake is done!
With regards to refrigeration. I personally do not have experience because I have not refrigerated my fondant cakes. However, I have heard that Wilton fondant does not refrigerate well while Satin Ice does. It depends on the humidity of your fridge as well. Refrigeration right after you put on the fondant can prevent bulges and allow the cake to keep its shape but may also produce sweating. Bulging can definitely be an issue in fondant cakes. So if it is a really important cake then you may want to give it a trial run in your own elements and conditions first.
So there you have it.
Awww....


The perfect party theme for your cute little button.

Tuesday, November 13, 2012

Buttercream Rose Cake

If you are looking for an elegant yet super easy cake, you really need to consider a rose cake.
This cake takes less than 5 minutes to decorate.... seriously.


I made this cake for my grandfather's 80th birthday party.
It is an 8 inch double layer spice cake with vanilla buttercream frosting.
Did I mention this is my favorite cake flavor combo EVER?
{It also happens to be my wedding cake flavors.... fancy that.}
You will have to forgive me for not posting a spice cake recipe. The balance of spices in a spice cake is so vital that, alas, I am still working on finding the perfect balance. 
You may find a delicious vanilla buttercream recipe HERE (keeping in mind the substitutions below).
When making your buttercream, if you want a very white icing then make sure you use clear vanilla extract as well as a pure white/clear shortening with or without some clear butter flavoring. Don't use butter because it will make the buttercream yellowish. I completely forgot to use clear vanilla so I got an off-white cake as you can see. It looked really cute but if I needed to have a white cake, that would have ruined my next 15 minutes (then I would have gotten over it), but still!


To get this look you just start with a cake that has a crumb coat and use a 1M star tip 
{The same kind you use for those swirly cupcakes}.
To make an individual rose you just start in the middle and circle around about 2 times and then release and drag the tail around to hide it. 
To make this cake you just do the rose over and over again all over the cake. There is really no science to it other than making sure your size of roses will fit the cake well. 
This also takes a lot of frosting so make more than you think you need and save the extras.
I actually ran out before I could do all my finishing touches but it turned out great still.


After you are done doing roses on the top and sides of the cake, sprinkle the cake with a few silver dragees to give it an extra special touch. Don't worry, they are edible! They really finish off the whole look quite nicely me thinks.


Again, this is really fast and easy after a few practice swirls. You can definitely do it!
Look how great it looks at the end!
One of these days I need to do a tiered cake with roses.
I think it is simply beautiful. 

Friday, November 9, 2012

Lollipop Birthday Party


I LOVE themed parties because it turns a good party into a memorable party.
This party was no exception! 


You only turn ONE once so why not start off those birthday parties with a POP!
 That's what my friend, Marci, thought too.
Nothing says "You're 1!" like a Lollipop Party!
  She did such an awesome job of organizing and creating an amazing party for her cute carrot-topped one year old, Lily.

I love her cute little personalized tutu outfit.

 
Join me for a walk down Lollipop Lane!
The theme colors were pretty pastels. As you will see, color is one thing this party did not lack!
 The entrance started the party off fabulously. I love festive entrances because it just tells you to get your party pants on 'cause we're not joking!

 
Marci made these pennants herself out of paper from a scrapbooking store. Made with love.


... and matching balloons. Can you really have a party without them?!


One of my favorite things about this party is that Marci used old fashioned candies to create a candy bar. Not a real candy bar but a candy candy bar... you know what I mean. I LOVE the concept of old fashioned candy and if I could make a living owning an old-fashioned candy store with the cute glass candy jars and little scoops and scales... I'm pretty sure I would pick up and do it right now. 
Yes, I like candy. How could you tell?


First Stop
Lemon Drops and Cake Pops


Made from a lemon pound cake, these cake pops have the perfect texture and flavor combo.
The lemon flavor is pure and fresh and perfectly balanced between the cake and buttercream frosting.
To tip onlookers of the delicious lemony surprise inside, I showcased the pastel vanilla candy coating with yellow jimmies in a whimsical swirl. Place some lemon drops in a jar with a cute little tag and insert that inside a ribbon lined foam ring filled with these little lemony daisies and you got yourself a lemon party. Sweet Huh?!


Next up is a picture of the cute little cake. I absolutely love these little 4 inch cakes because they are the perfect size for a personal cake, especially for one that a 1 year old is about to destroy!


This cake was covered in fondant and trimmed with a few different colored ribbons. To attach the fondant circles, just dip your finger into a little bit of water and spread it on the back of the fondant circle. This makes it tacky so it will now stick to the other fondant.You are ready to create a masterpiece.


Marci supplied me with this super cute lollipop candle that finished the cake off perfectly.


Vanilla dipped rice krispie treats are always a great addition to a dessert bar.


A huge hit with the kids was the automatic bubble blower. It blows 1,000 bubbles per minute! I need this for my dog!


I LOVE, LOVE, LOVE these pink and white lanterns. I'm trying to figure out how I can incorporate these around my house somehow. Come on, now every day's a party!


Another super cute idea was using clothes pins to clip pictures onto a clothes line for all to admire. These pictures were filled with a whole year of memories!
{Beware the wind...wind is not your friend with this} 
You could also do this concept with the wire zig-zagged down an antique shutter so it has some stability on one side.


These were one of the hottest items on the dessert table.
Mexican Chocolate Cake Pops in the shape of a "1".
Oh my goodness. These. are. tasty.
They were gone fast. We should have made more.
Mexican Chocolate Cake Recipe can be found HERE.


The other pops are chocolate dipped oreos. Mmmhmmm. I did.
Also so tasty.
Let me warn you that these should not be placed in direct sunlight. Yes, they will melt.
But only if they don't get eaten first....so you may be ok.


These little mini lollipops were the perfect size! It was so cute seeing tots walk around with a mini-me sized lollipop. Just one of those cute little details that totally makes the party.


And who doesn't love a good old fashioned sugar stick. Mmm... strawberry.
I love granulated sugar for suspending lollipops, candies and cake pops. It's recyclable {not for baking....that's gross. You can reuse it for another party though!} and cheap plus it works quite well and was perfect for a sugar-filled lollipop party! Why not?


This is one of my all-time favorite candies. The perfect amount of sour mixed with cherry flavor and sweet goodness. Mmm... mmm... good.  And really addicting. Be warned. The cherry sour.


And then comes the chocolate. Need I say more to you chocolate lovers out there?


I remember going to the penny candy store with my mom for movie nights and ALWAYS buying these little guys for about 5 cents. I miss the good ol' days of penny candies but I love the fact that they still make the candies I love from my childhood. Warm fuzzies. :)


I also remember how I would eat so many that my tongue would get raw. Oh, the sacrifices I was willing to make.


So these jelly belly candies aren't just your typical jelly belly candies. They are Snapple flavored people. SNAPPLE FLAVORS! Oh. my. goodness. I had a jelly belly bezoar in my stomach after this. 
You have to order them online but I am telling you that you should. Do it and try it and tell me how much you love them. You will never see me go nuts over chocolate like I do pure sugar. Gaahhhhh... drool.


Remember candy buttons {which until recently I thought were called "dots"} ?


They are pretty disgusting (I think they taste like food coloring) but they have such character and history that I can't help but love them. I remember loving these as a kid. What? It's pure sugar. Nothing wrong with that as a child.


We featured these cute-as-a-button candies {baha.... get it?} inside the circle of lollipop cookies. These here cookies received the approval of Marci's sister, who says she is quite a connoisseur of sugar cookies. I'll take it. :)


These are quite simple to decorate actually. You give the whole cookie a base coat of colored royal icing and allow to dry very slightly and then swirl in a second color of your choosing. Voila.
Be careful not to use too much icing on your base coat or it will overflow when you swirl in your second color. Just do a little less than you think you need.
Recipes of cookie dough and royal icing may be found HERE.


One of the funnest parts about themed parties is planning the little details. I remember sitting with Marci looking at millions of little baggy designs trying to decide which one would be the perfect compliment to a lollipop party. :)
These baggies were for kids of all ages to collect their candies in. These looked like little lollipop circles and had the same pastel color theme.


Marci's husband's favorite old fashioned candies are root beer barrels so those were a must since this party was really for him. ;)


In addition to the huge dessert table was a whole second table filled with food! Oh la la!
A party fit for a king...or queen!


I just love fruit. It's tasty. It's healthy. It's sweet and hydrating. A good alternative to those who don't want to stuff their faces in the candy bar.


Sandwiches, veggies, and chips. oh my!


I love large beverage jars for some reason. I don't own any... but I probably will soon. They just make me happy.


And here is the infamous Marci digging into the lemon cake pops before the party even began!


and that's me.


Here is Marci's husband, Jeremy, displaying their HOMEMADE Pinata!
I was so impressed. I'm pretty sure it took her hundreds of hours to make this. Maybe not that long but look at this thing! It's HUGE!
Marci goes big or goes home!


If you weren't sure, the birthday girl's name is Lily.  :)
I so love the detail in this pinata. Notice how they used 2 different tissue paper techniques. Fancy!
I think I will have to have her do a guest tutorial for us all. So awesome. What a talented lady.


Marci and Jeremy before the games began.


I still think it is hilarious that we choose one of the most dangerous games possible for children's birthday parties. Haha. I would give anything to have been a part of that first conversation inventing the pinata. 
"Yeah... and then after we fill the box with candy, we should hang it from a tree and put blind folds on the kids so they can't see anything and give them a large heavy bat to swing at it with!" 
But seriously, you really can't beat how much fun a pinata is at your birthday party.... even if you are only 1. I am sure Lily thought it was the best part of the party.


Here is a picture of the back of the pinata... notice something?
Yup. It's a GINORMOUS LOLLIPOP!


Luckily there were no casualties. Some near-misses, but no casualties. I call that a win.


And the moment we have all been waiting for!
Look how cute she is!


She had no problem digging right in (once mom helped puncture the fondant barricade).


Sweet goatee!


and some cake in the eye, why not?


Besides being all over the table and Lily, most of the cake was actually eaten by a certain sneaky aunt. ;)


My personal favorite pic is of her eating the cardboard.... the cake was THAT good!
So I just wanted to show you how I secured the ribbon to the cake. It all depends on the type of ribbon you have. I had a really silky ribbon so I couldn't glue it to the fondant with some icing. You can get some sort of fasteners that look like pearls made for wedding cakes but I didn't have time to go get any so I actually used some long sewing pins (wash them first if you do this). We just took them out when it was time for Lily to dig in.


Awwwww.......


The End